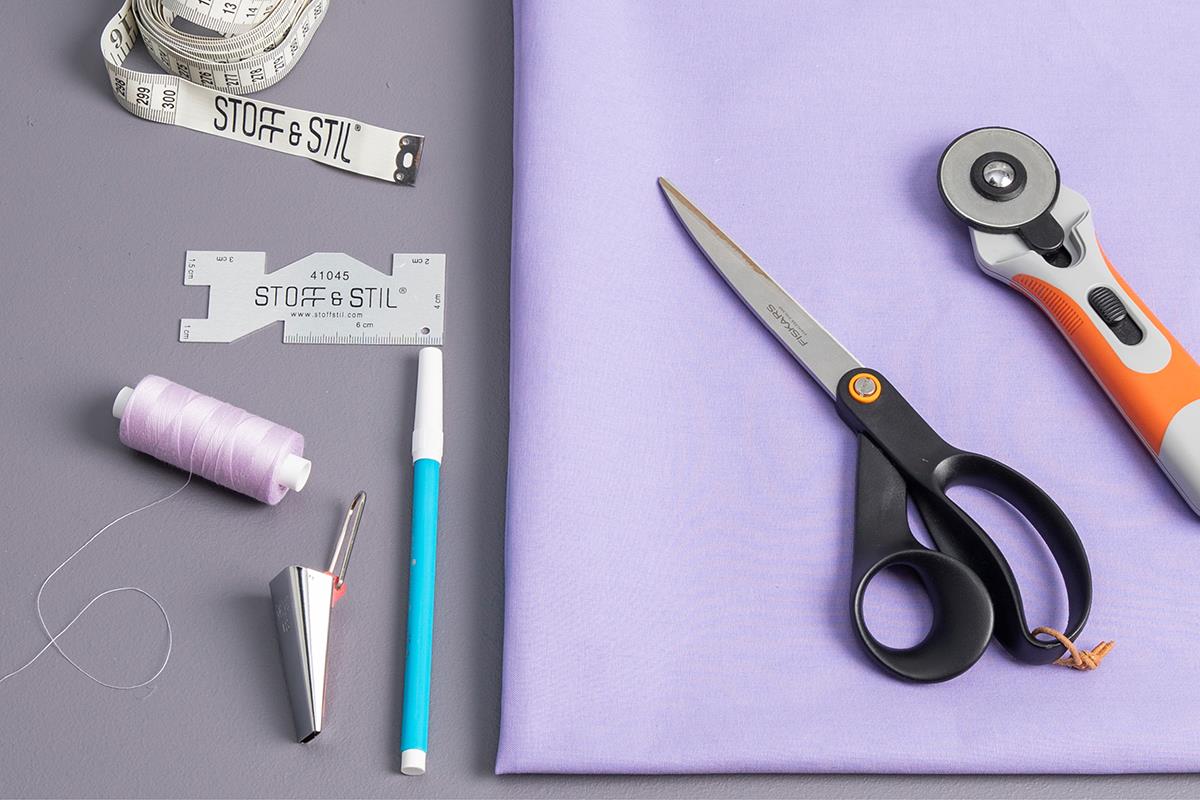
Bias tape is fantastic as a finishing touch for your sewing project. If you cannot find a bias tape, matching your sewing project – don’t worry! You can make your own bias tape – nice and easy!
This is how you can make your own bias tape. You can buy a fabric which you want to use for making bias tape, or you can use a remnant of fabric. How to get started:
- Tailors scissors or rotary cutter thread
- Sewing thread
- Marker
- Patchwork ruler
- Bias tape maker
- Measuring tape
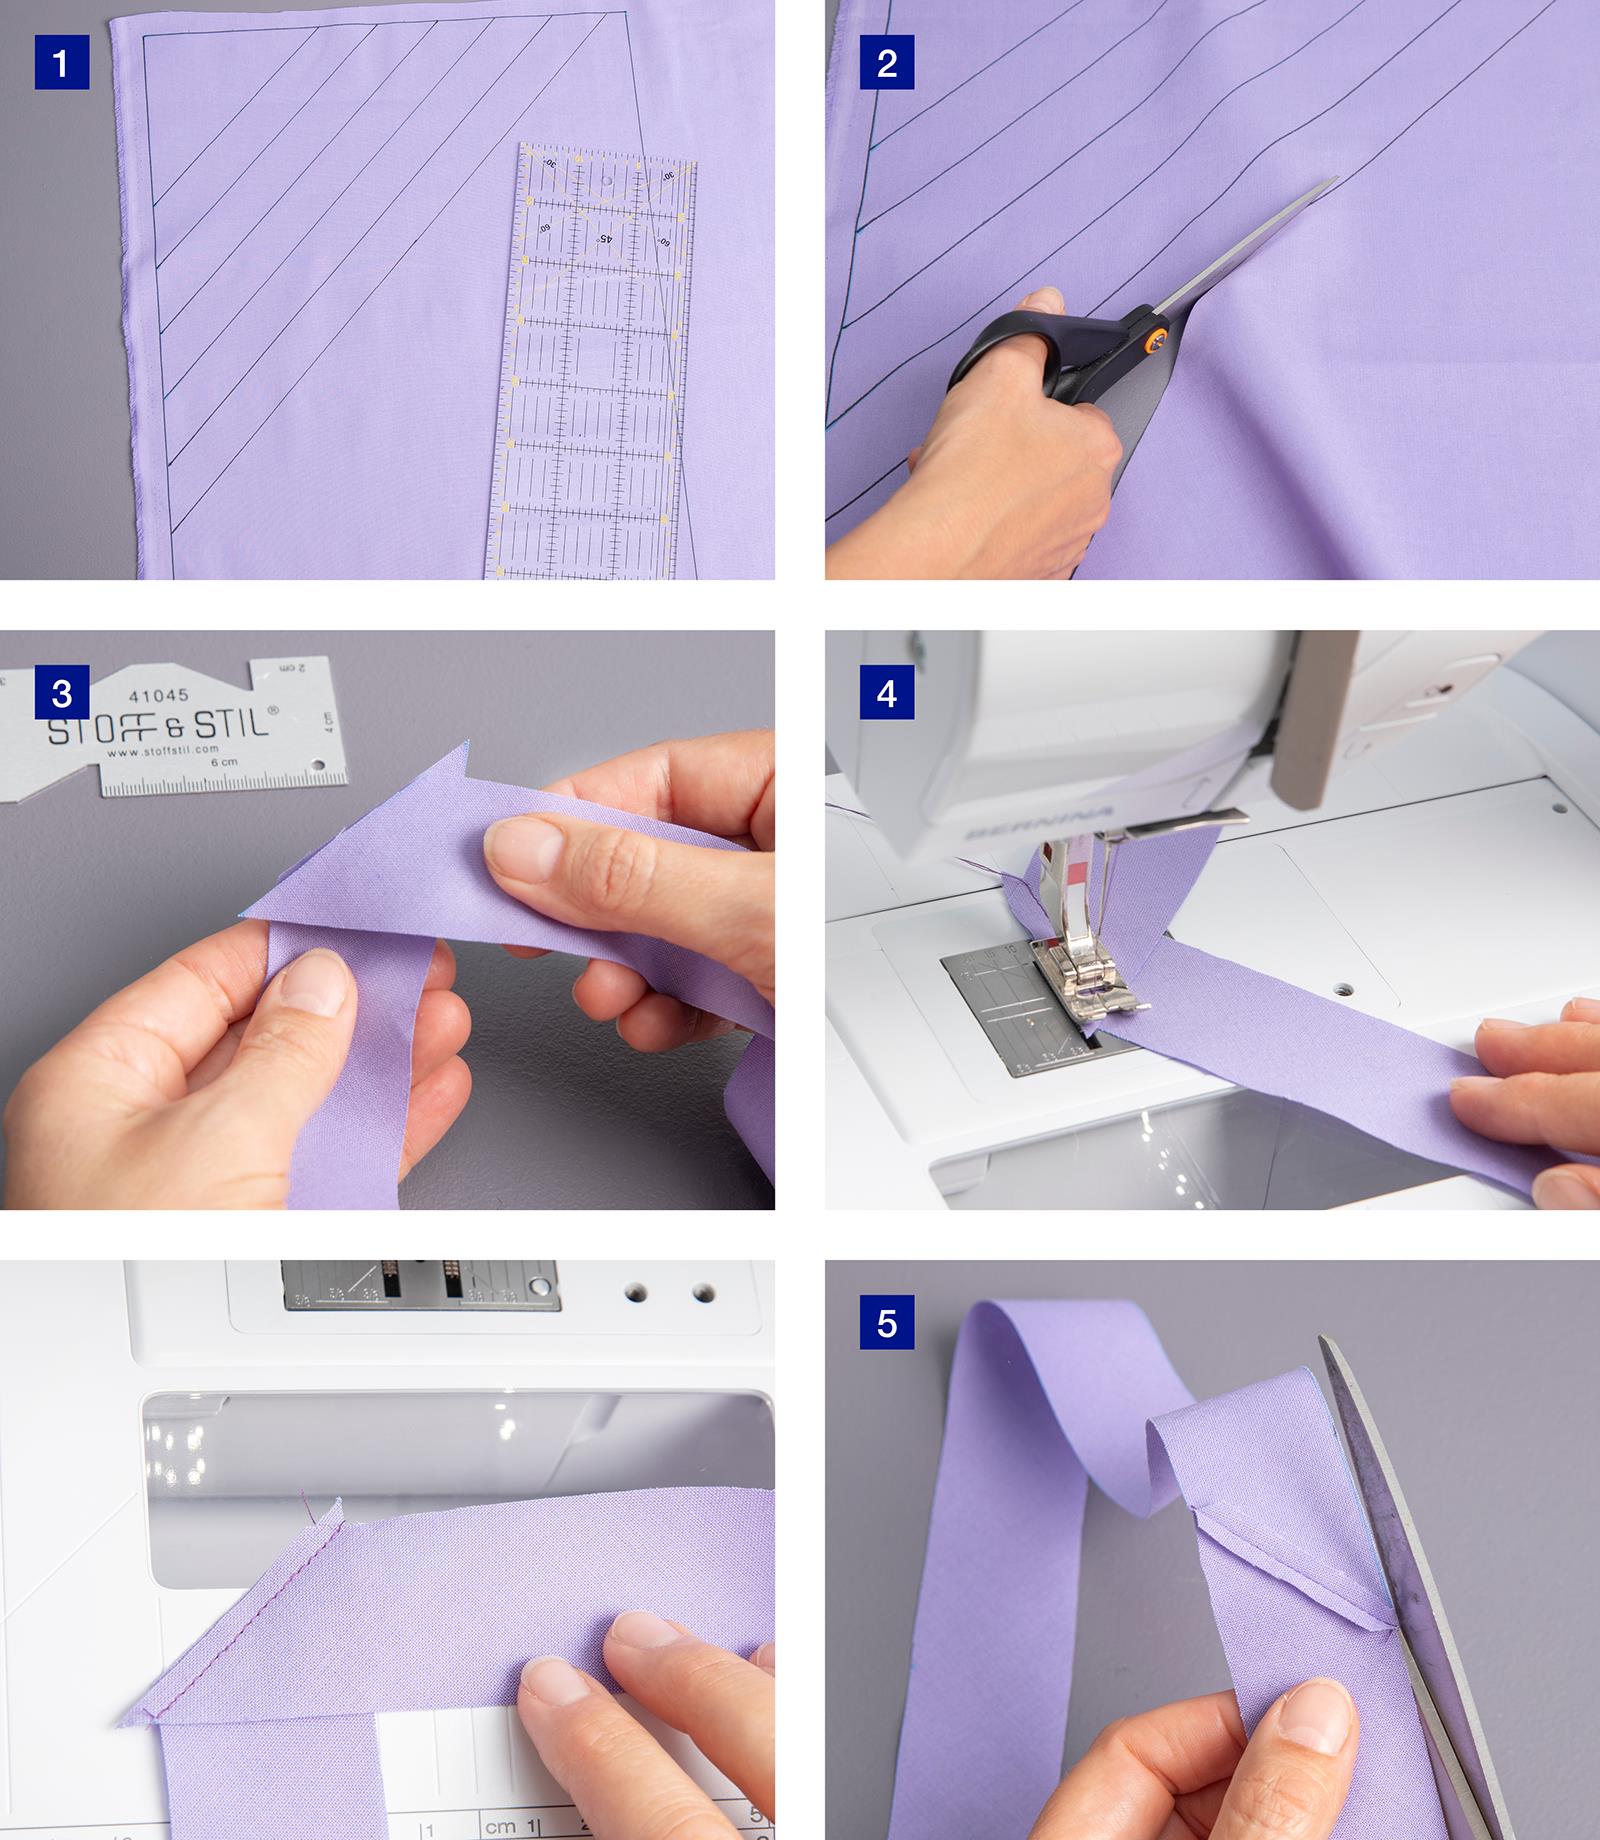
1:
Find your fabric, and mark up. If you e.g. use a bias tape maker for 18 mm, your strings must be 3.5 cm when measuring in the middle of the string. N.B. If you measure the 3.5 cm in the edges of your fabric, your string will not fit the bias tape maker.
Most fabrics give when you stretch them askew, so you get the flexibility in your bias tape. As jersey already is a very flexible fabric in itself, if will be uncooperative, if you cut it askew.
TIPS
Cut off your fabric for your bias tape:
Viscose, satin, woven cotton: Cut askew between the selvedges
Jersey: Cut horizontally between the selvedges
2:
Afterwards, cut a string with a 45 degree angle to the selvedge. You can also use a rotary cutter.
3:
When you sew your bias tape, you should give both ends a 0.5 cm seam. E.g. draw the seams with a marker. Afterwards, put the strings together, right side against right side in a 45 degree angle. However, they should NOT be levelled tip to tip. The tips should stick out 0.5 cm from the edges. E.g. pin the edges of the seams.
4:
Sew from edge to edge on the strings. 'Unfold your tape, iron above the two edges of seams.
5:
Cut the excess fabric of both sides and along the needlework. It should be quite close to the needlework, as close as 3 mm.
Repeat the process until you reach the wished length of your bias tape.
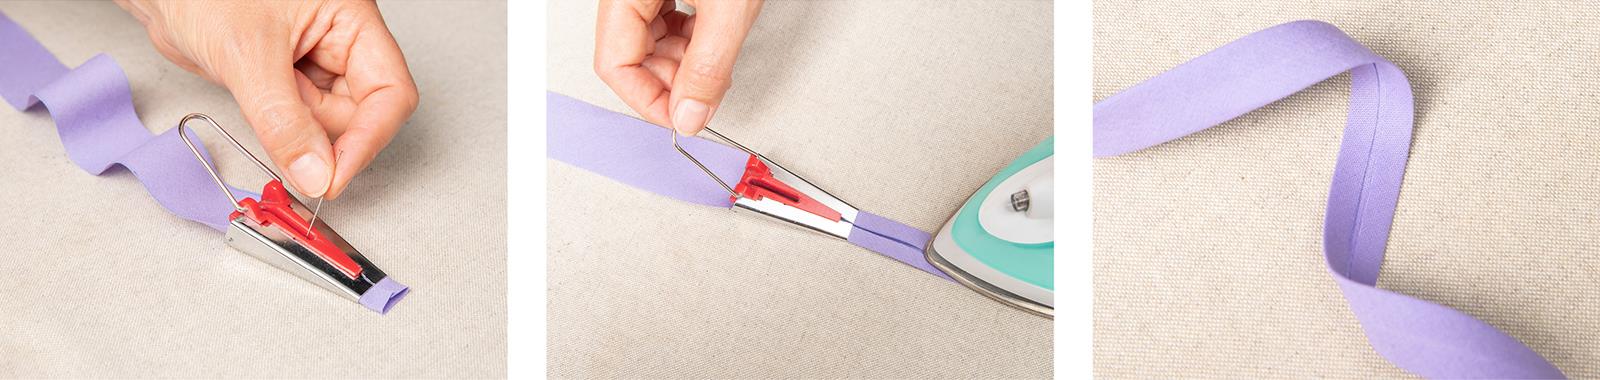
How to fold your bias tape
When you have sewn the wished length of bias tape, use a bias tape maker to fold the edges. We have bias tape makers in three different sizes, so you can make bias tape with different widths.
Take your bias tape strip, use a pin to carefully pull the string through the bias tape maker.
E.g. fasten the tip to your iron board with a pin, then pull your bias tape string through the bias tape maker. While pulling your bias tape, you iron it.
Voilá...! You have your finished bias tape – ready for use.
You can dedicate half a meter of fabric, to make your bias tape before starting your project. Then you can make all the bias tape, you need along the way.
What is bias tape useful for?
Bias tape fits most fabrics. You can apply bias tape on clothes and interior projects. It adds a really nice finish – and lots of personality. You can also use bias tape for patchwork or rouleau straps, suitable for straps and buttonholes.
If you wonder, whatelse you can use bias tape for, you can find great inspiration in our Creative Guide about “The Magical Power of Bias Tape”.
If you have any questions about sewing with bias tape, or how to make your own, you are welcome to contact our Customer Service or ask our staff in our stores. They are always ready to help you with Tips and Tricks.