Textile paints offer endless possibilities for creative projects and designs. And the paint has a very special feature! When it's dry, it keeps its colour - even after washing.
Textile decoration is popular among children and adults alike. It offers a unique opportunity to personalise textiles and clothes. How about creating a unique mule bag, a pillowcase or perhaps tea towels?
You can also use textile paints to upcycle your old, pre-washed clothes - and much more!
So what are you waiting for? Follow our guide for 6 great ideas on how to use textile paints.
Textile paints in a multitude of colours
With textile paints, you can do projects in the colour spectrum of the rainbow. So naturally, we also have a large selection that you can use for most fabrics. And if you can't find exactly the colour you're looking for, we've developed a colour mixing guide that's easy to follow.
A good tip before you start with textile paint
You might think that textile painting might be messy, but relax! Get a transparent oilcloth as a base – and you don't have to worry about stains here and there. Then, you can easily take the canvas out of the cupboard whenever you need to do projects with textile paints.
5 great ideas for textile paints
Ready to be inspired? Let's go!
Idé nr. 1: Giv dit tøj en makeover med tekstilmaling
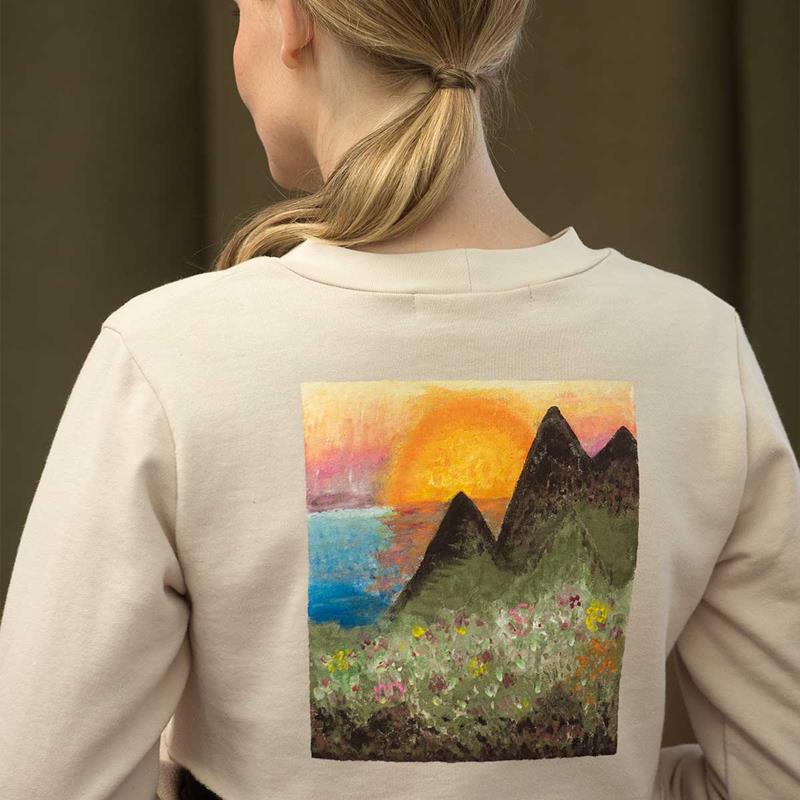
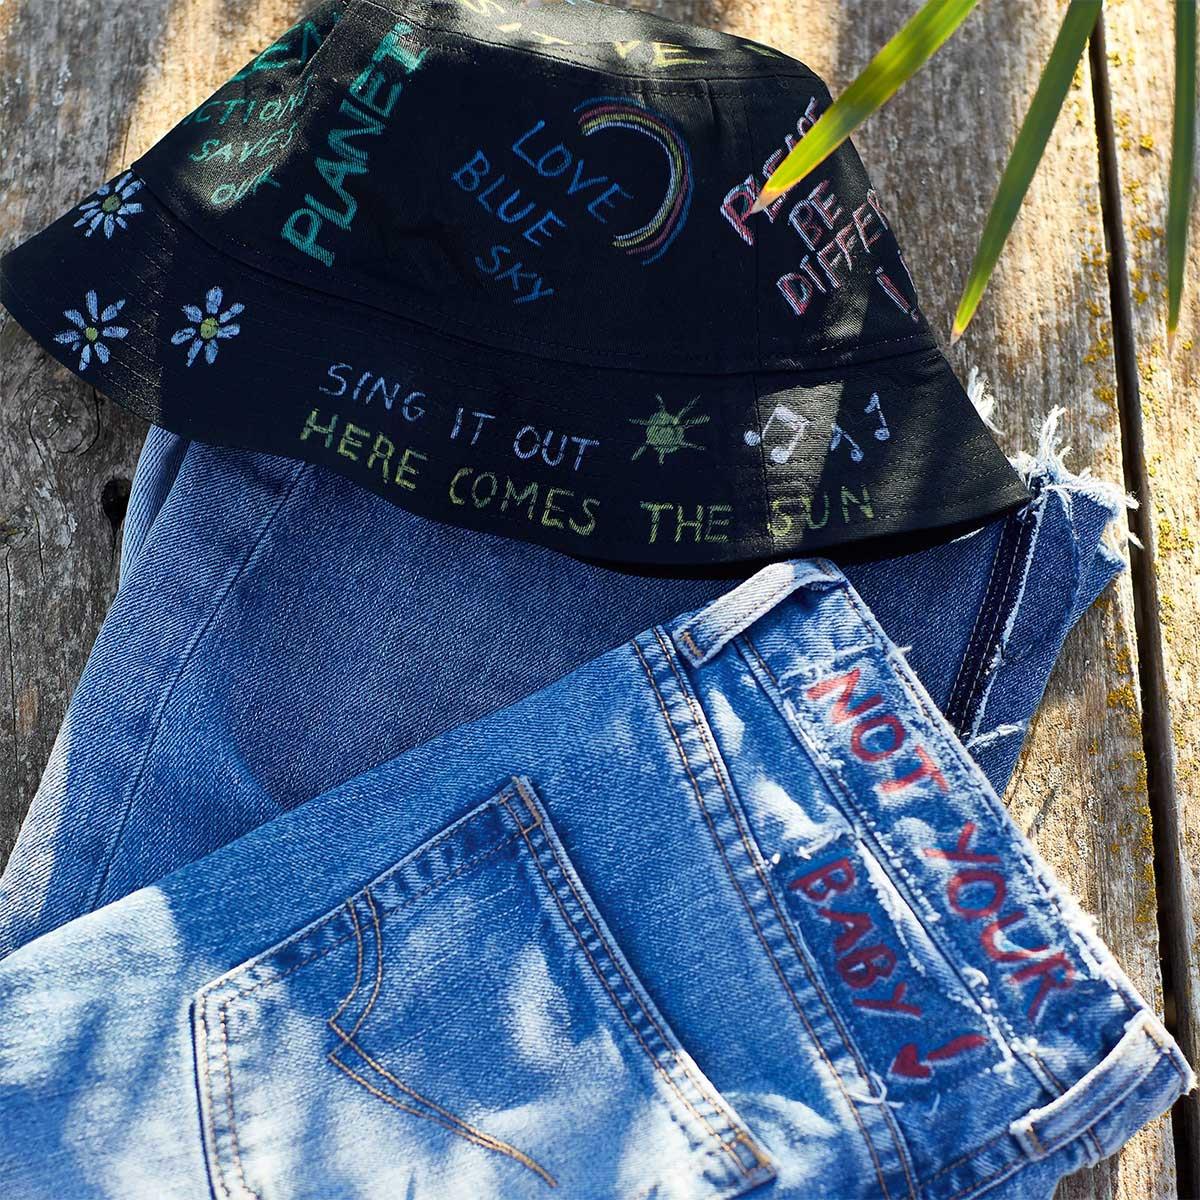
Are you dreaming of giving your new style a unique touch? Do you have a stain on your favourite sweater? Or do you want to give your old jeans jacket a makeover? Then Javana textile paint is your preferred choice!
Choose fabrics with natural fibres.
Select fabrics with natural fibres, as they absorb textile paint better. Remember to wash your fabric to make sure it's clean before you start.
How do I use textile paints?
Create beautiful freehand designs on your cotton sweater - or use a stencil with letters, for example. You can use a brush, a foam sponge or something else to create the desired effects. Experiment with a piece of fabric before you start.
We recommend using a backing to protect the surfaces you're working on - but also so your paint doesn't soak through to the fabric, for example, the back of your jumper.
For example, you can push a piece of cardboard into the garment you're painting on. And feel free to use a plastic backing or a wax cloth on your table.
What type of textile paint should I use?
We have different types of textile paints in our range. You must choose the right kind of paint for your project. In particular, you need to pay attention to the colour of the garment.
For example, if you paint on dark fabrics, choose an opaque textile dye that makes your chosen colours stand out - even on dark fabric.
Silk paint is suitable for silk and light fabrics in cotton, linen, viscose or materials blended with up to 20% synthetic fibres. You can use the paint alone or with a contour pen, salt and various spray techniques.

How much textile paint do I need?
It's hard to say exactly how much paint you'll need, as it obviously depends on your project. But our textile paints have great coverage, so usually each can of paint goes quite far.
In fact, you rinse off all excess paint when you wash your project afterwards. So it pays to be economical with paint; use just enough to achieve the desired coverage.
How to dry textile paint
When you have finished painting with textile paints, leave to dry for up to six hours before fixing with an iron. Do not iron directly onto your project. Lay a thin cloth over it. When dry, the paint is colourfast and washable. Turn your project inside-out. It is washable at up to 40°C.
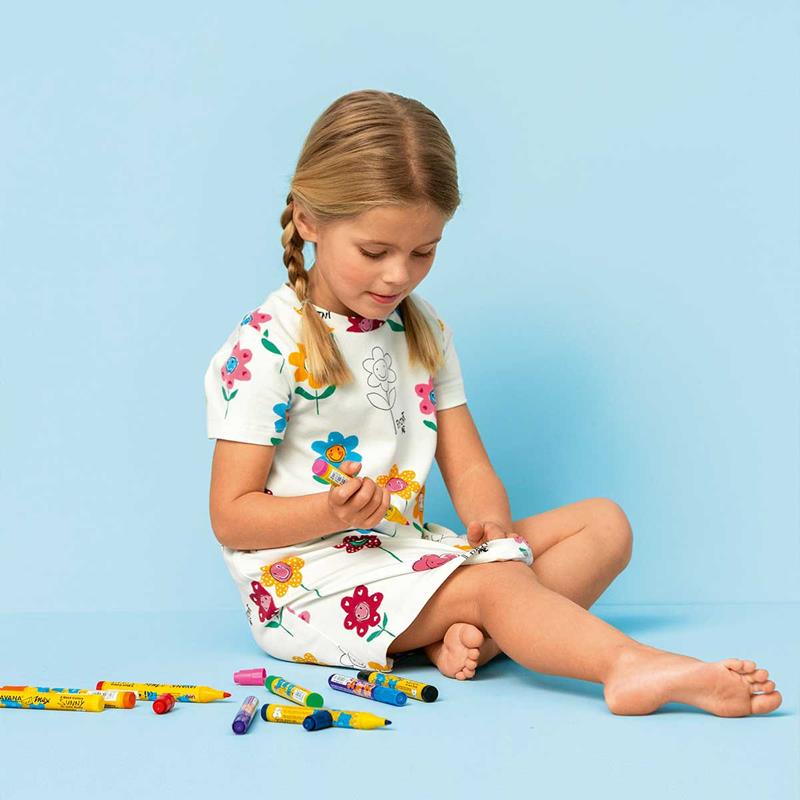
Do you love to be creative with felt tips? Then you'll also love giving your clothes new life with textile markers! They're available in all sorts of colours - and for light and dark fabrics.
Get your sparkle on!
If colours aren't enough for you, you can, of course, also get textile ink with glitter! So make every day a party - and give your jeans a good makeover, for example.
How do I use textile markers?
Our textile markers are super easy to work with. Create personalised designs on recycled clothing and home decoration projects - or write your name on children's clothes. Anything is possible!
In fact, they work just like ordinary markers - except your design can't be washed off again.
Good to know about textile markers
Put a piece of fabric or cardboard between your layers to prevent the colour from rubbing off. After use, we recommend leaving your project to dry for at least six hours, before heat-fixing it with an iron. Cover your project, i.e. with a tea towel or another cloth, to protect it during fixation. Your project is now washable at up to 60°C - please wash inside out.
Take care of your textile pens.
Before using a marker, shake it for 1-2 minutes. Then, press the tip of the pen down (a few times if necessary), and you're ready to go. After use, the textile marker should be placed horizontally.
Who doesn't love batik? You can achieve the most marvellous patterns, and the method is brilliant for upcycling. But actually, batik isn't just one technique - it's many!
You can use batik dye to easily dye larger surfaces or even entire garments. But you can also opt for retro techniques like dip-dye and tie-dye. Let's dive into some of them.
How do I make DIP DYE batik?
With this technique, you "dip" parts of the textile in your dye bath, creating different shades of colour that create a colour-blocking effect.
We've created a guide to help you get started with dip dye batik paints. You'll find it here: Upcycle with batik dyes.
How do I make TIE DYE batik?
With tie dye, you tie parts of your clothes with rubber bands or similar. In this way, you shield the colour from penetrating the fabric. Perhaps you've already tried the technique?
It creates excellent abstract or geometrical patterns. You can try many different twisting and binding techniques, each with a unique result.
Pouring technique with batik dye
If you find the tying and binding too much of a hassle, you can pour your batik dye directly onto the garment. Simply prepare your batik dye and pour it over the clothes.
You can also use a pipette bottle to make finer patterns. Another option is to put the paint in a spray bottle.
Of course, you also have the option of dyeing entire garments with batik dye.
What do I need for batik?
You'll need batik dye and fixative for each batik project.
Beyond that, it all depends on which technique you want to use. So, find the method you want to try and find materials based on that.
How much paint do I need?
You can vary the intensity of the colour by adding more or less batik powder to your dye bath. For the exact amount of colouring salt you need, see the product information on this page or the product instructions.
Tips and ideas for batik
- The project you want to colour must be freshly washed (and wet).
- Mix the batik dye with water (please follow the instructions).
- Let your project soak in/with the batik dye for an hour and rinse.
- Finally, use fixative to bind the colour.
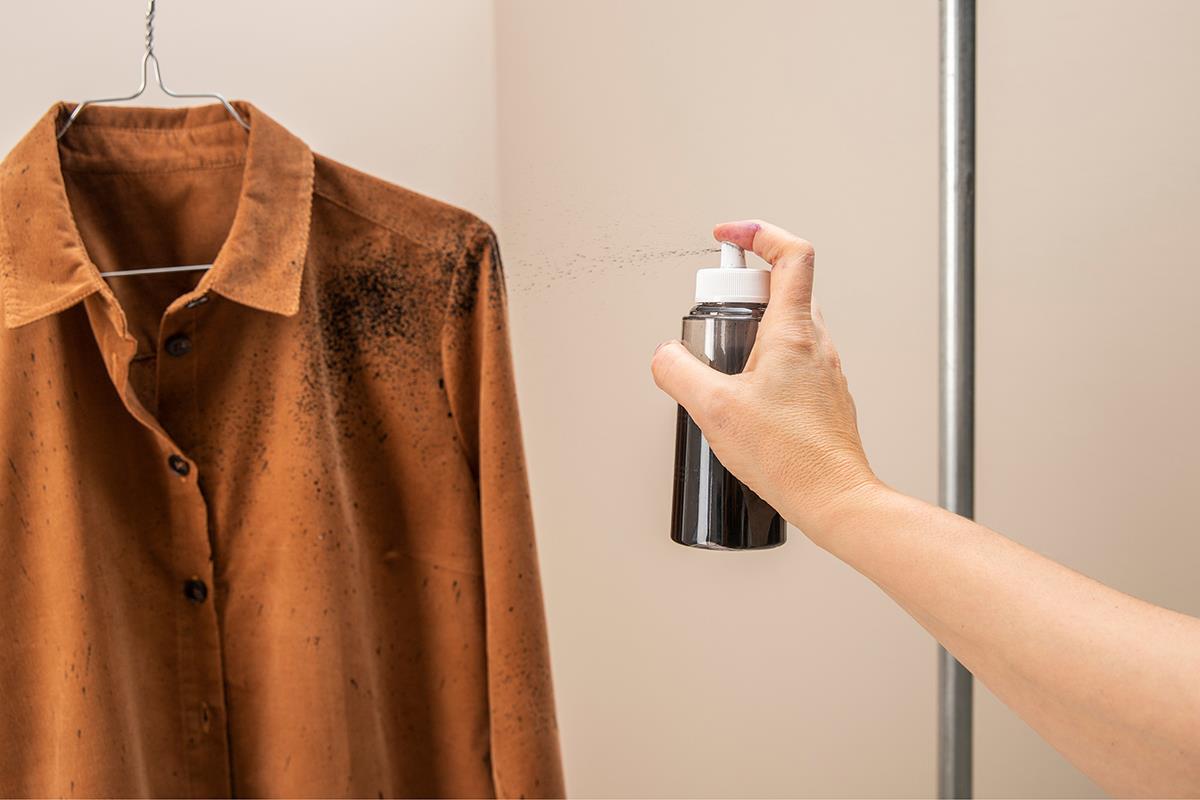
A simple technique that delivers a great result! Simply splash your project with textile paint and get an almost artistic look.
How to make splashes with textile paint
Take your fabric/project and spread it well on a surface. You can also hang it somewhere in a spacious room. Now dip your brush or sponge in textile paint (a good coat). Then splash the paint onto the project.
Use a pump for better control
You can also use our spray bottle with a pump, offering you more control over the technique. You'll get similar results, and it's easy to use. Pump a few times and spray!
Experiment
Experimenting with splashes on a piece of paper may be helpful. Then you can find your style and splash density before you get started. The closer you splash on your project - the more substantial and denser the splash.
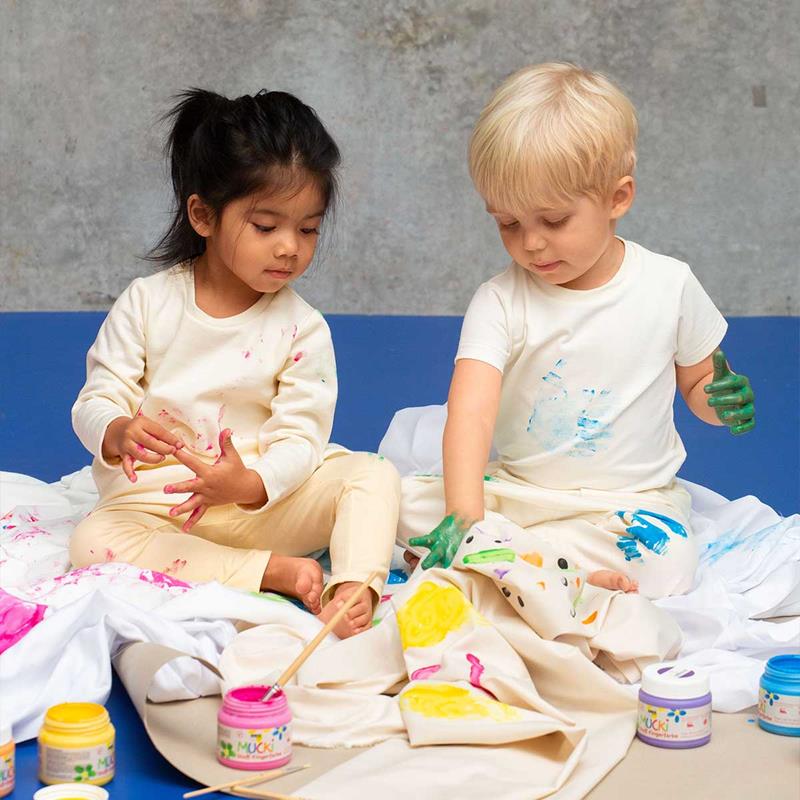
Do your kids love to paint too? Then let them play with Mucki finger paints, which are water-based and contain no hazardous chemicals. Kids as young as 2+ can join in - so go for it!
How do I use Mucki finger paint?
The paint buckets have large openings and are, therefore, easy for small hands to get into. Use your fingers as brushes on light or dark fabrics (up to 20% synthetic content) - and let your imagination run wild!
Make tablecloths with cute handprints, vegetable prints - or whatever you fancy.
How to dry the finger paint
After use, leave your project to dry for a minimum of six hours, before heat-fixing it with an iron. Cover your project, i.e. with a tea towel or another cloth, to protect it during fixation.
Please find our complete guide to textile paints for children here.
Textile paints for children
If finger painting sounds like an unwieldy paint-it-all project, children can also use ordinary brushes and sponges for painting. Finger paints are a little thicker than regular paint but can still be used.
And most children can also paint with ordinary textile paints and textile pens. They'll also find it fun to create batik projects, for example. The tie-dye effect is probably the most fascinating.
However, we recommend that children use an apron because textile paint -obviously- cannot be washed out.