Download templates for lino printing above
Learn how to make lino prints in 6 simple steps
Want to make lino prints but don't know how to get started? Don't worry! It's easy to do and EVERYONE can join in on this wonderful creative project.
In this guide, you'll learn how to make lino prints in 6 simple steps - and, of course, you'll get our best advice along the way.
What is lino printing?
Lino printing is a fine art technique where you use linoleum as a printing plate. You cut out your desired design in linoleum and then roll linoleum ink onto the raised areas with a linoleum roller. Finally, transfer the design to paper - and voila, you have a lino print!
What tools should I use for lino printing?
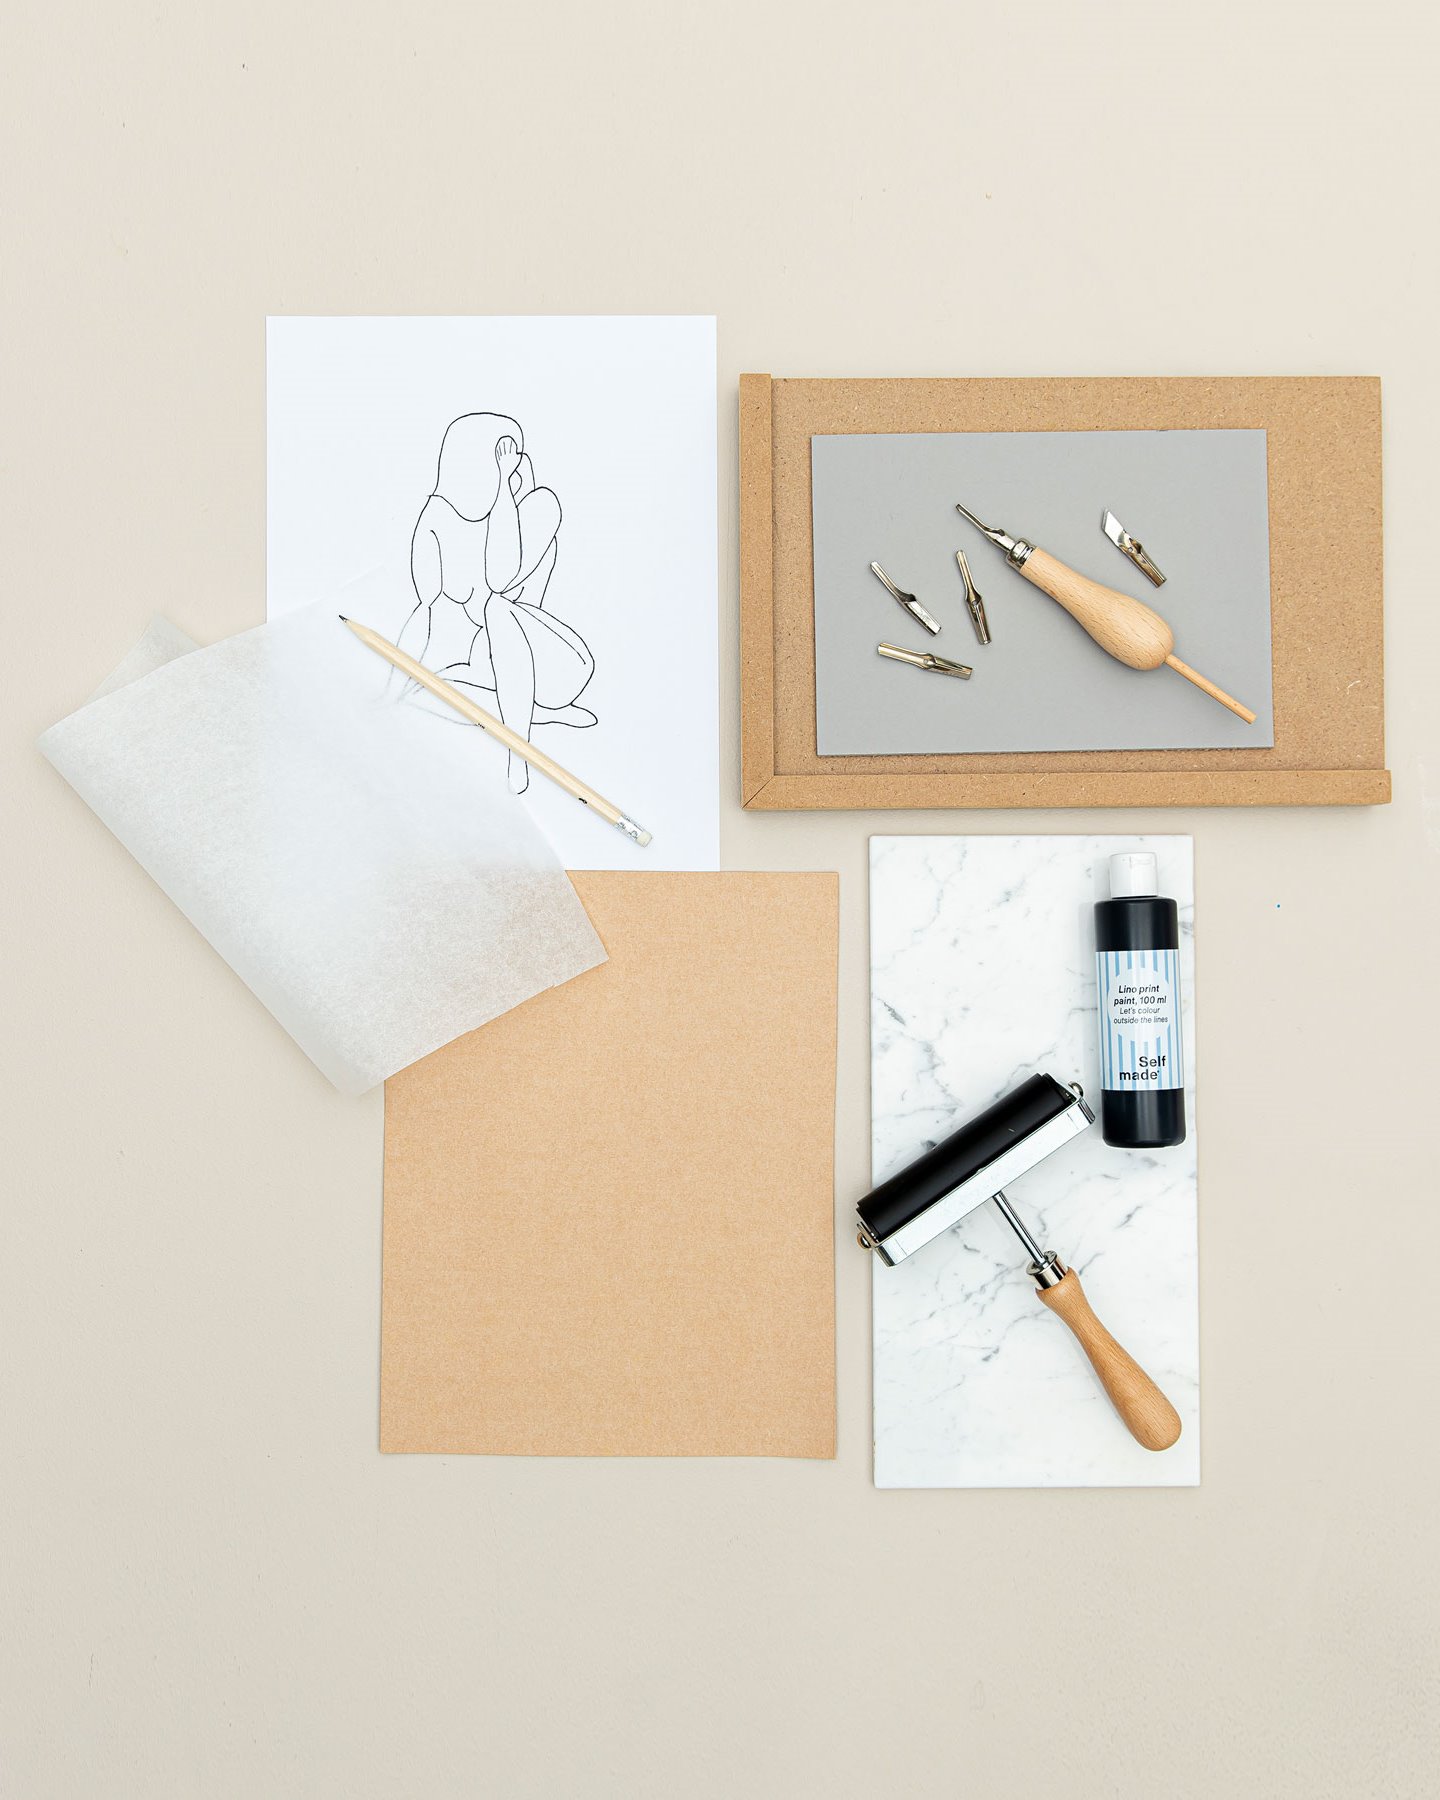
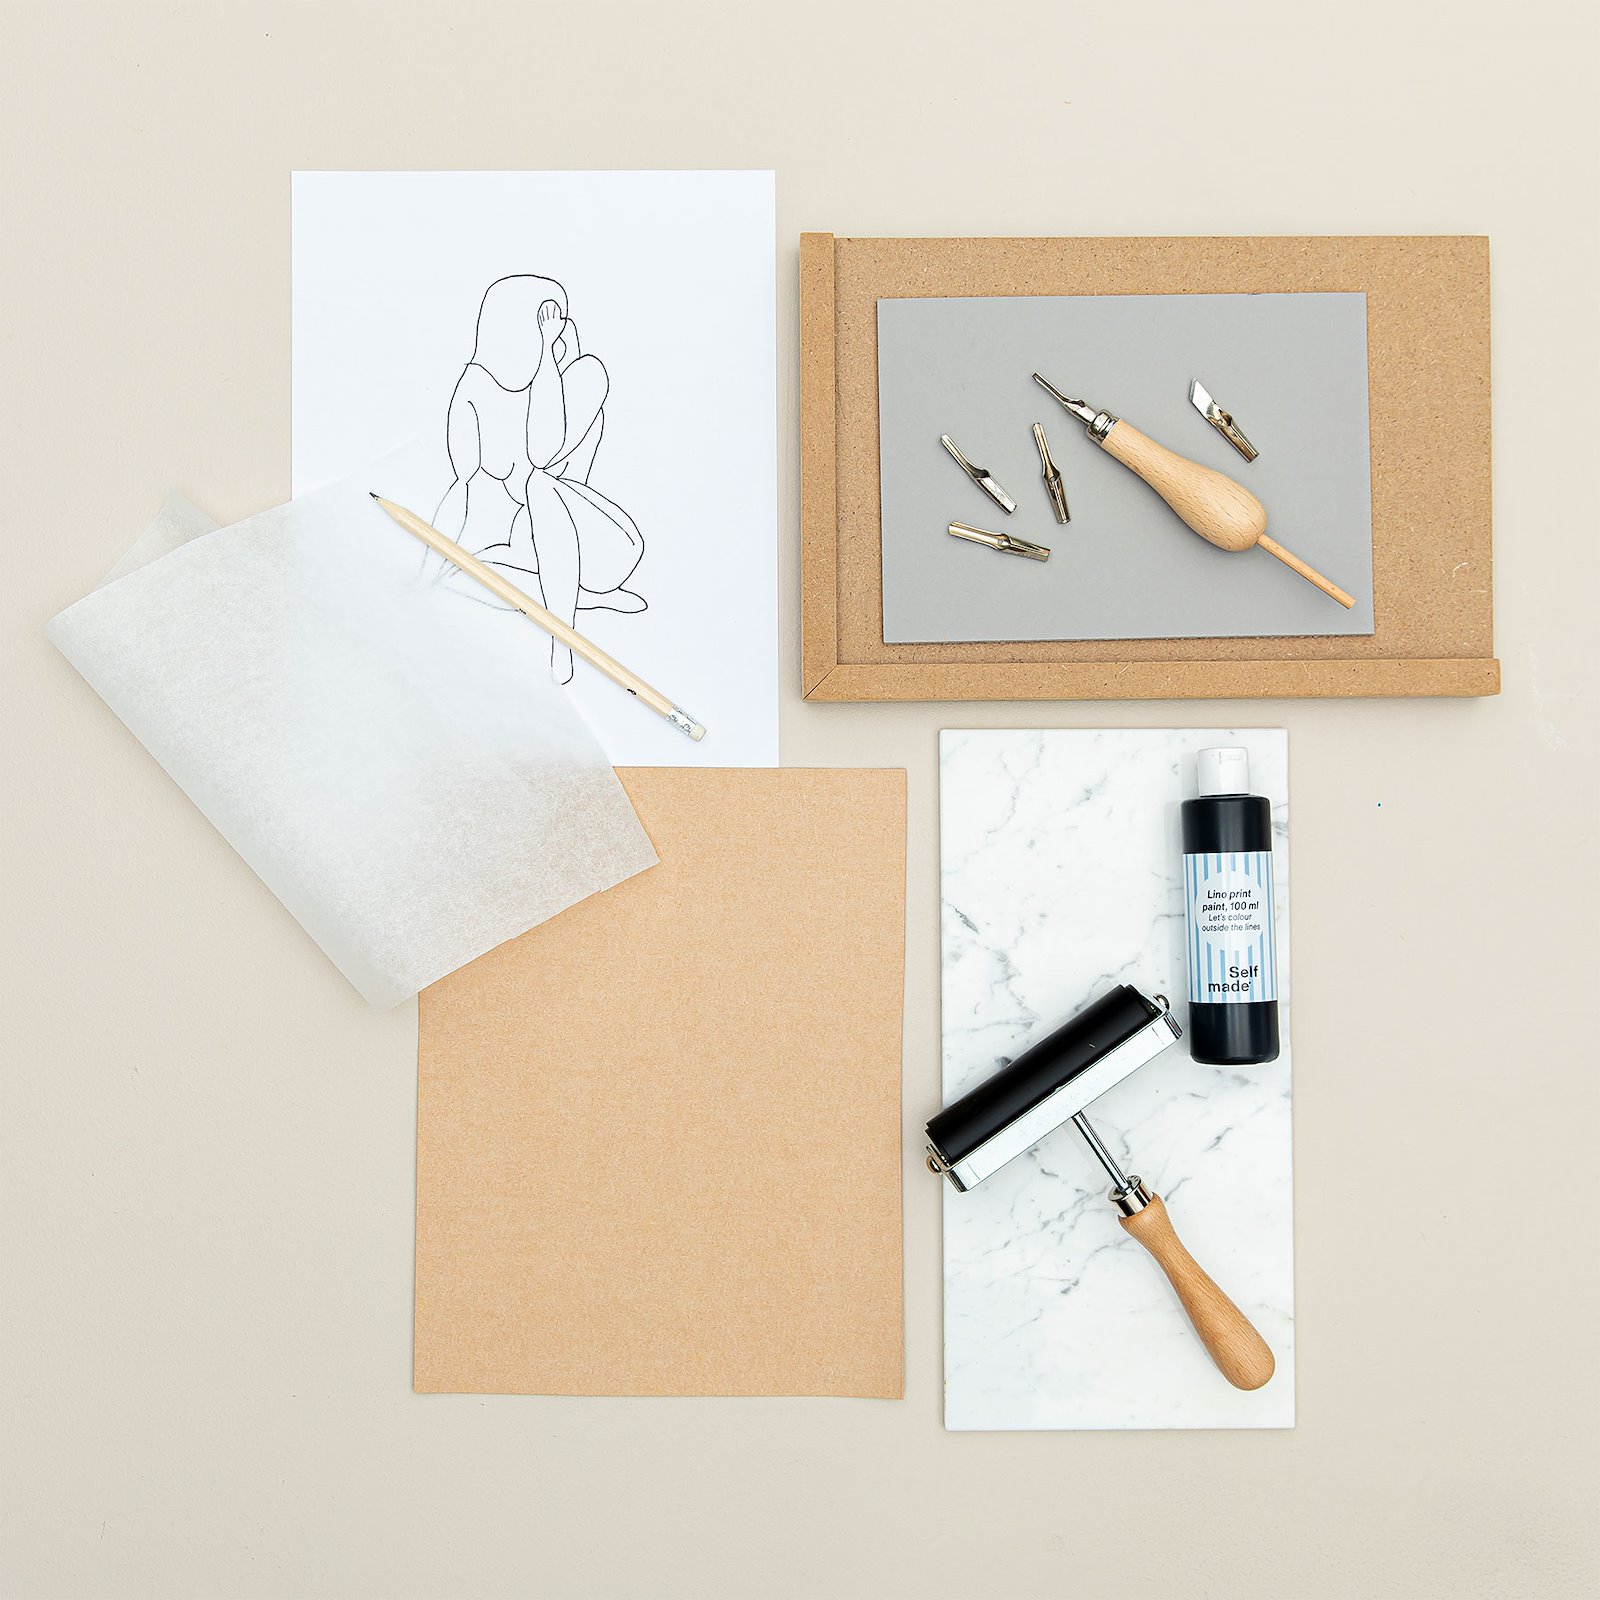
Before you start lino printing, you need the proper tools:
· One soft cut sheet for lino print / pressure plate (Item no. 95700 and 95701)
· Lino roller (Item no. 95707)
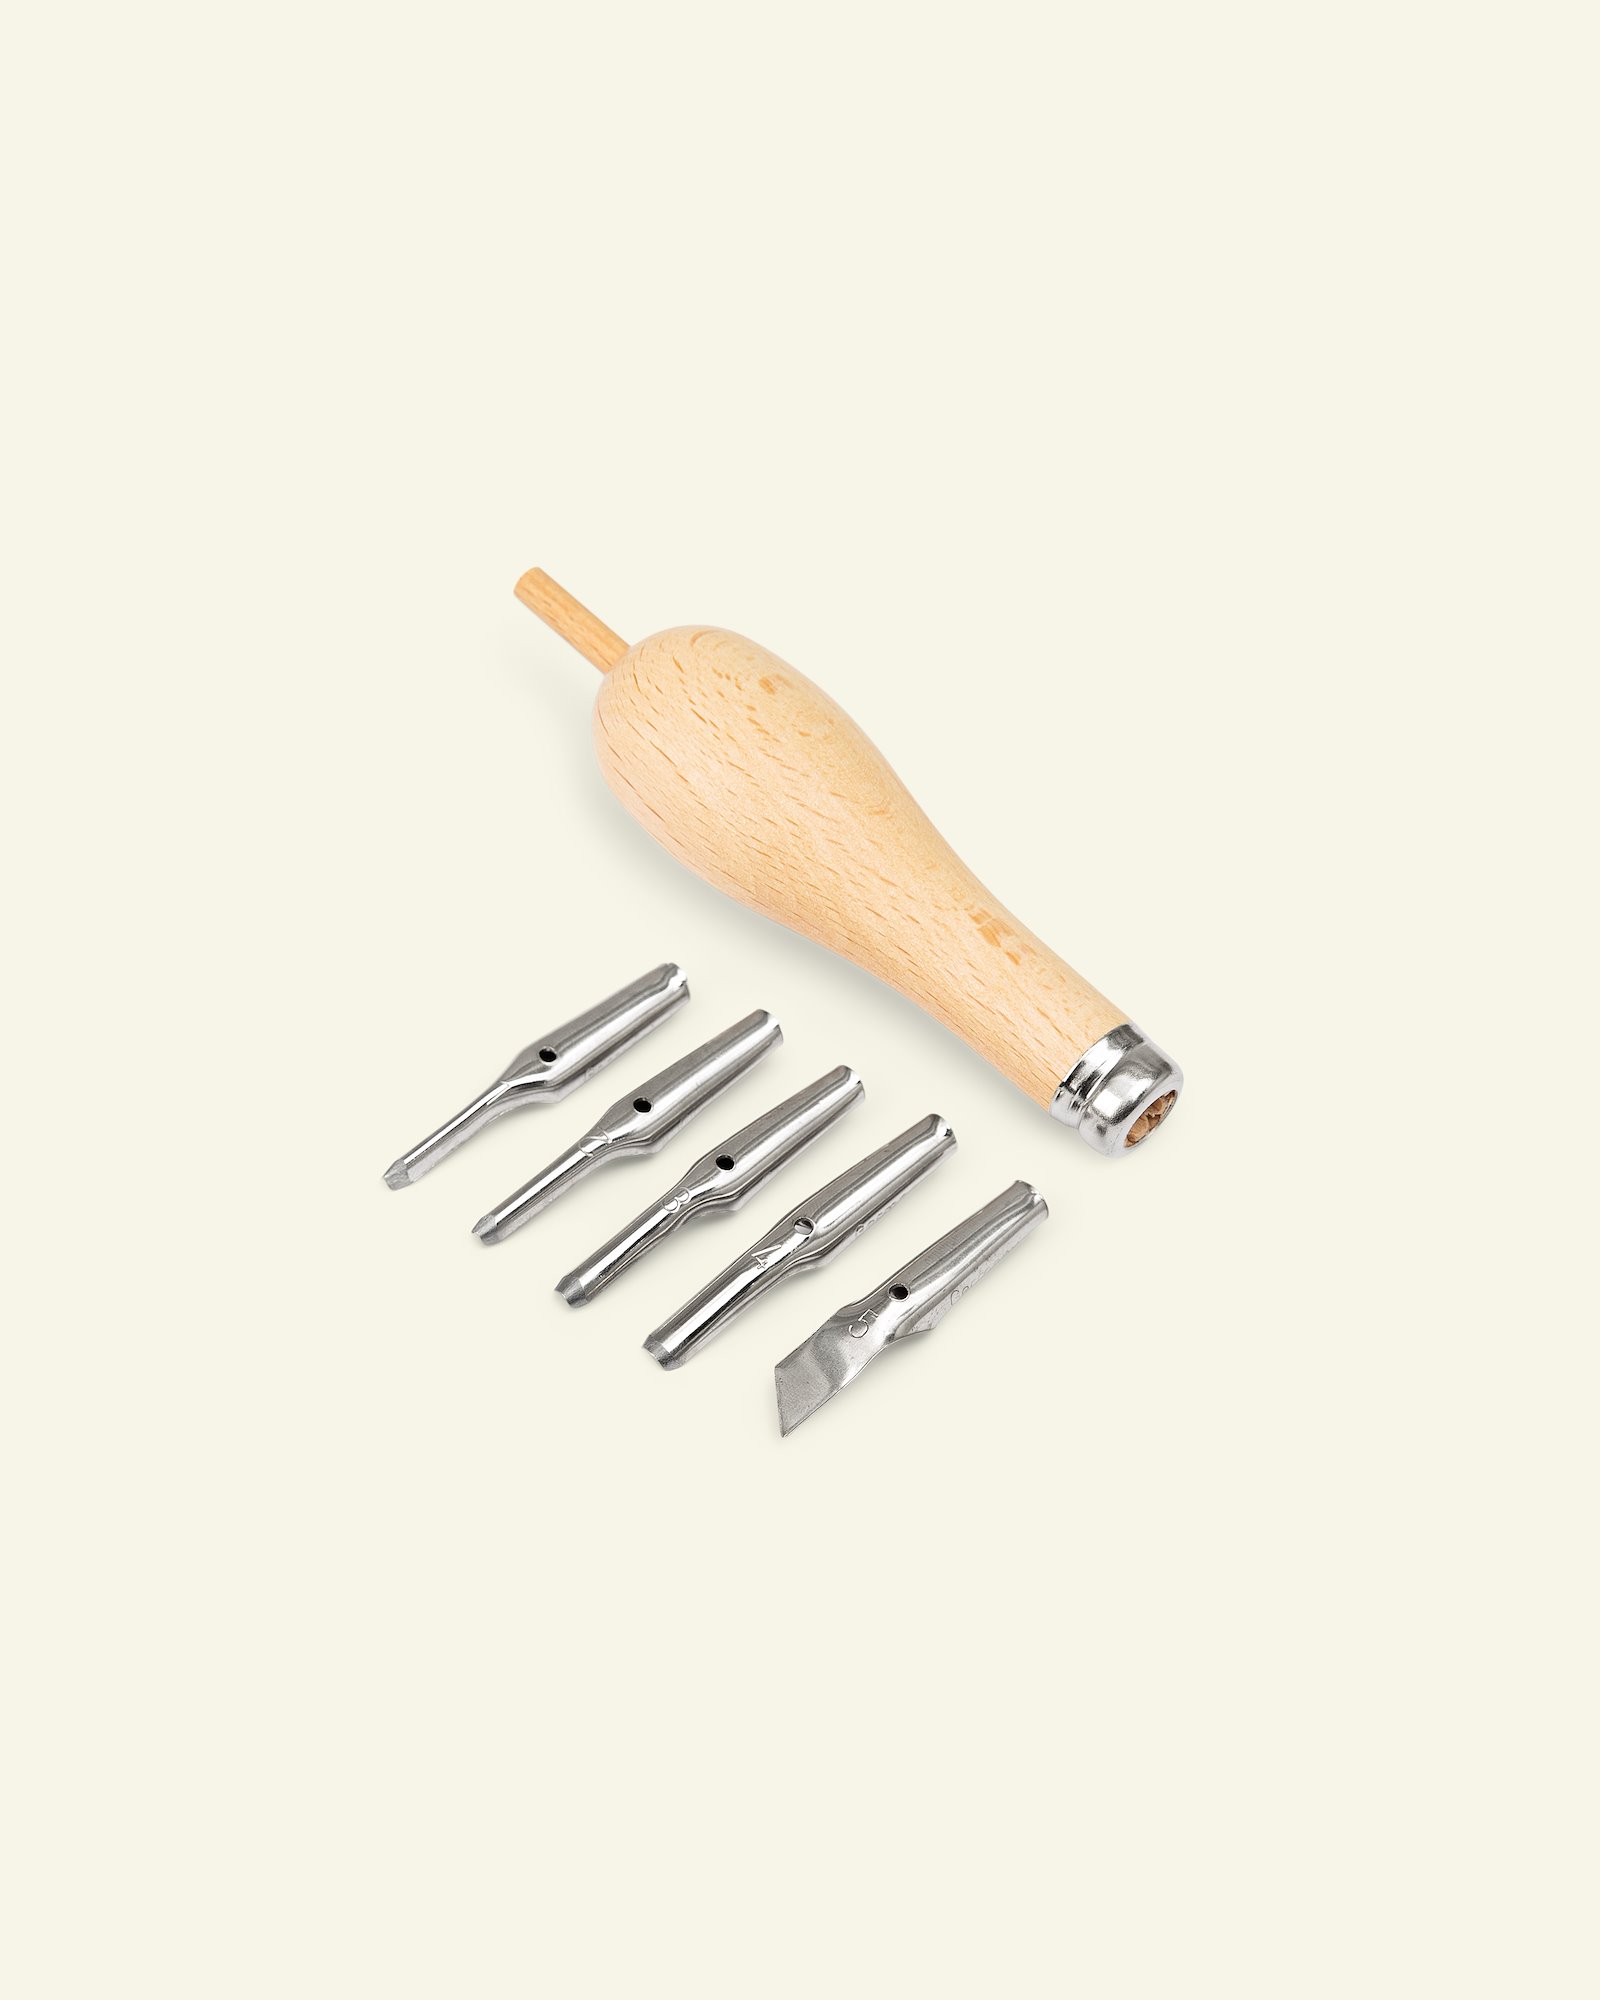
· Lino cutter (Item no. 95706)
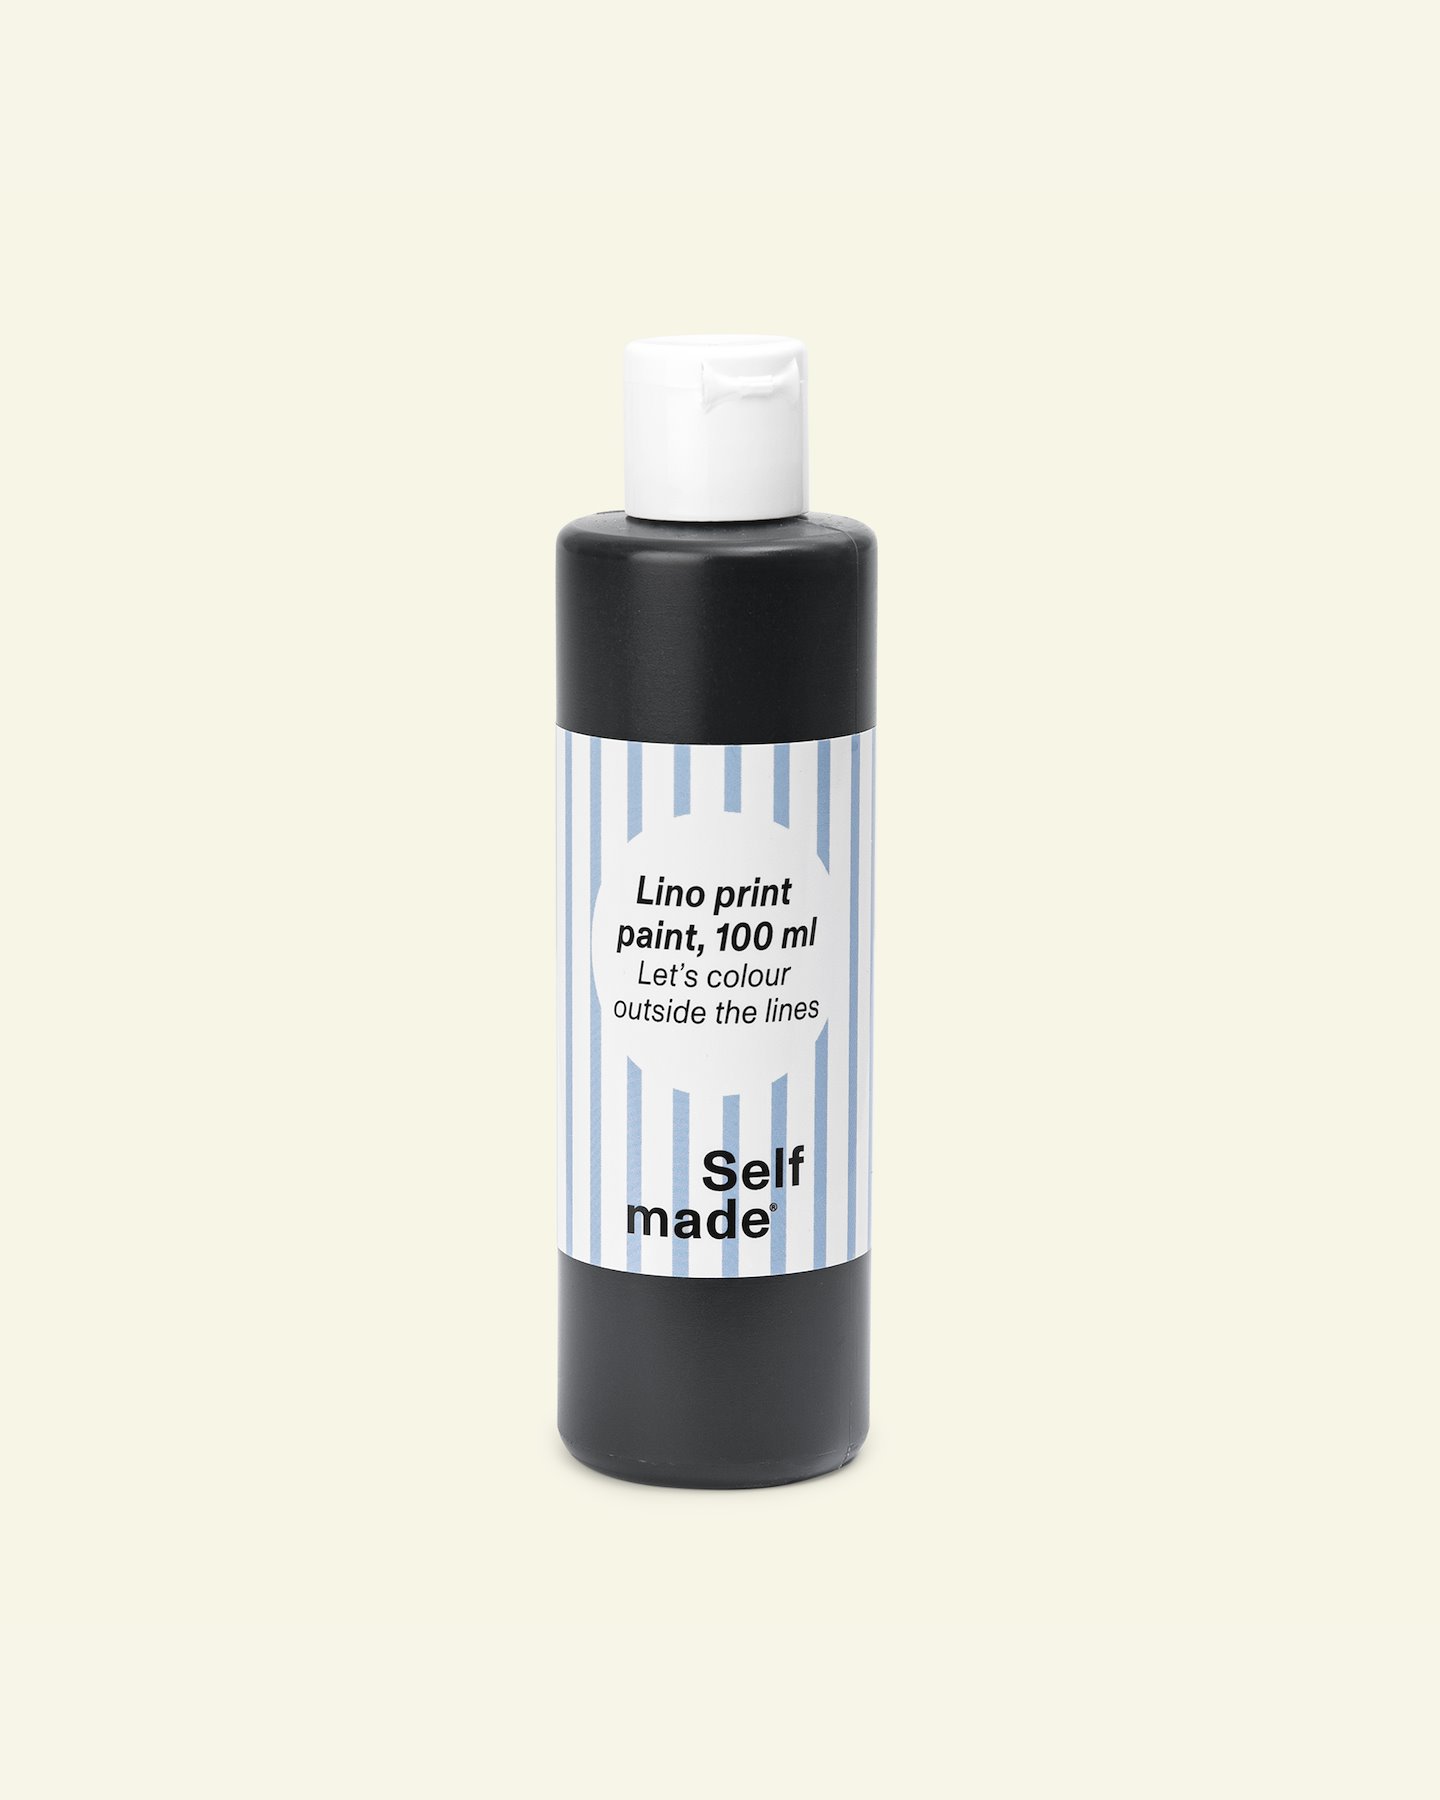
· Lino ink (Item no. 95702)
· A Linoleum Cutting Board (Item no. 95703 and 95704)
In addition, you will need pencil and paper (you can also use PAP FAB, textiles and similar) and protective paper or cardboard. We have linoleum sheets in both A5 and A6, and our linoleum cutting board is available for both right-handed and left-handed people.
Are you looking for a complete linocut starter kit (Item no. 29697)? Naturally, we have a smart little one that includes everything you need to get started!
1.Gather all materials 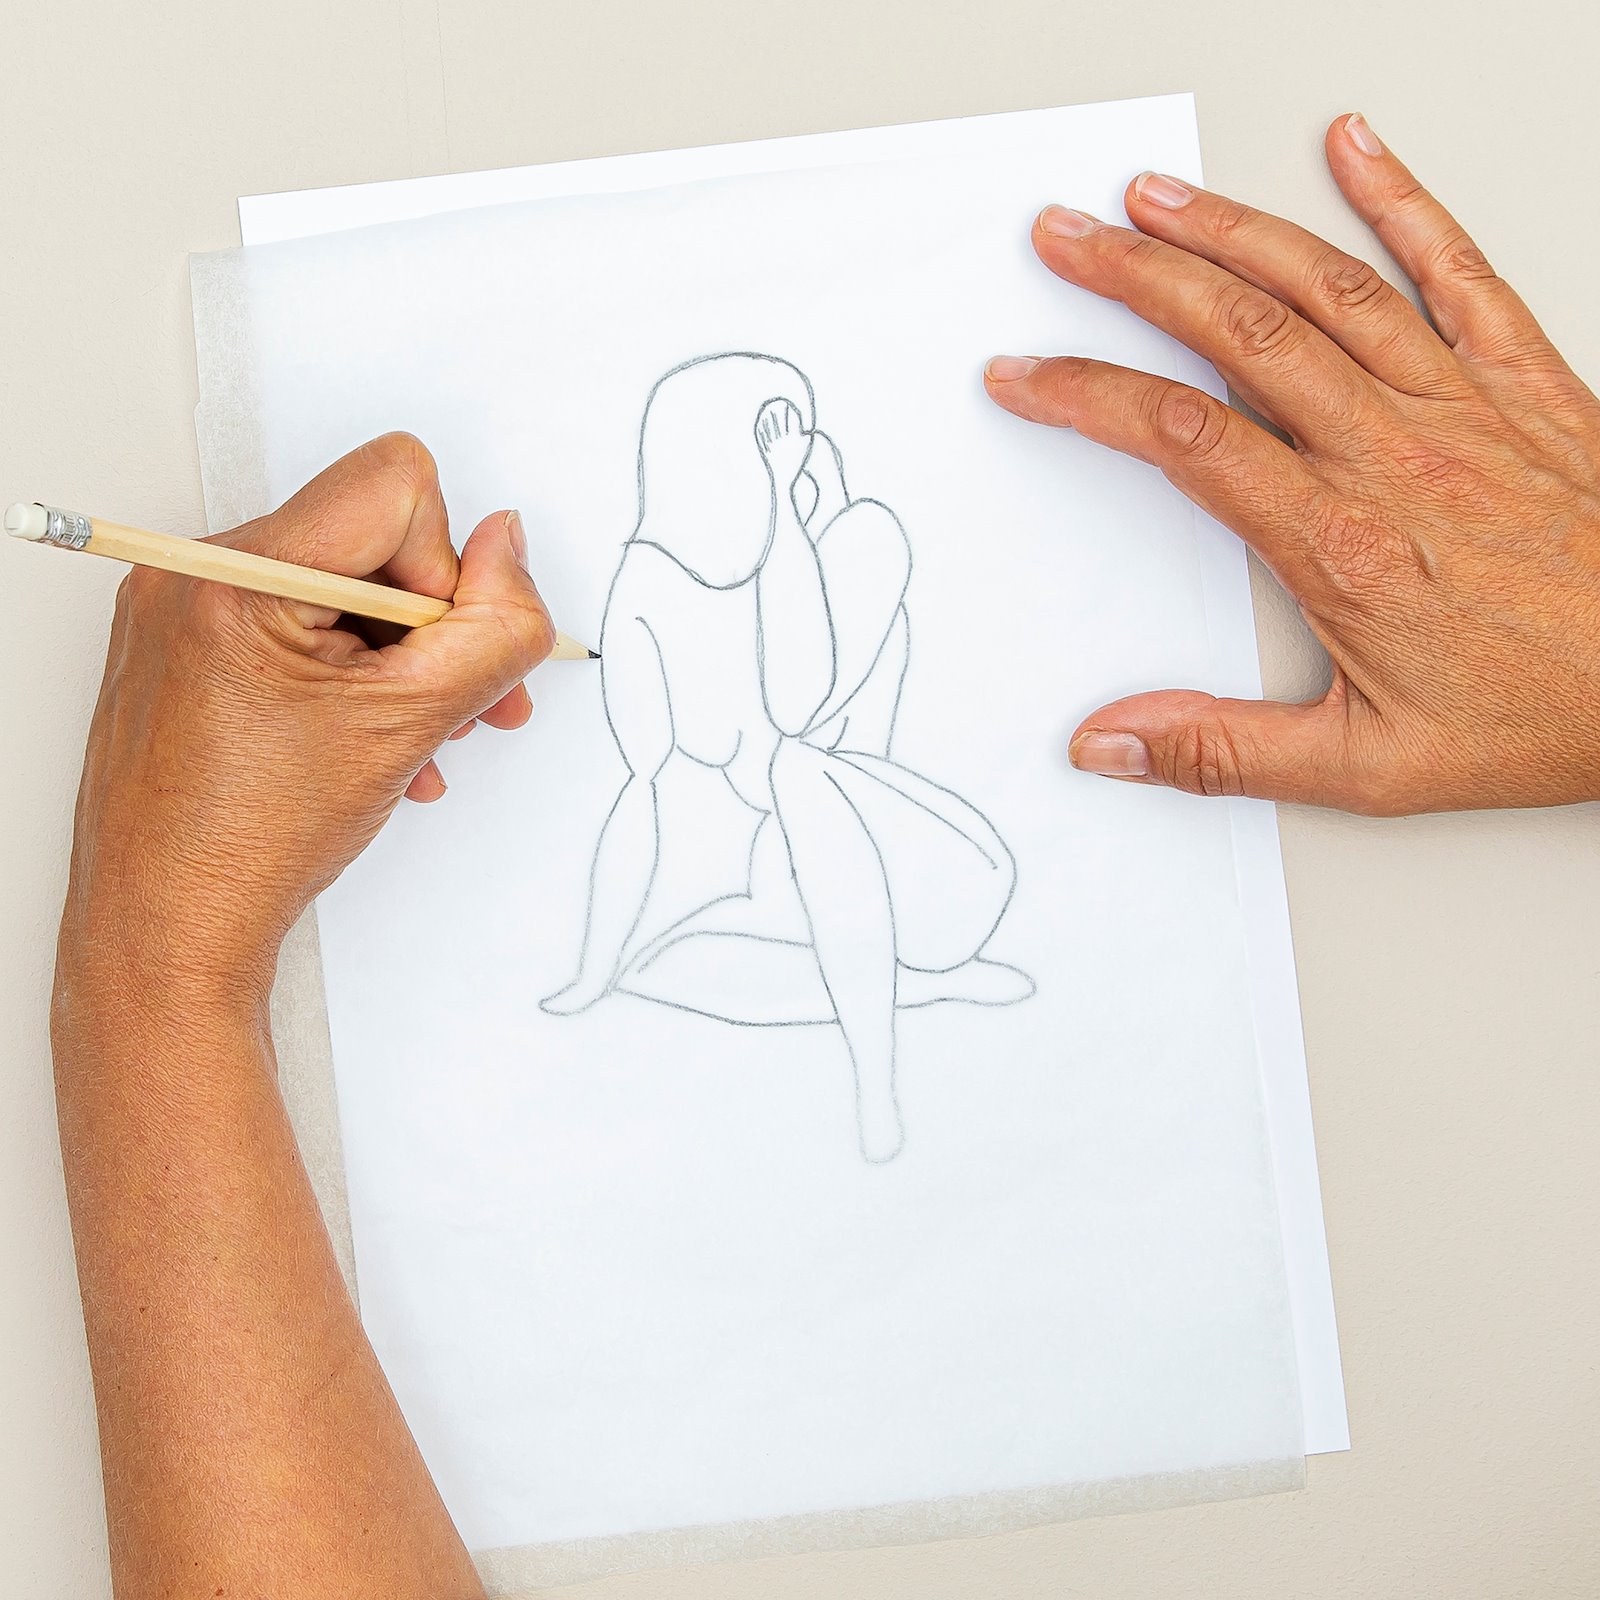
2.Draw your design in pencil on a printing plate (soft cut lino sheet). You can cut the lino sheet to a different size if you wish. 
3.You can also transfer a design using baking paper. 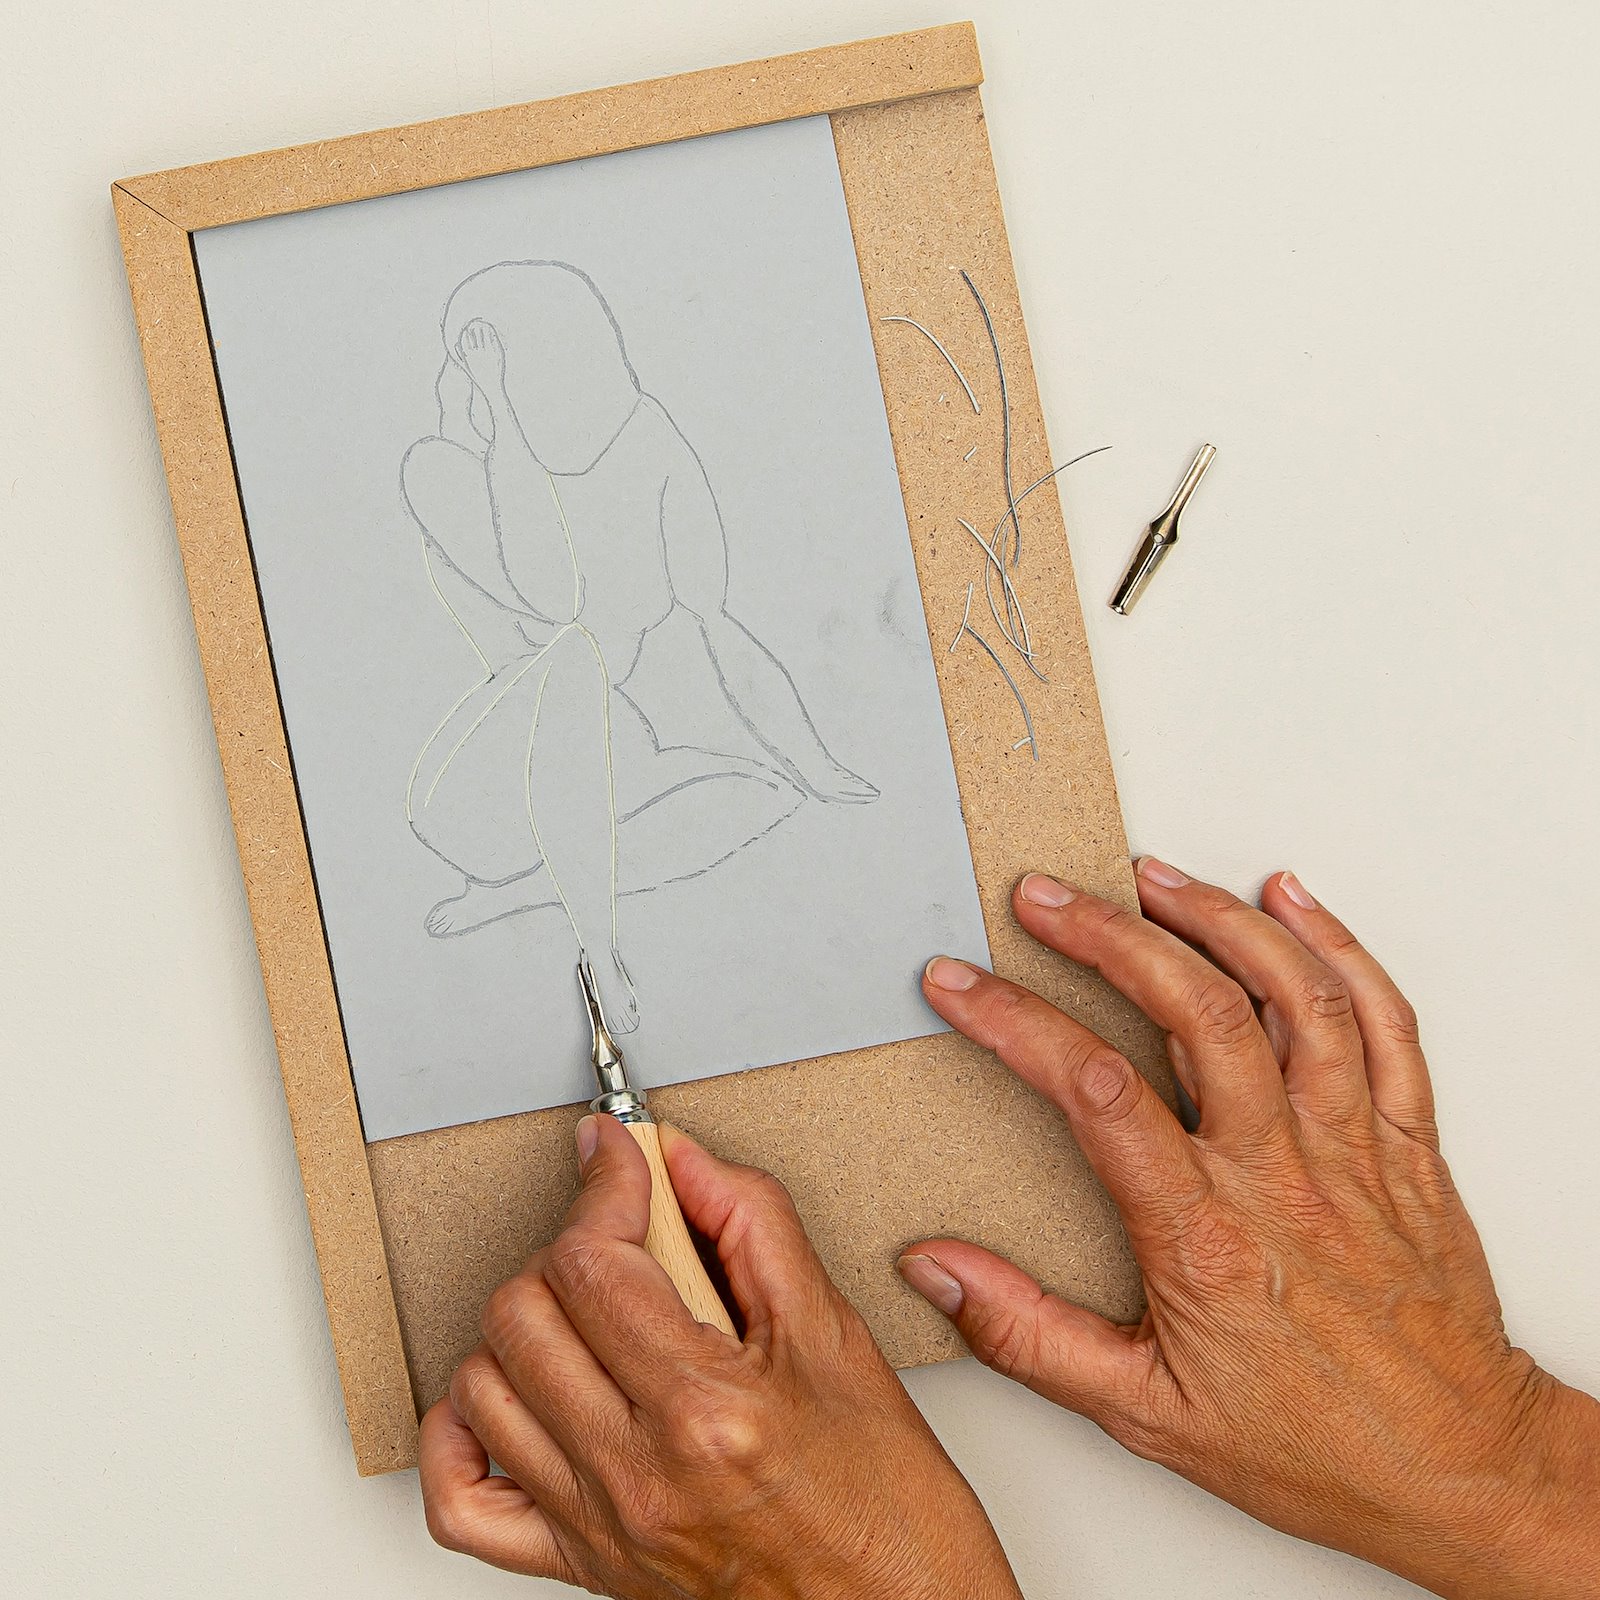
4.Cut away either the line or the background behind the line with a linoleum knife. Remember that you’re printing in negative - that is, what you remove will be white, and what you leave out will be black (or whatever colour you’re using). If you use words or text, remember to mirror it. Different blades give different looks; a pointed spout is good for thin lines, while a wide one is good for removing large surfaces. If possible, use a linoleum cutting board and always make sure to cut away from yourself. The knife can be sharp - so adults should always assist children with this. Tip: Slide your pressure plate into one of the corners of the linoleum cutting board (we have both right- and left-handed versions) - it will stay in place while you cut. 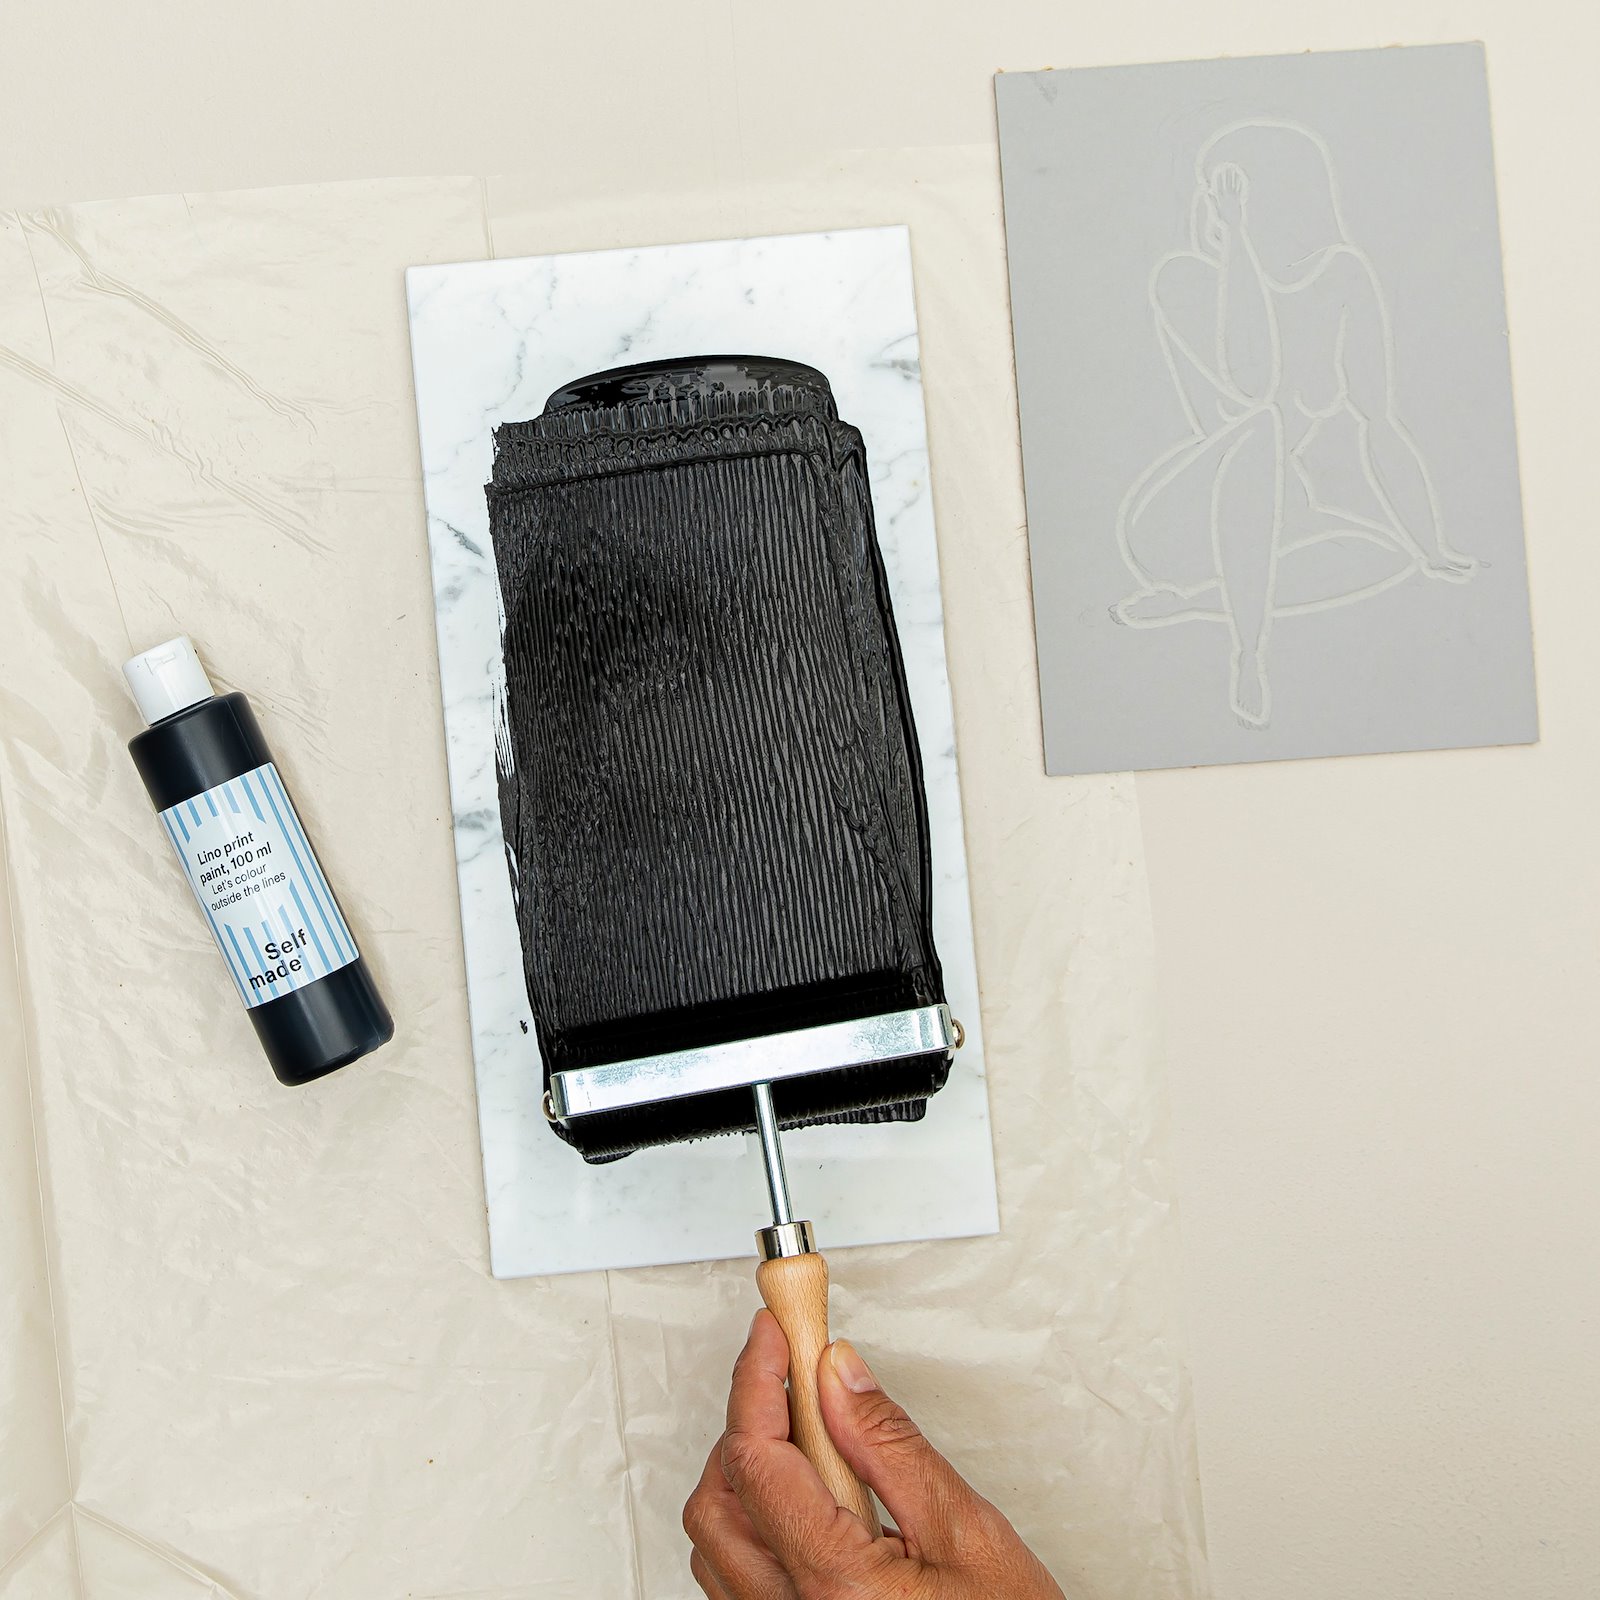
5.Roll out the ink on a flat surface (such as a mirror, marble tile or old shifting frame) in an even, thin layer with a lino roller, and roll the ink over onto the printing plate using the lino roller. 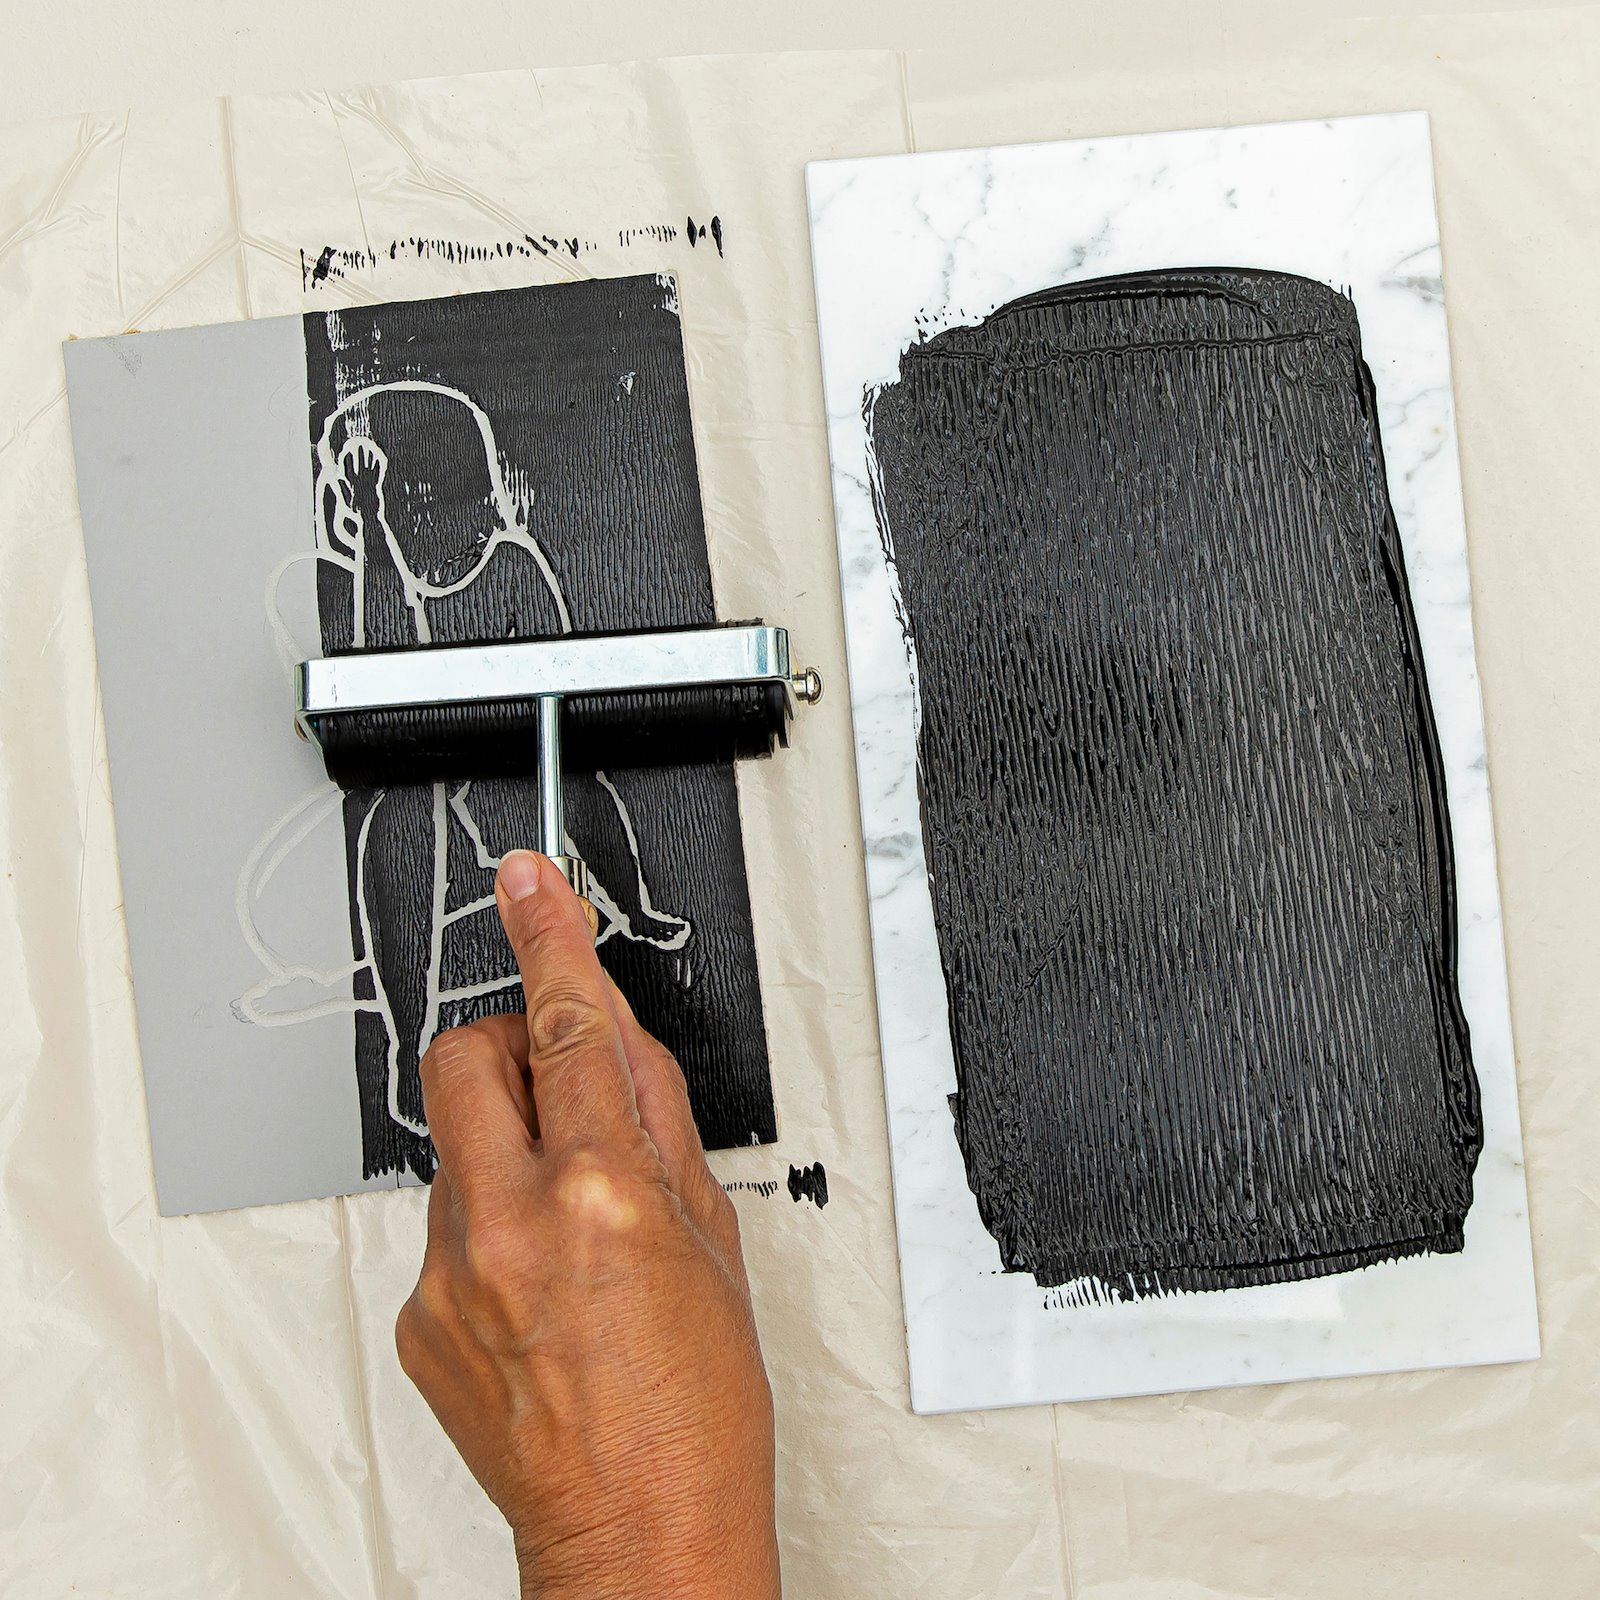
6.Roll back and forth in different directions from edge to edge of the printing plate, so that ink gets on every surface you’ve left. Check that no ink gets into the negative spaces; otherwise you won’t see them in the final print. 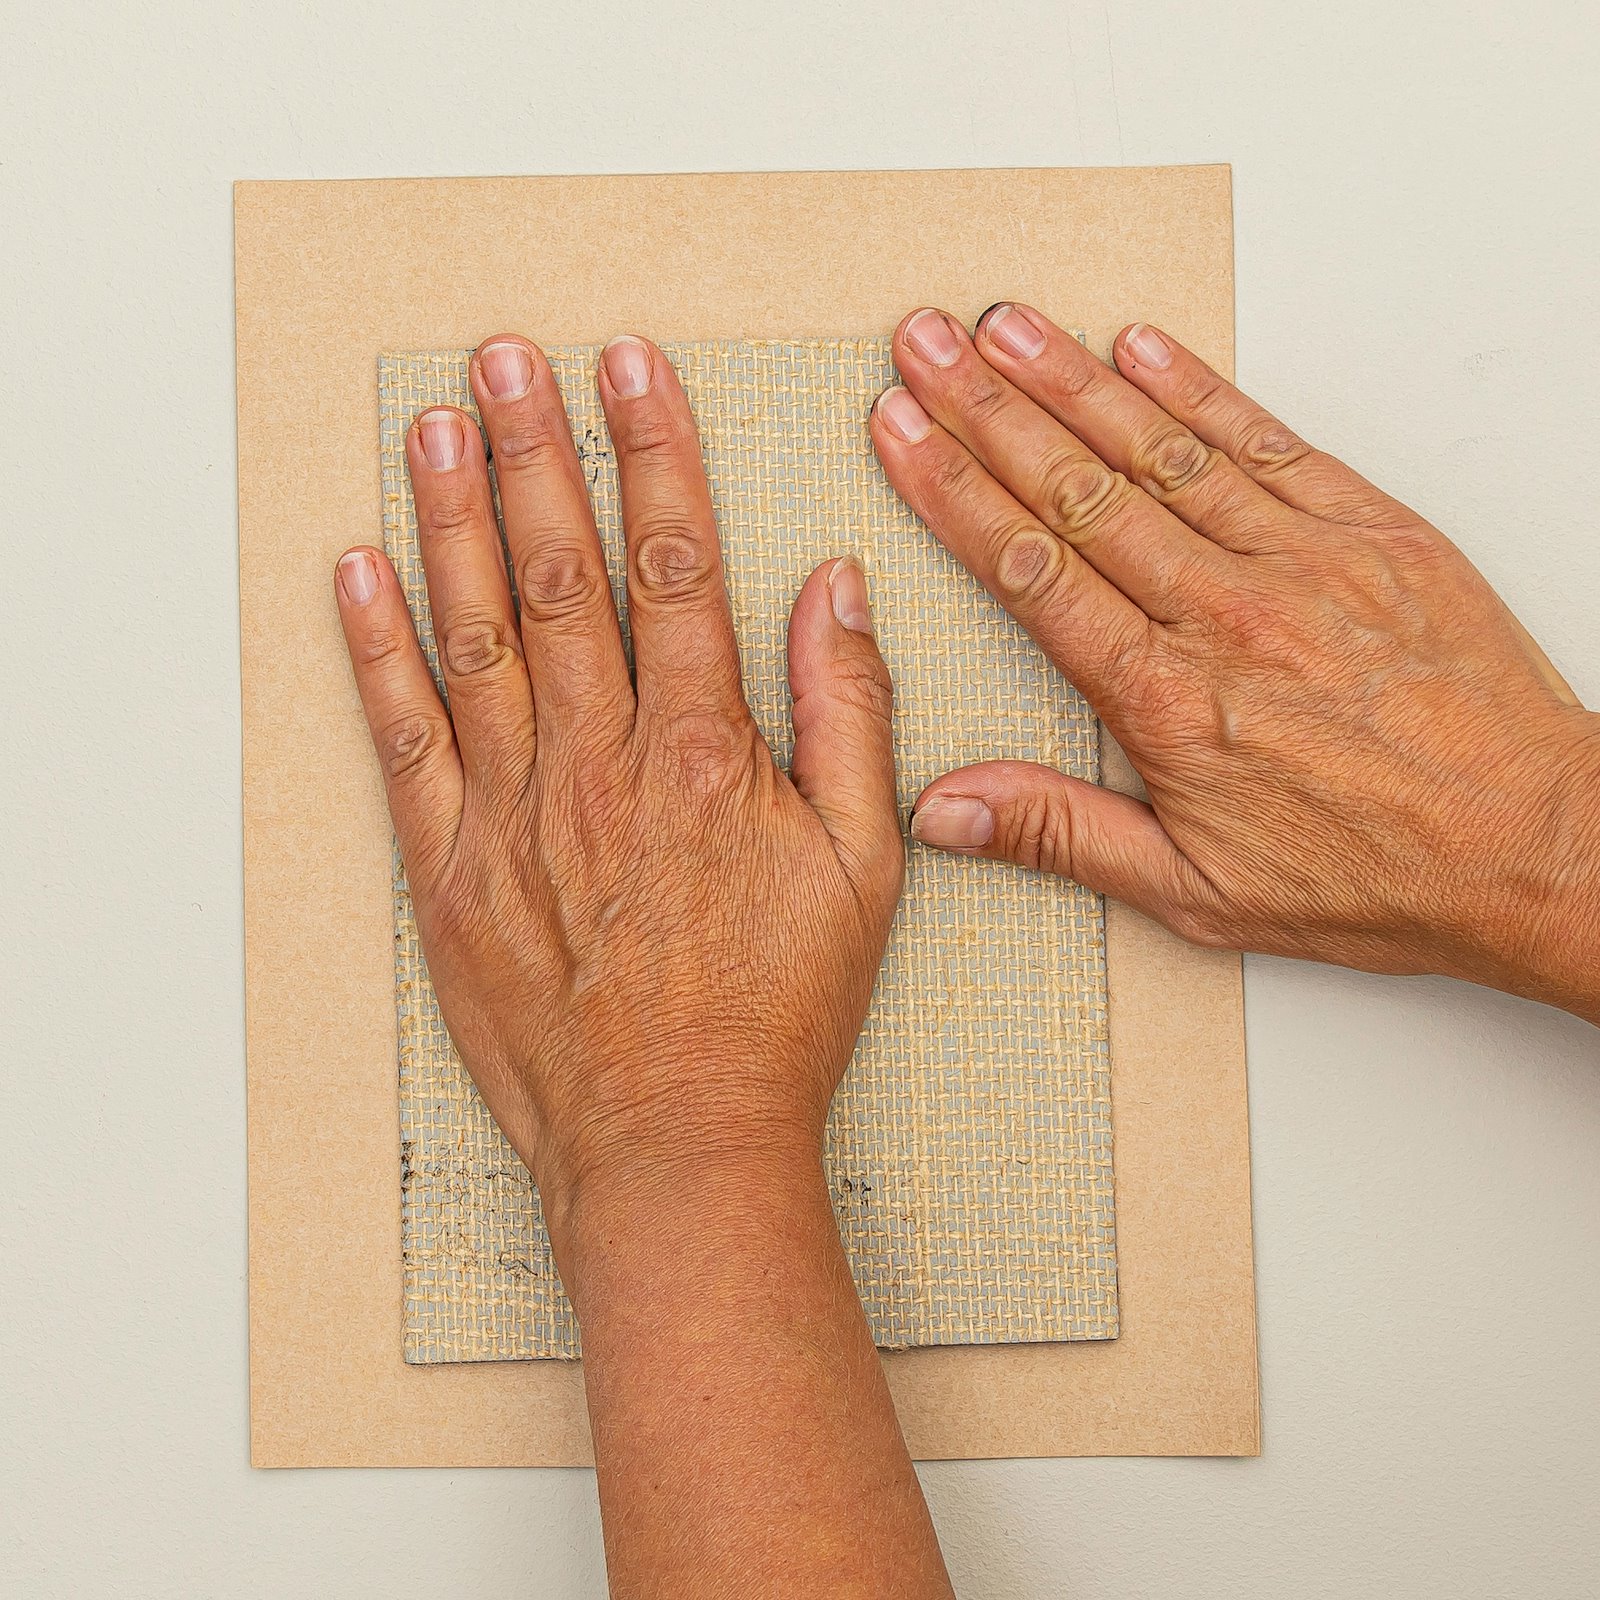
7.Place paper on top of the printing plate, and place a piece of protective paper or cardboard on top. Now, roll back and forth with the cleaned lino roller (or a rolling pin) on top of the protective paper. Change direction and run from edge to edge (without pressing too hard) so that the ink is evenly distributed. Tip: You can also use the “spoon method”. Here you place the side of the printing plate with the ink on it down on the paper and use the back of a spoon to press on the back of the printing plate. Try out different printing methods and find the one that works best for you. 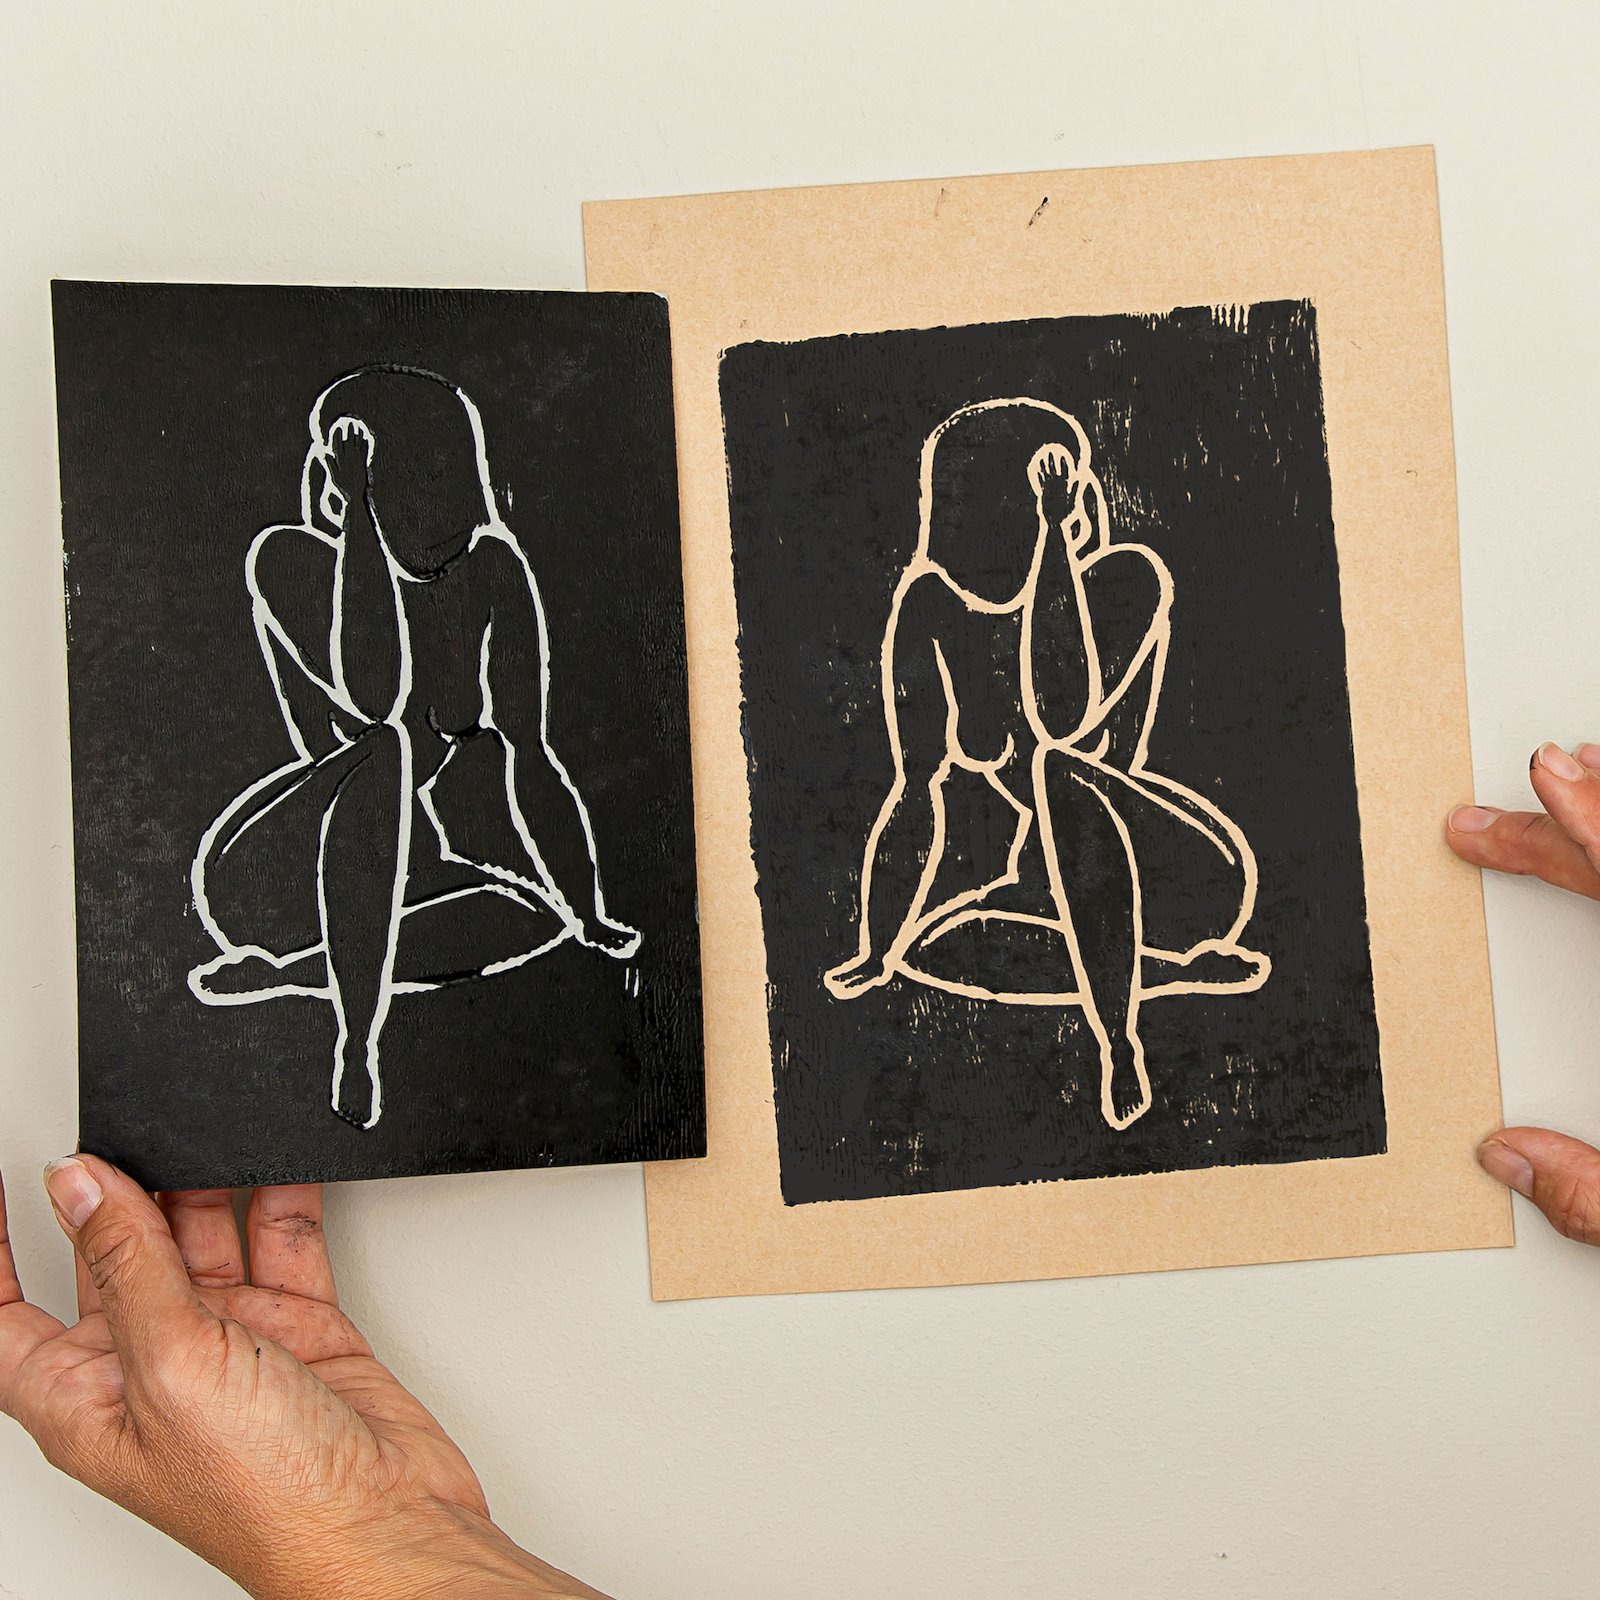
8.Remove the protective cardboard, carefully lift the printing paper off the printing plate and let it dry. Now you have a great design!
What can be used for Lino Prints?
For Lino Print you can use ordinary printing paper - but be aware that it can curl when it gets damp. We also recommend using our PAP FAB for the project, and in addition you can use absorbent paper such as watercolour paper, card stock and cardboard.
Tip: Always do a test to see if your chosen paper is suitable for lino printing. Also, use a piece of paper that is larger than your printing plate, as this makes it easier to place.
Is it possible to do lino print on fabric?
You certainly can! Our lino printing inks also work well here - for small home projects, for example. If you need to wash your project, for example a T-shirt or a cushion, we recommend using our Javana textile dye for dark textiles instead. Afterwards, you can sew or embroider on top of the print to make it even more unique.
Take care of your surroundings and your tools
When working with lino prints, it's a good idea to lay a plastic cover, an old wax cloth or similar on your table.
Clean the lino roller in lukewarm water after use and wipe it dry - the linoleum cutting boards can be cleaned with water and dish soap. The tiles tend to curl up when wet, so it's a good idea to lay them out to dry between two towels with something heavy over them.
Have fun making lino prints!