1.Draw around the container lid on the back of the fabric. Cut out lid piece. NB: Cut precisely and not too small. If the fabric piece for the lid is too small, you will be able to see the cardboard underneath. 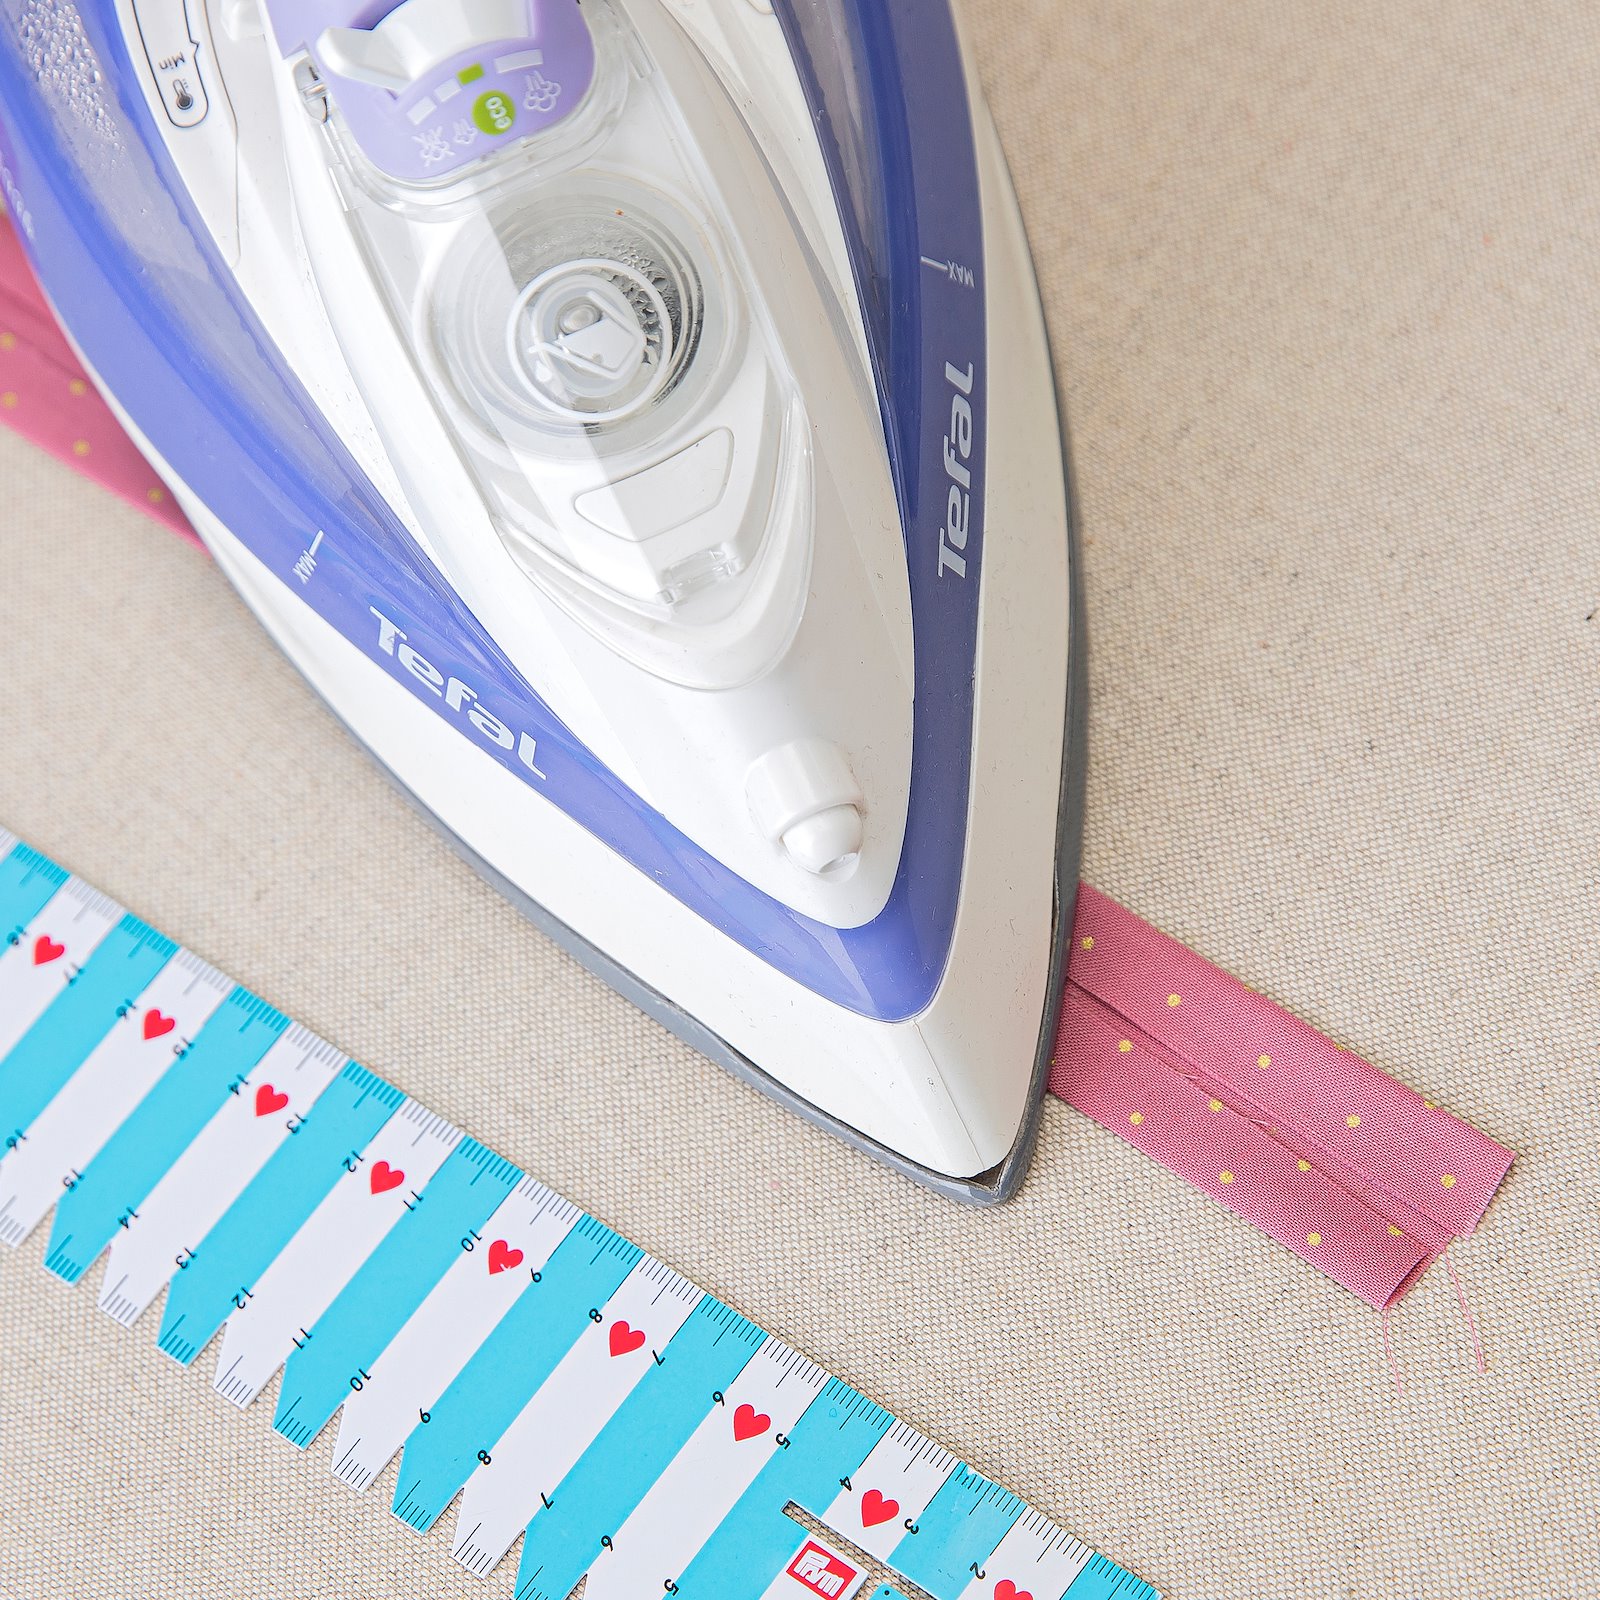
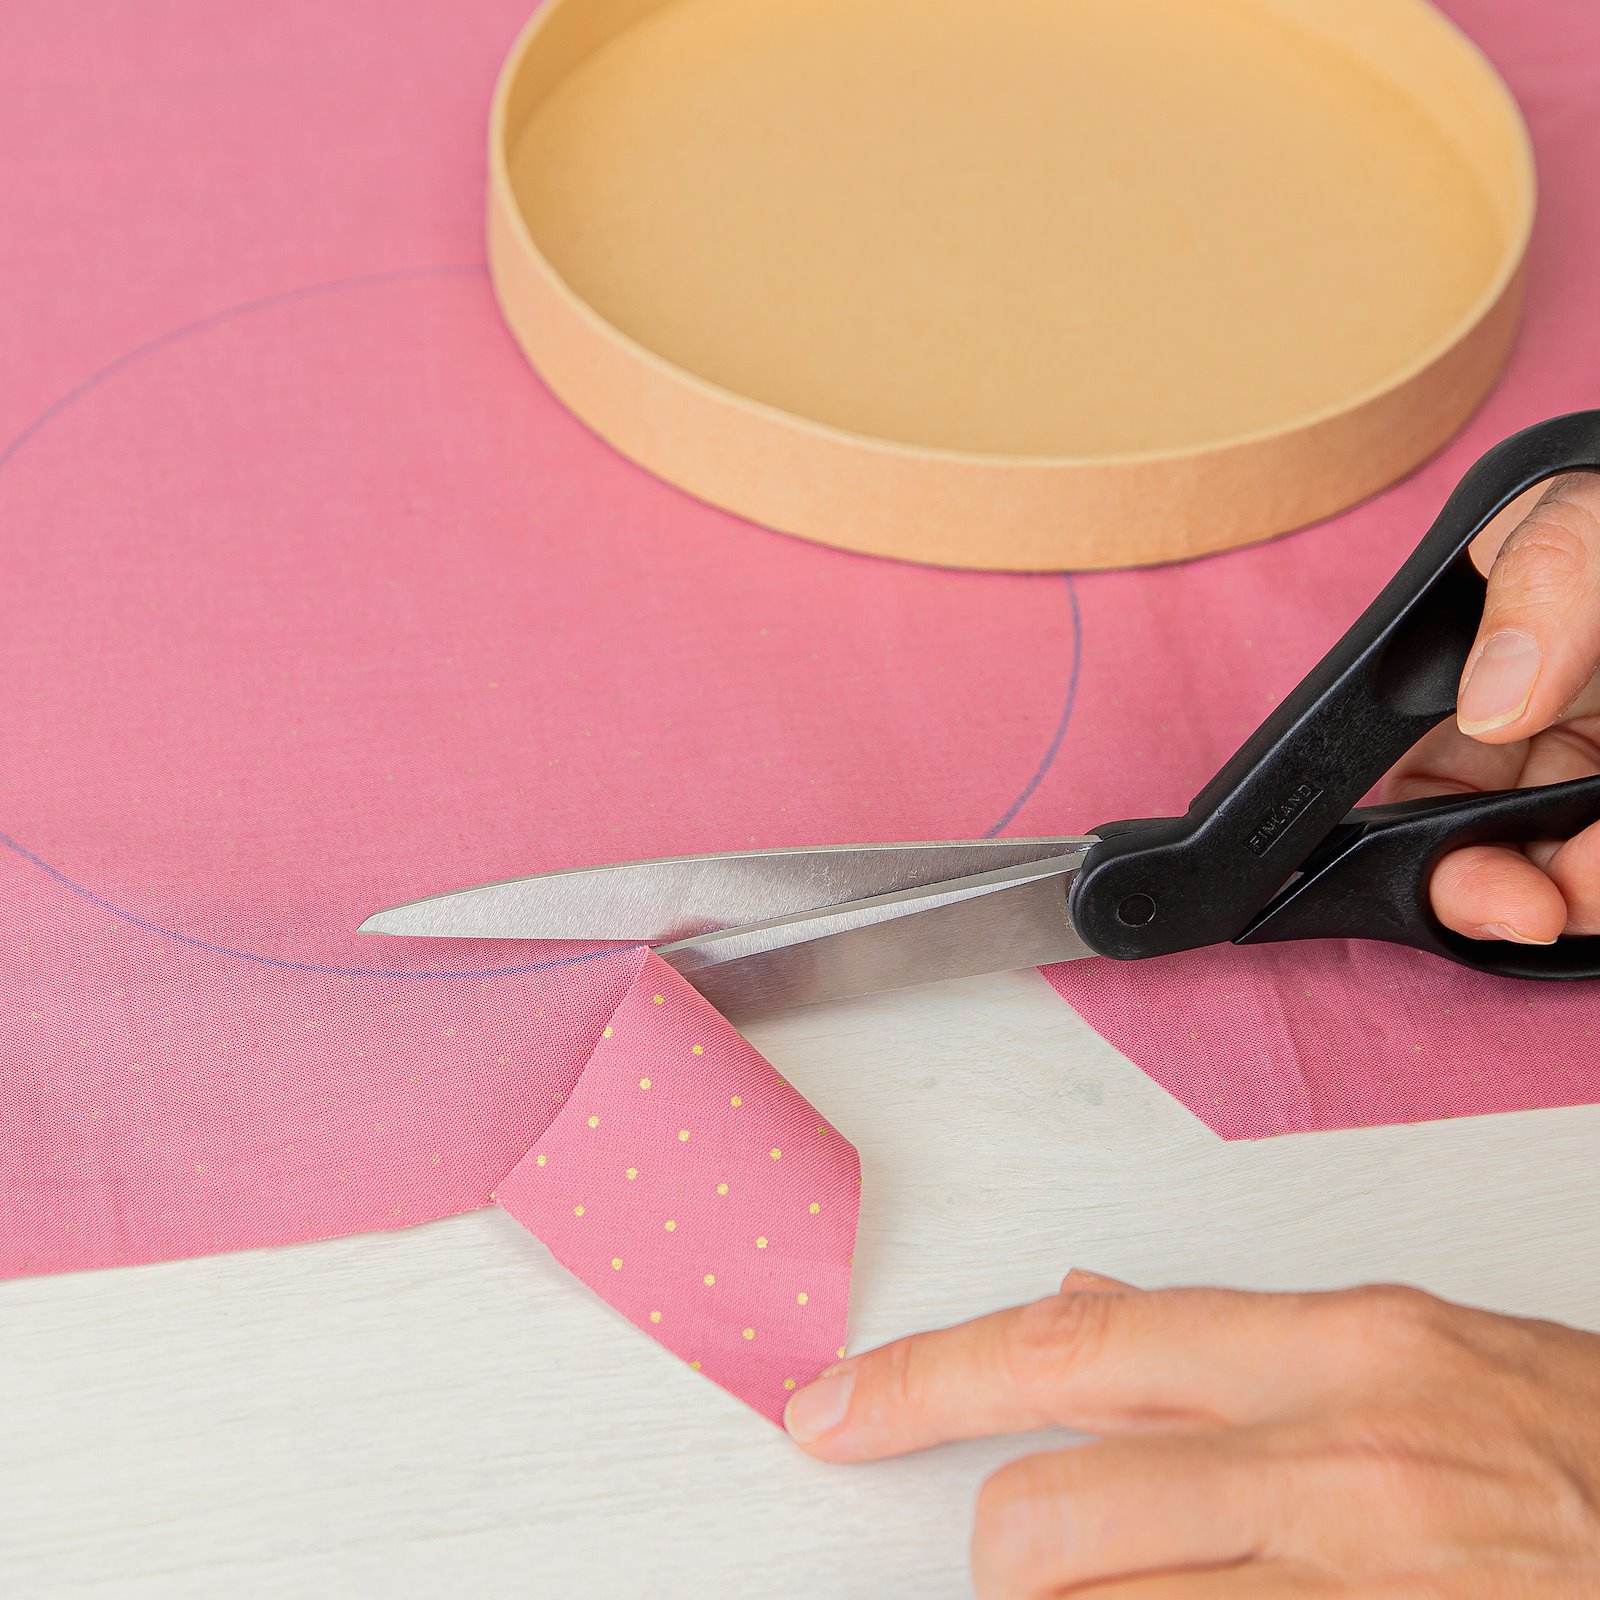
2.Measure the height of the lid edge, e.g. 2.5 cm, and the perimeter, e.g. 66 cm. Cut a strip of fabric twice the width but the same length (i.e. 5 cm x 66 cm). Fold and press the lid edge so that it is 2.5 cm wide. Use a sewing gauge. 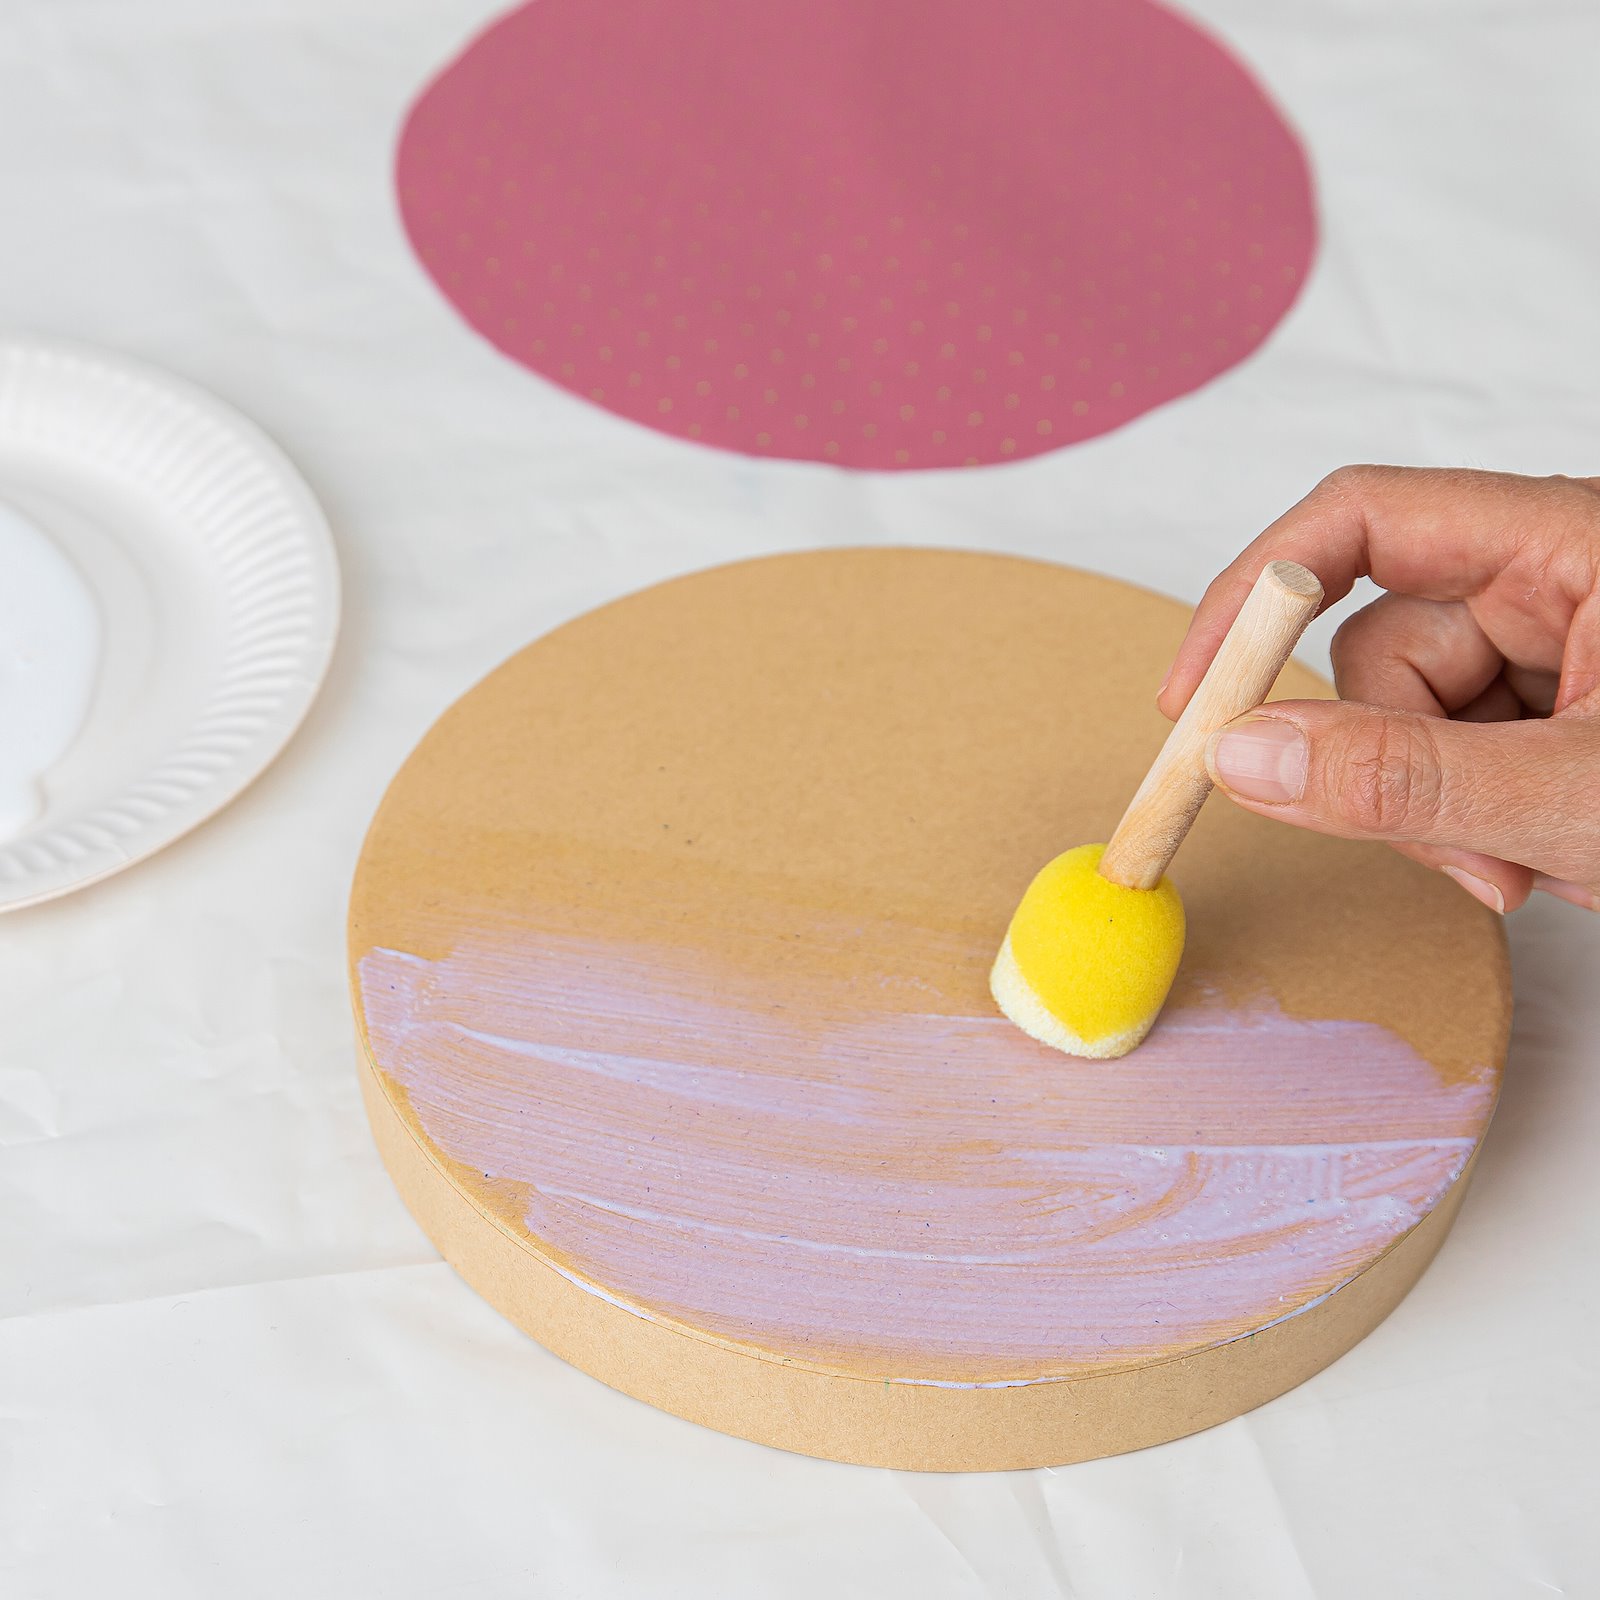
3.Apply adhesive to the top of the lid using a brush or sponge. NB: Not too thick a layer. Glue on the circular top piece. Press into place with your fingers to eliminate pleats. TIP: Always use protective plastic sheeting when painting and gluing. 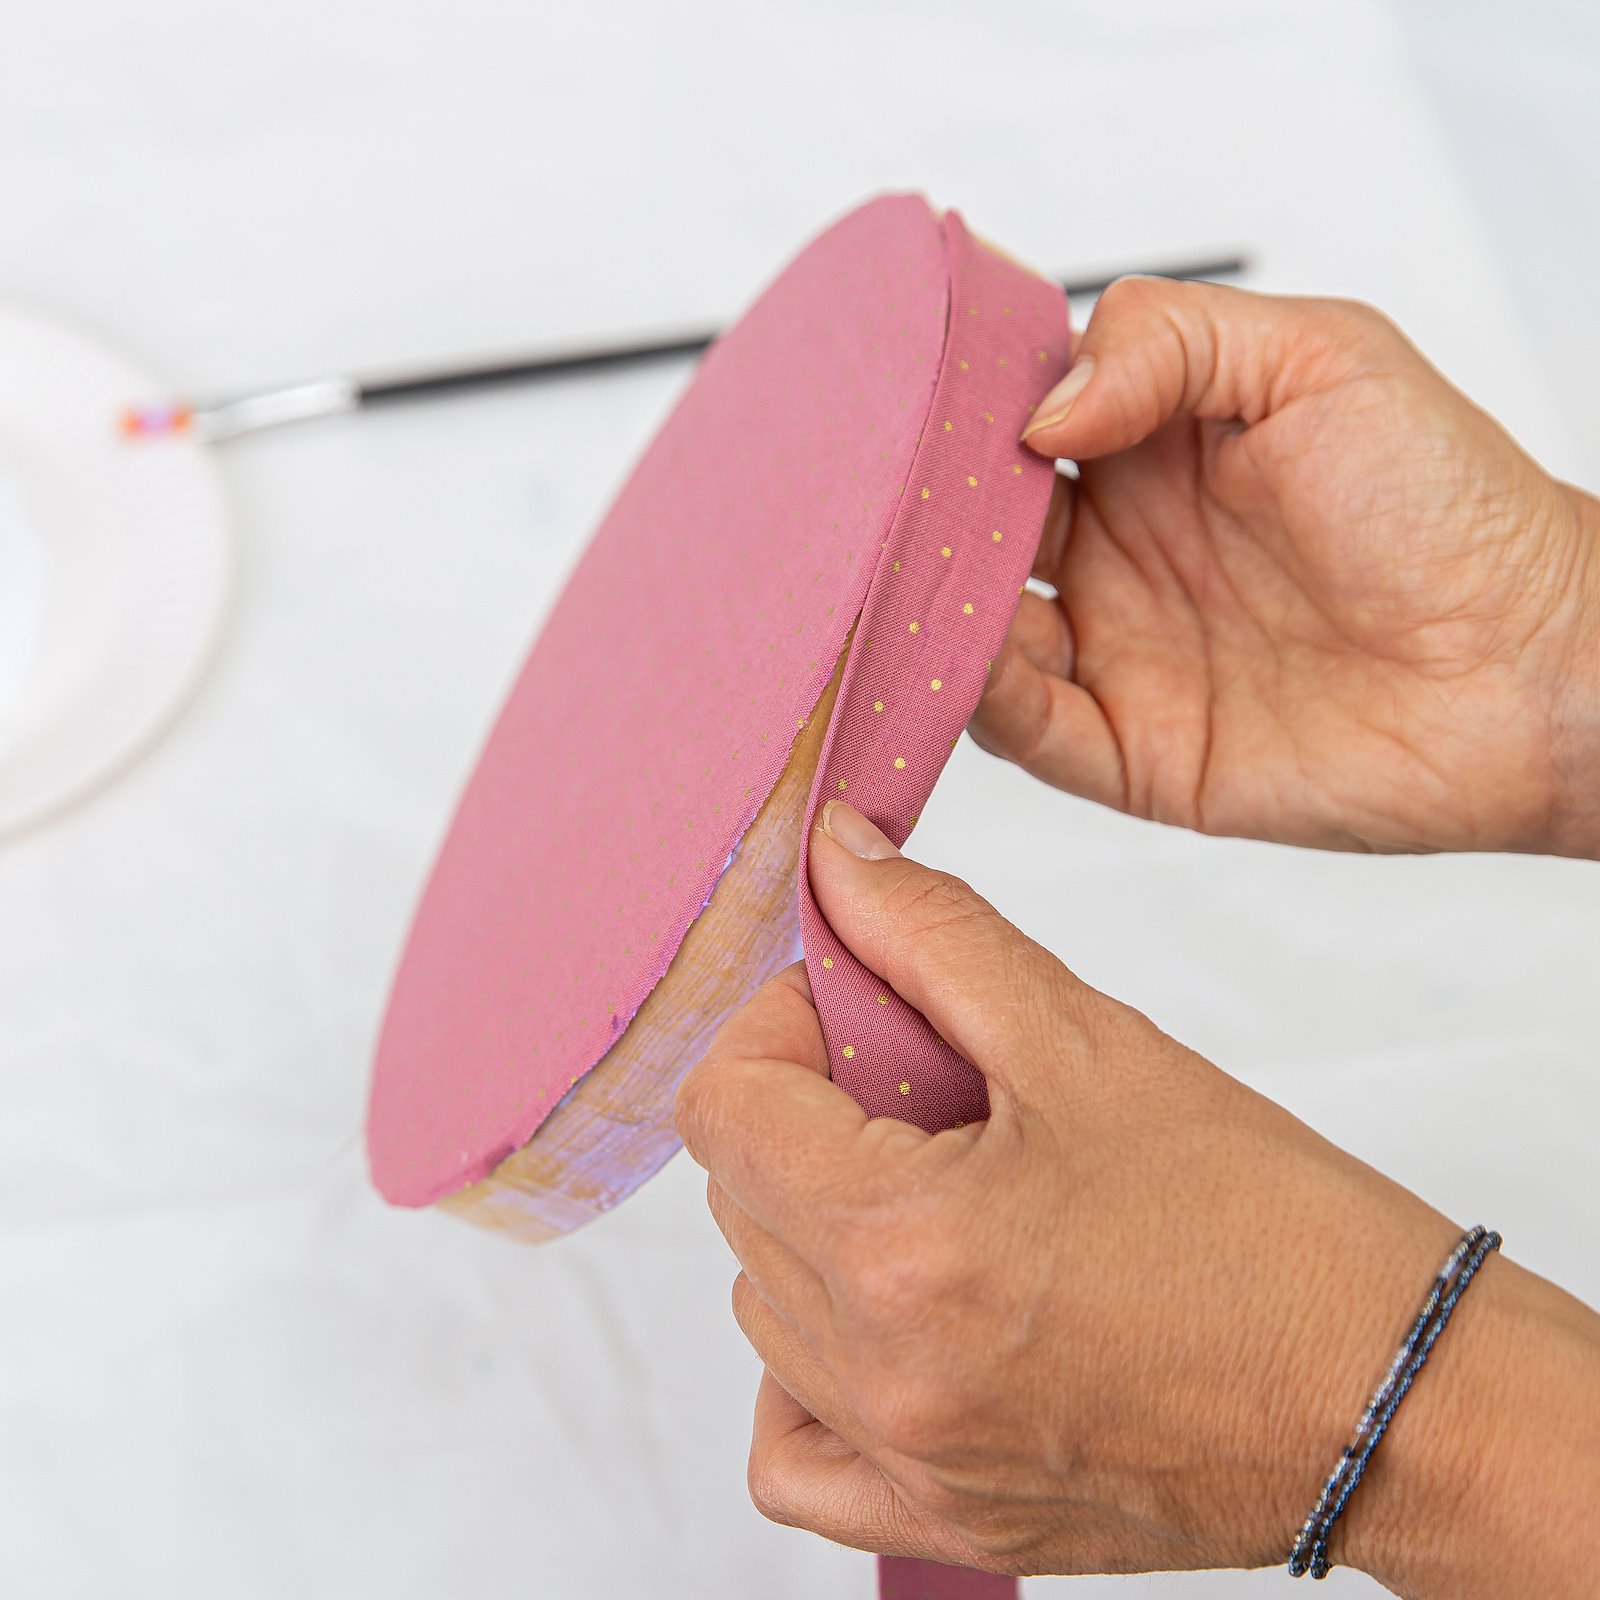
4.Apply adhesive to the lid edge. Glue on the strip of fabric. Press into place with your fingers. Add an extra dab of adhesive at the joins. 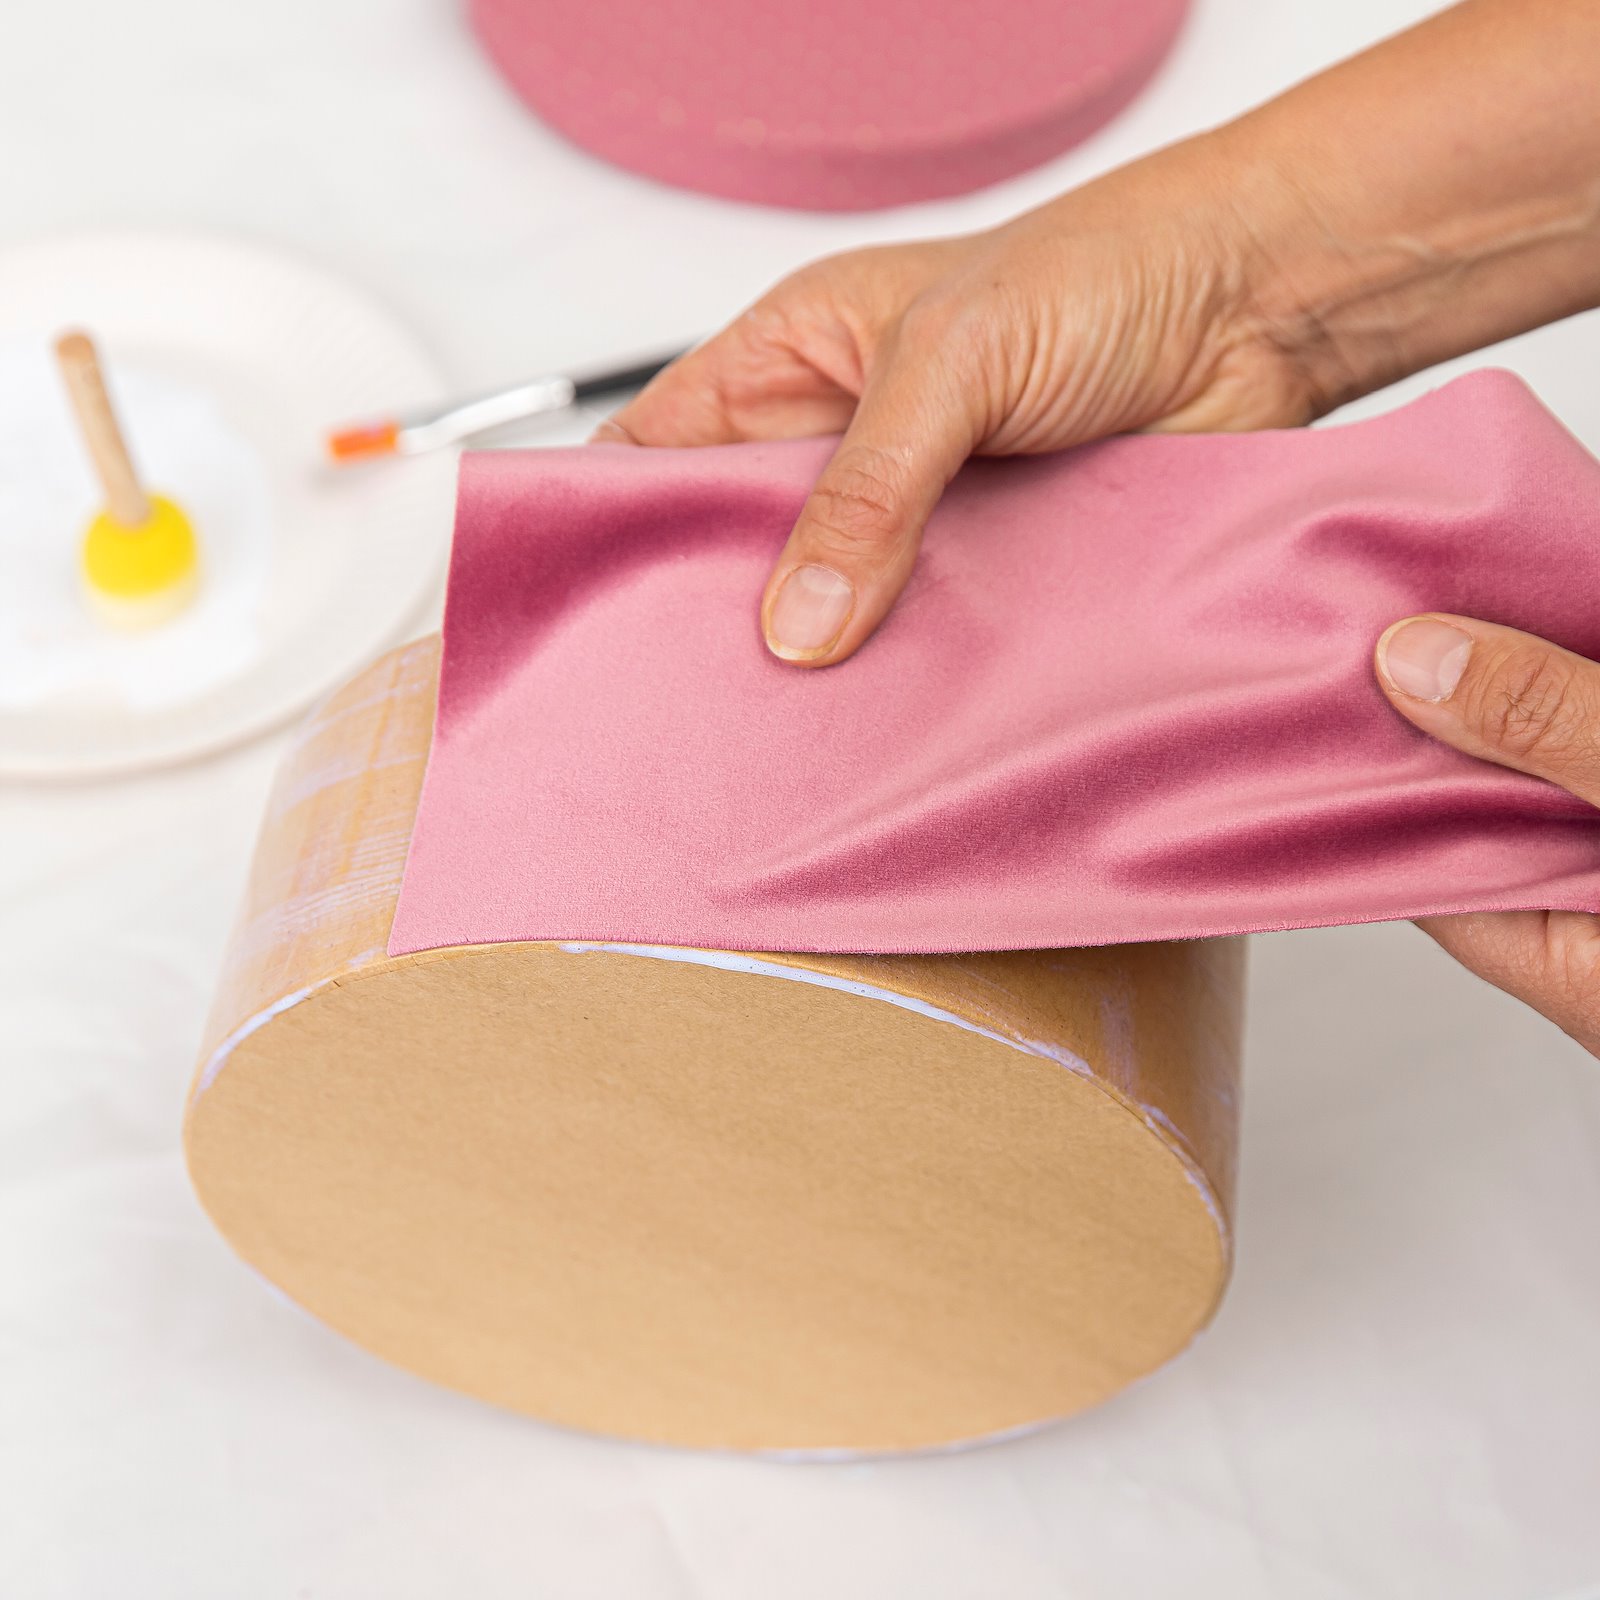
5.Measure the height and circumference of the box. Add approx. 4 cm to the height. If the fabric has a tendency to fray, add an extra 1 cm to the box height and fold the fabric to the wrong side at the bottom before gluing it to the box. This way you avoid raw edges at the base. Measure the fabric. Cut out. Apply adhesive to the box edge. Glue the fabric to flush with the base. Press the fabric firmly with your fingers to eliminate folds. 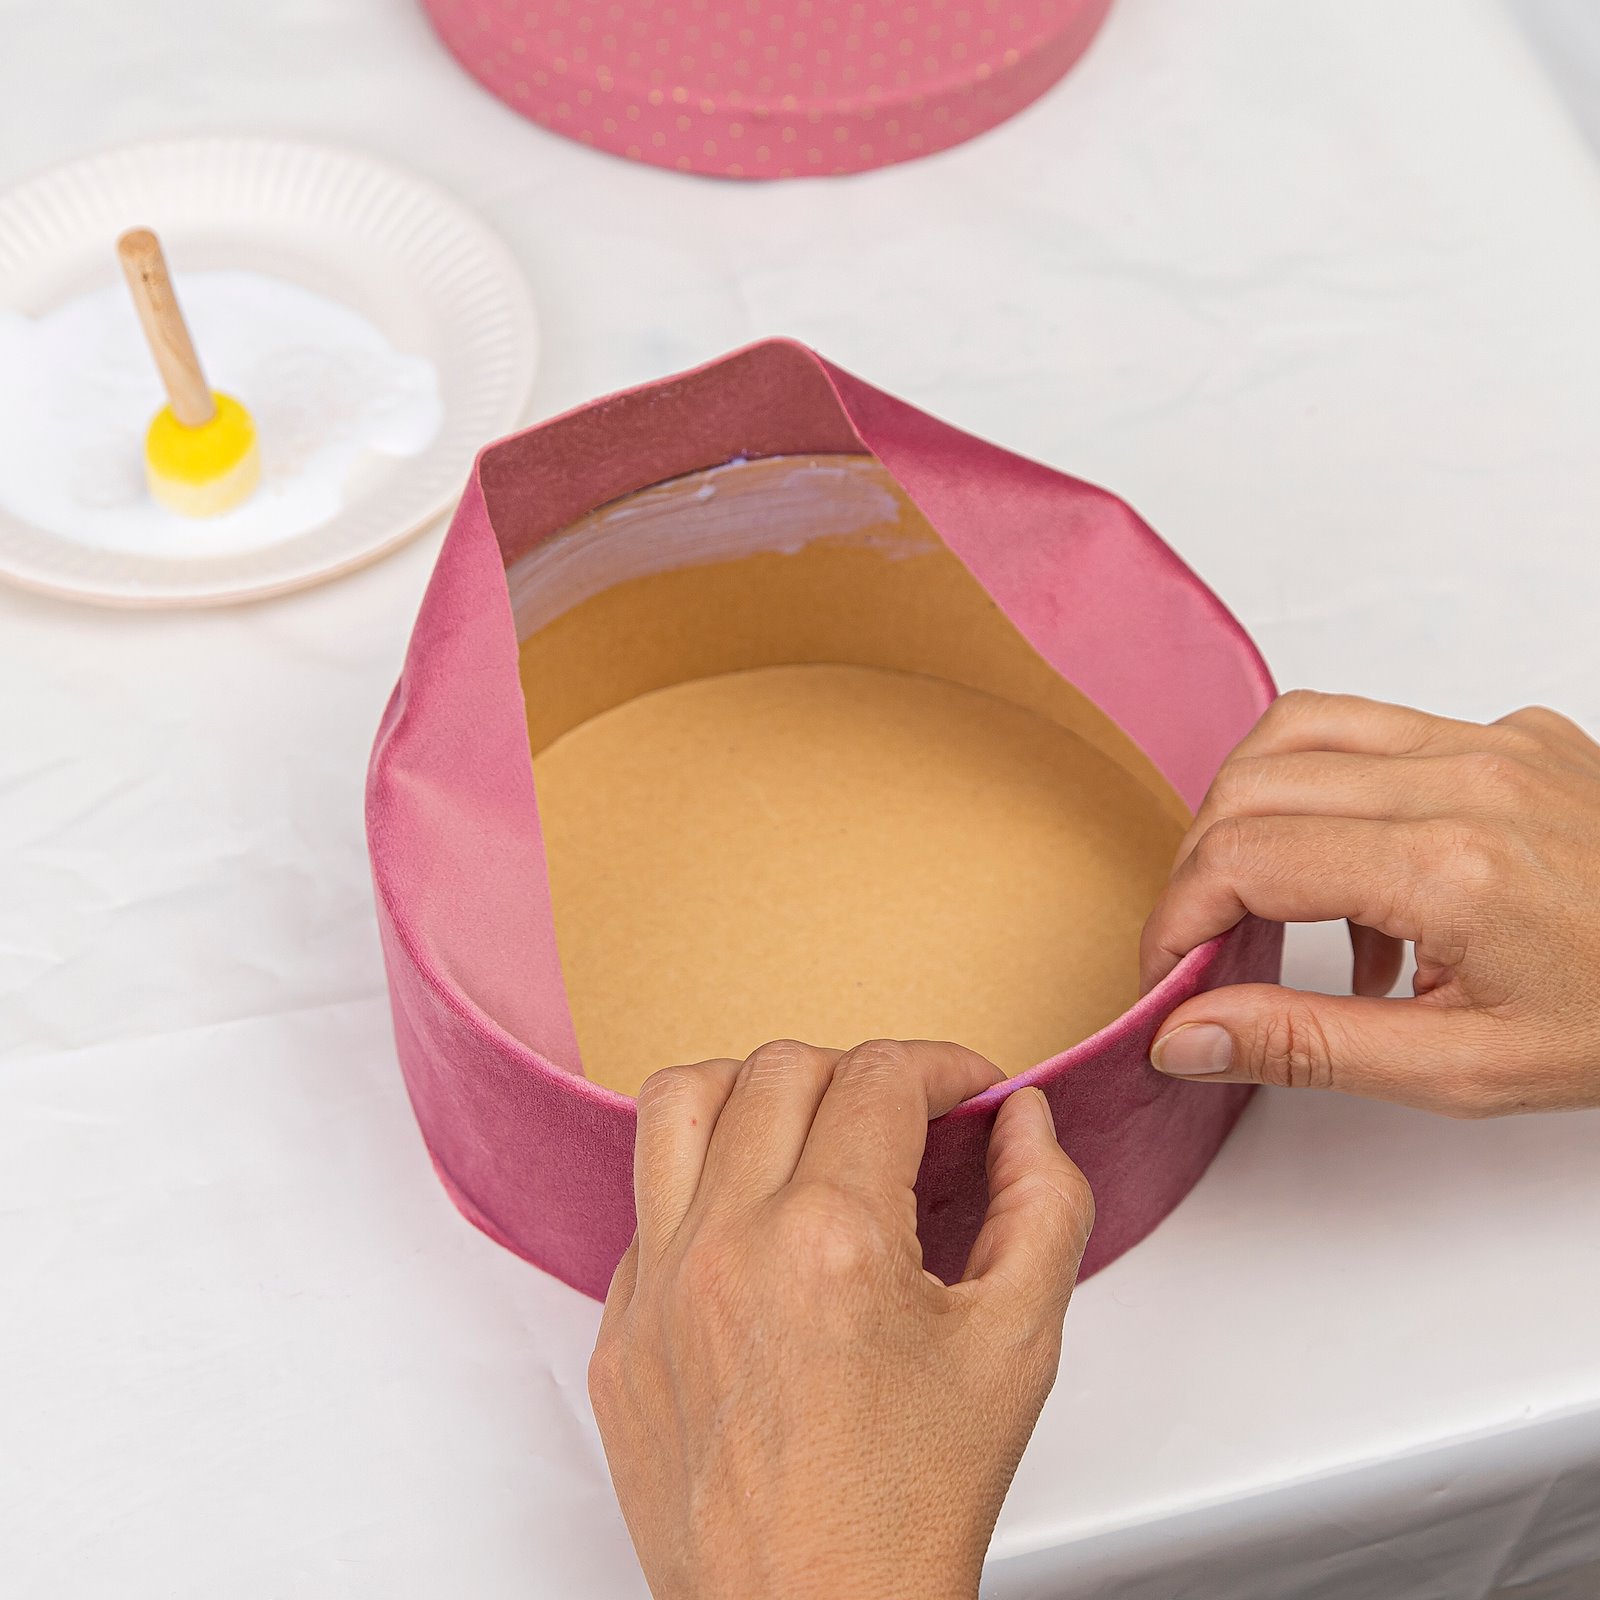
6.Apply adhesive to the inside approx. 4 cm down. Fold the fabric firmly down on the inside of the container. Leave the adhesive to dry. Use the same procedure to cover rectangular boxes. However, you will need to cut a slit in the fabric at the corner folds. If you decorate the edge of the lid with nylon ribbon, affix it with power tape (because adhesive soaks through ribbon).