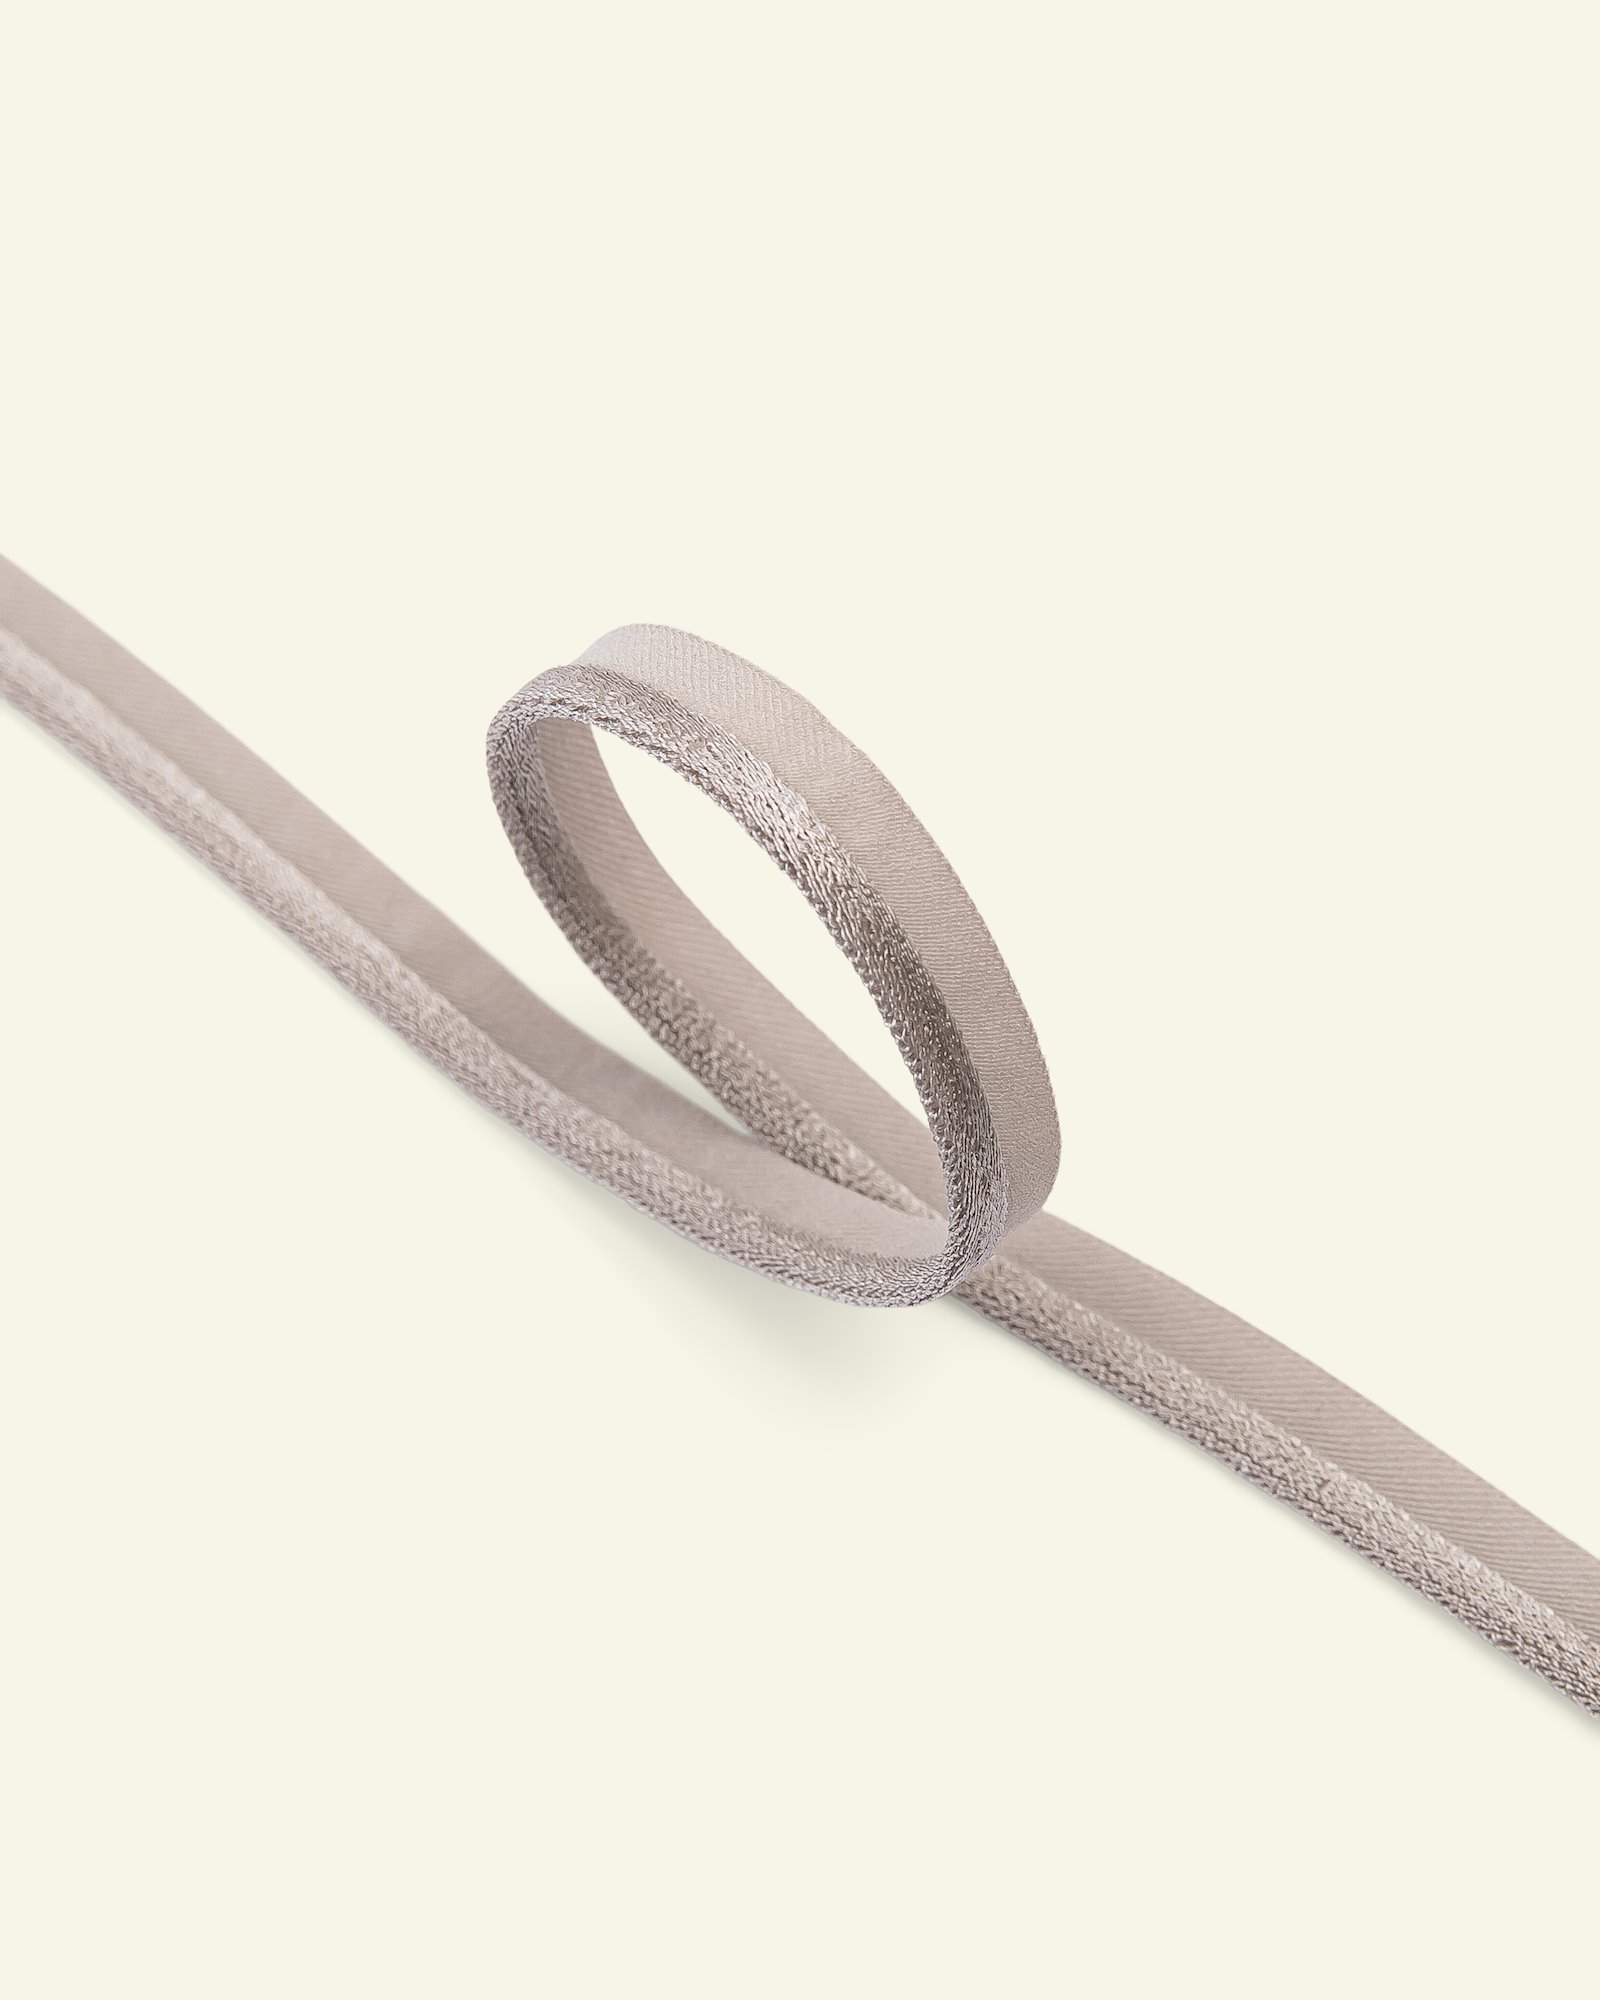
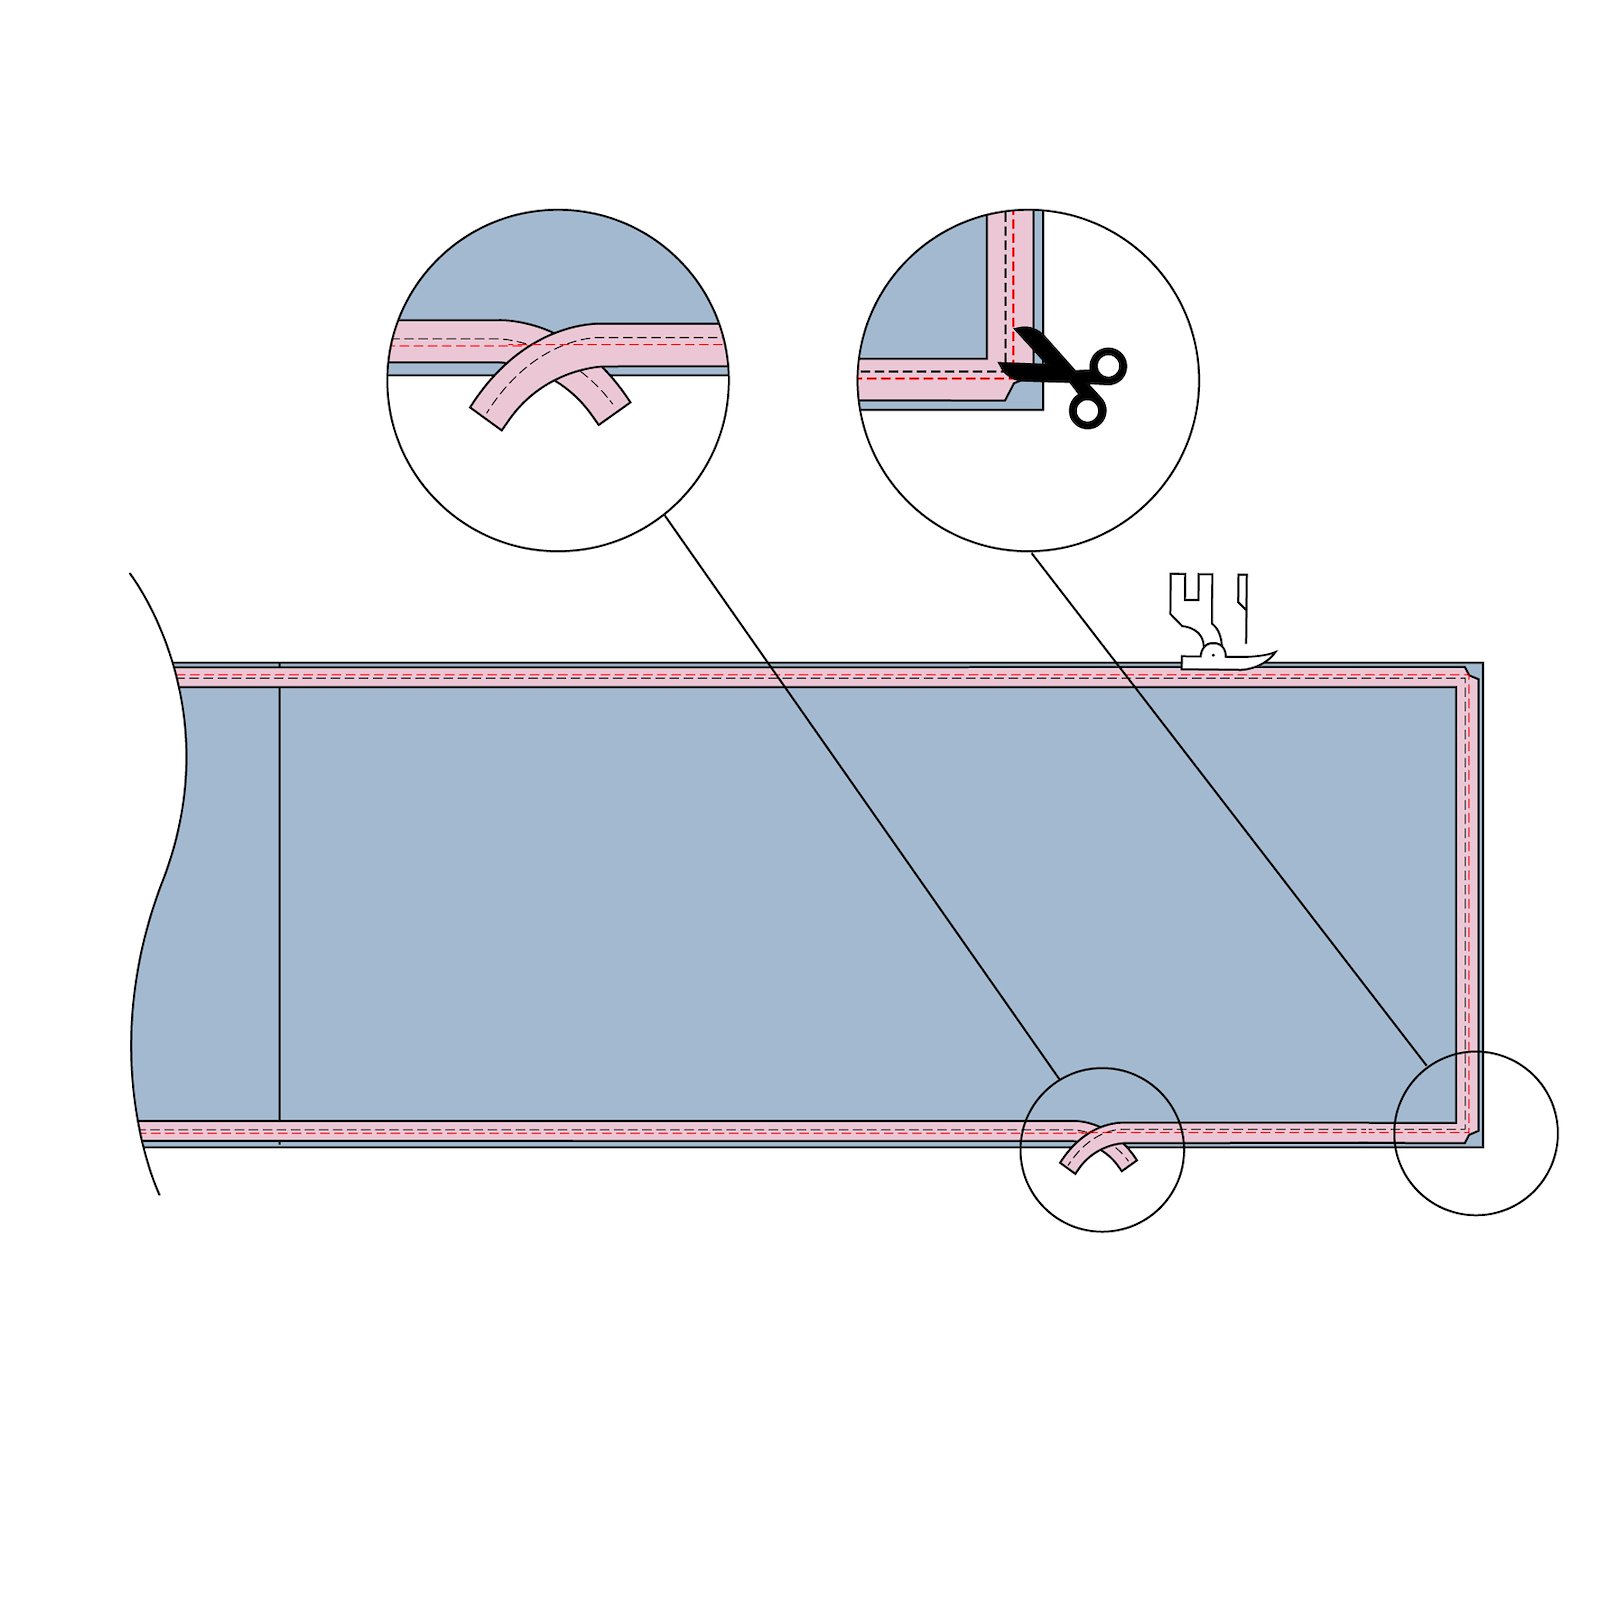
1.Sew piping ribbon along the edge of the fabric for the inside. To turn the corner neatly, snip into the seam edge of the piping ribbon. Fold the ribbon ends over each other at the start and end of the stitching line. 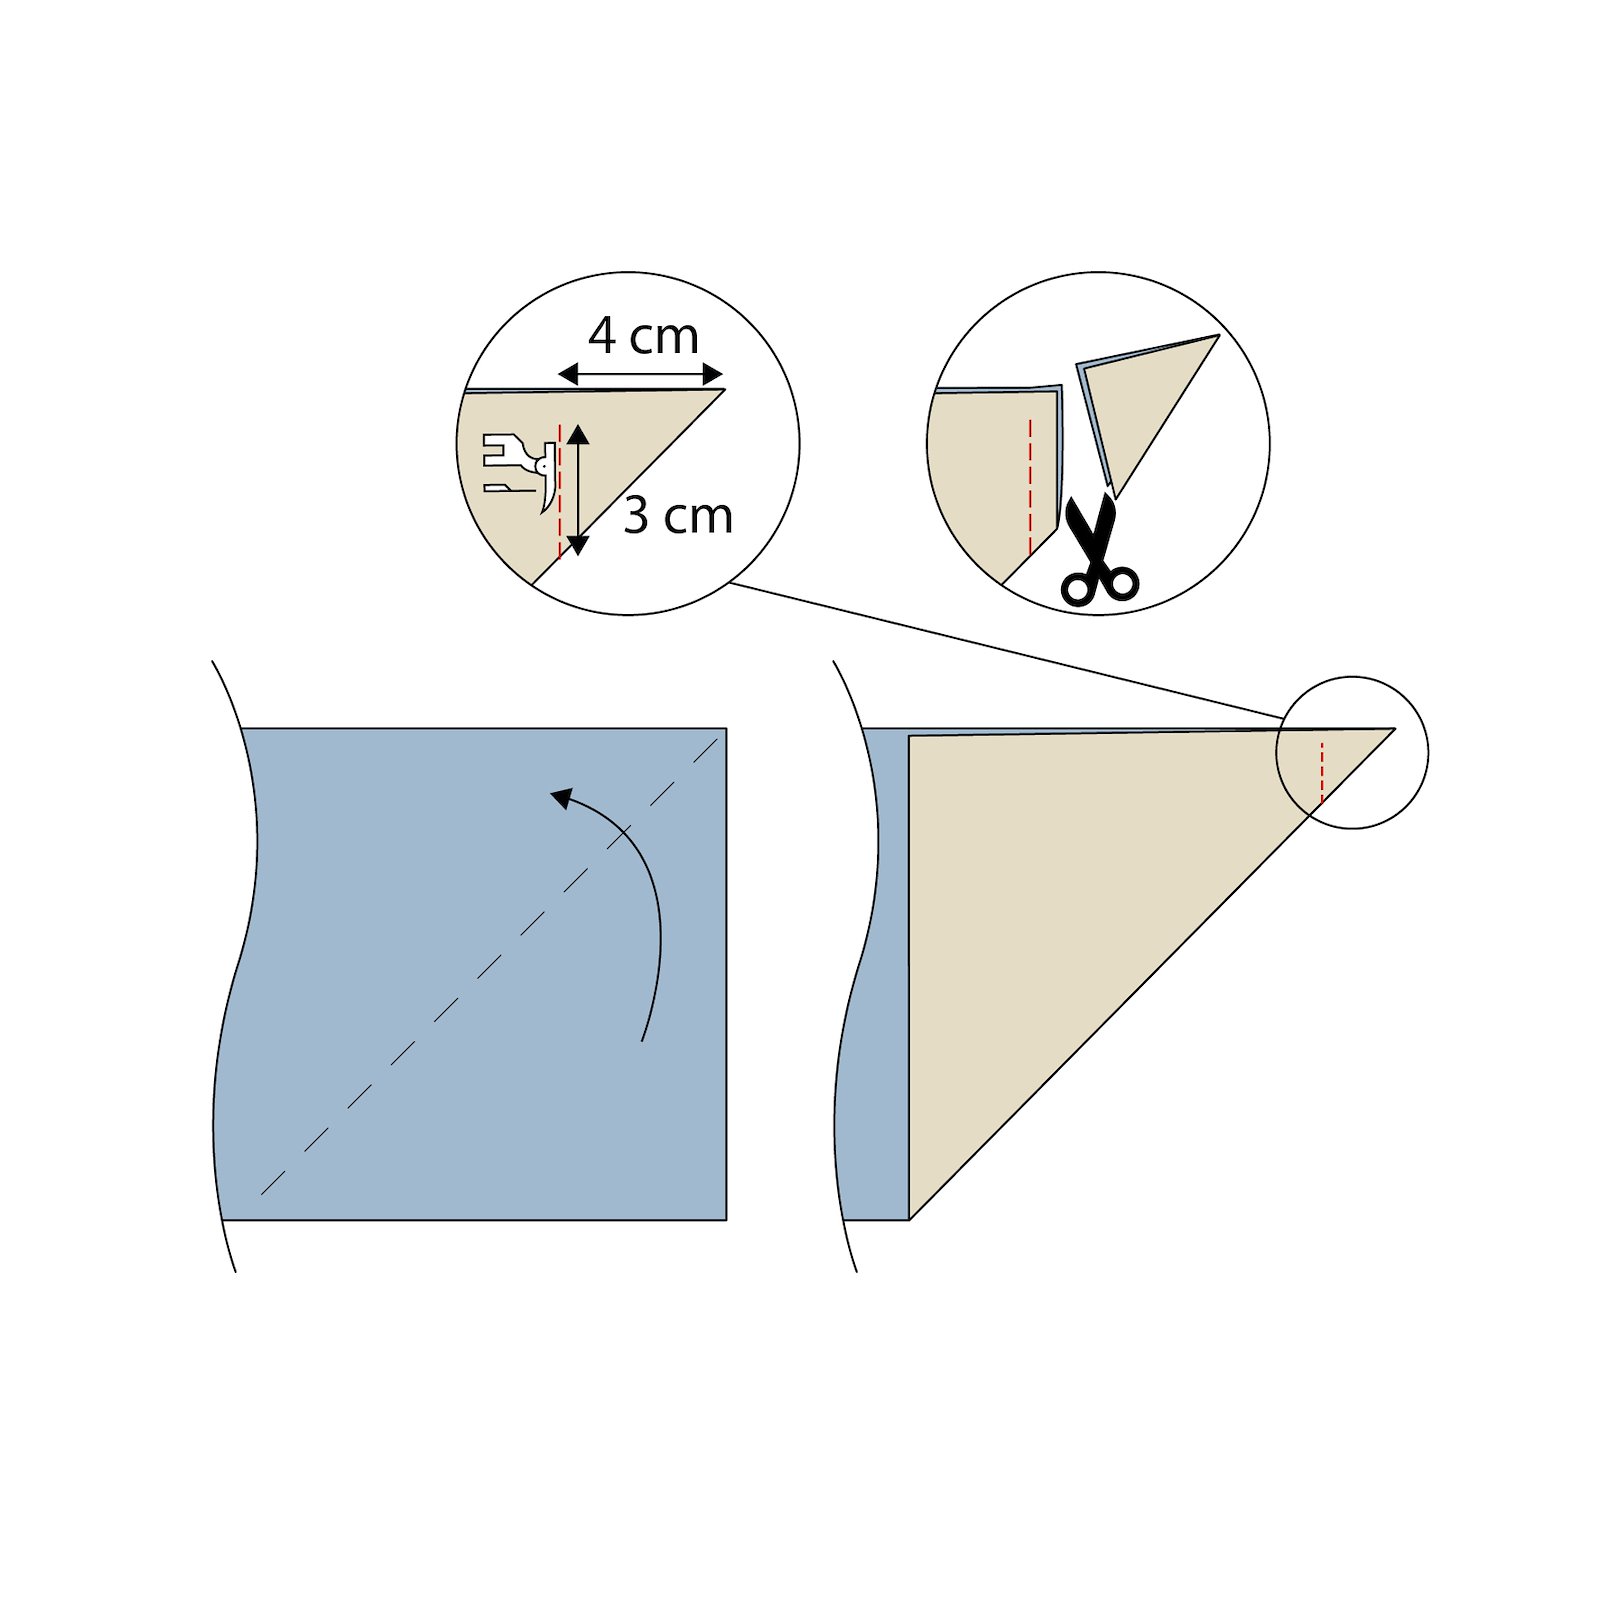
2.Fold the fabric for the outside in half, right sides facing. Sew from the edge of the fold and 3 cm towards the edge (see the measurements in the drawing). Mitre the corner. 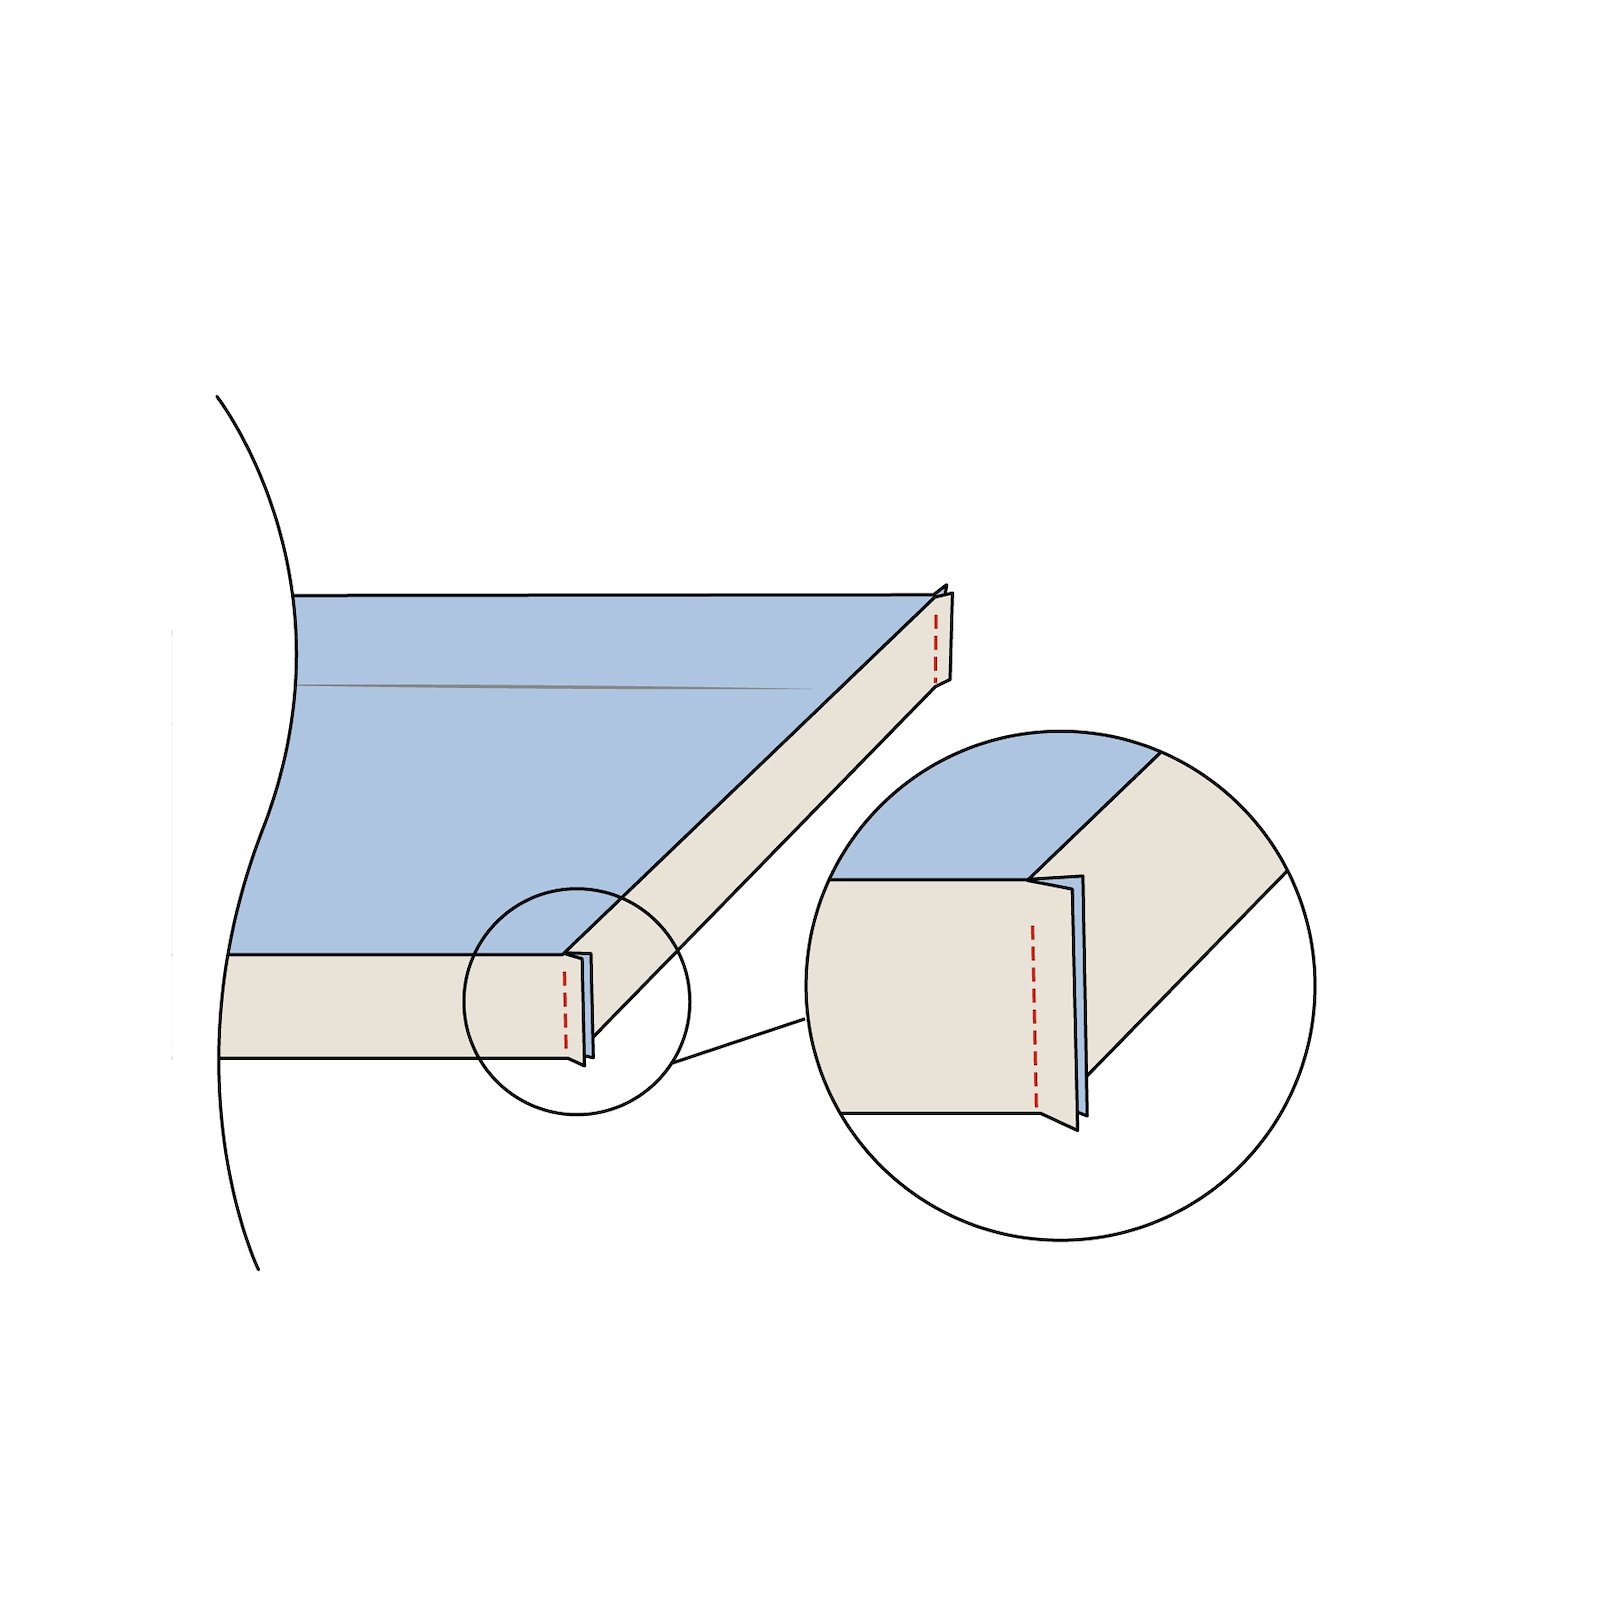
3.Sew the remaining three corners of the fabric for the outside in the same way. 
4.Sew the inside and outside fabric pieces together, right sides facing. Sew along the same seam line as the piping ribbon. Start 20 cm from one end (at the lower edge of the crib bumper). Sew to the corner. Sew along the end of the bumper until you reach the next corner. Sew along the long side (top) until you reach the next corner. Sew along the end to the next corner. Finally, sew 20 cm along the lower edge. Turn right sides out. 
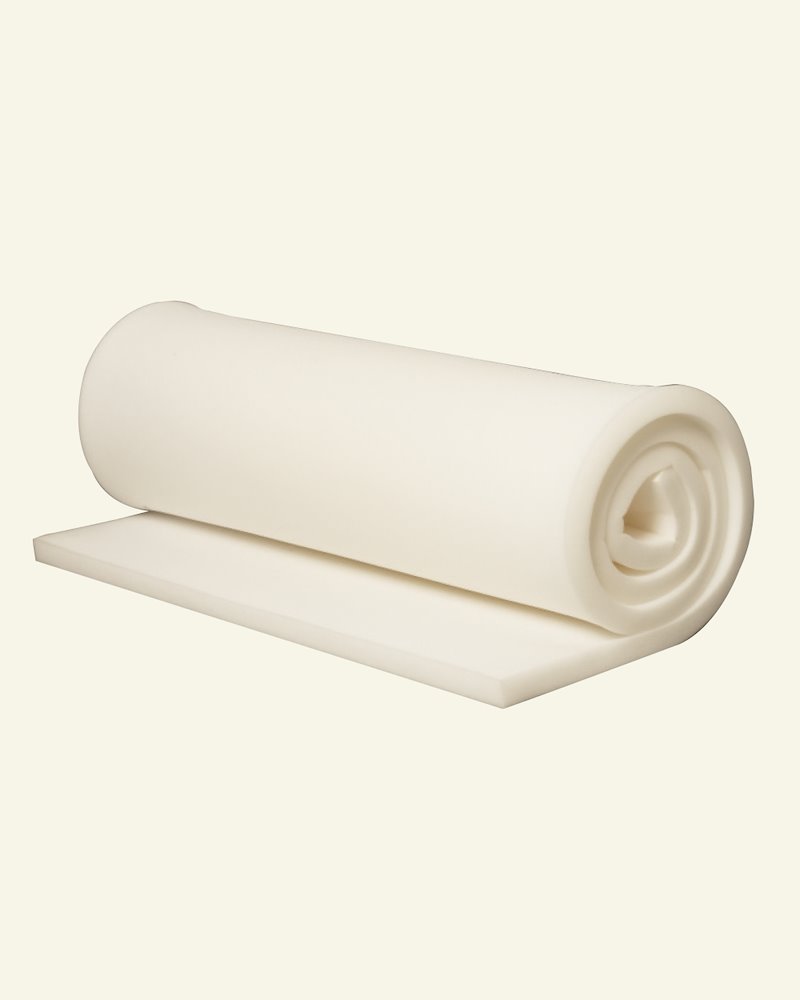
5.Sew the two pieces of hobby foam together by hand to create one long piece measuring 25 cm x 350 cm. 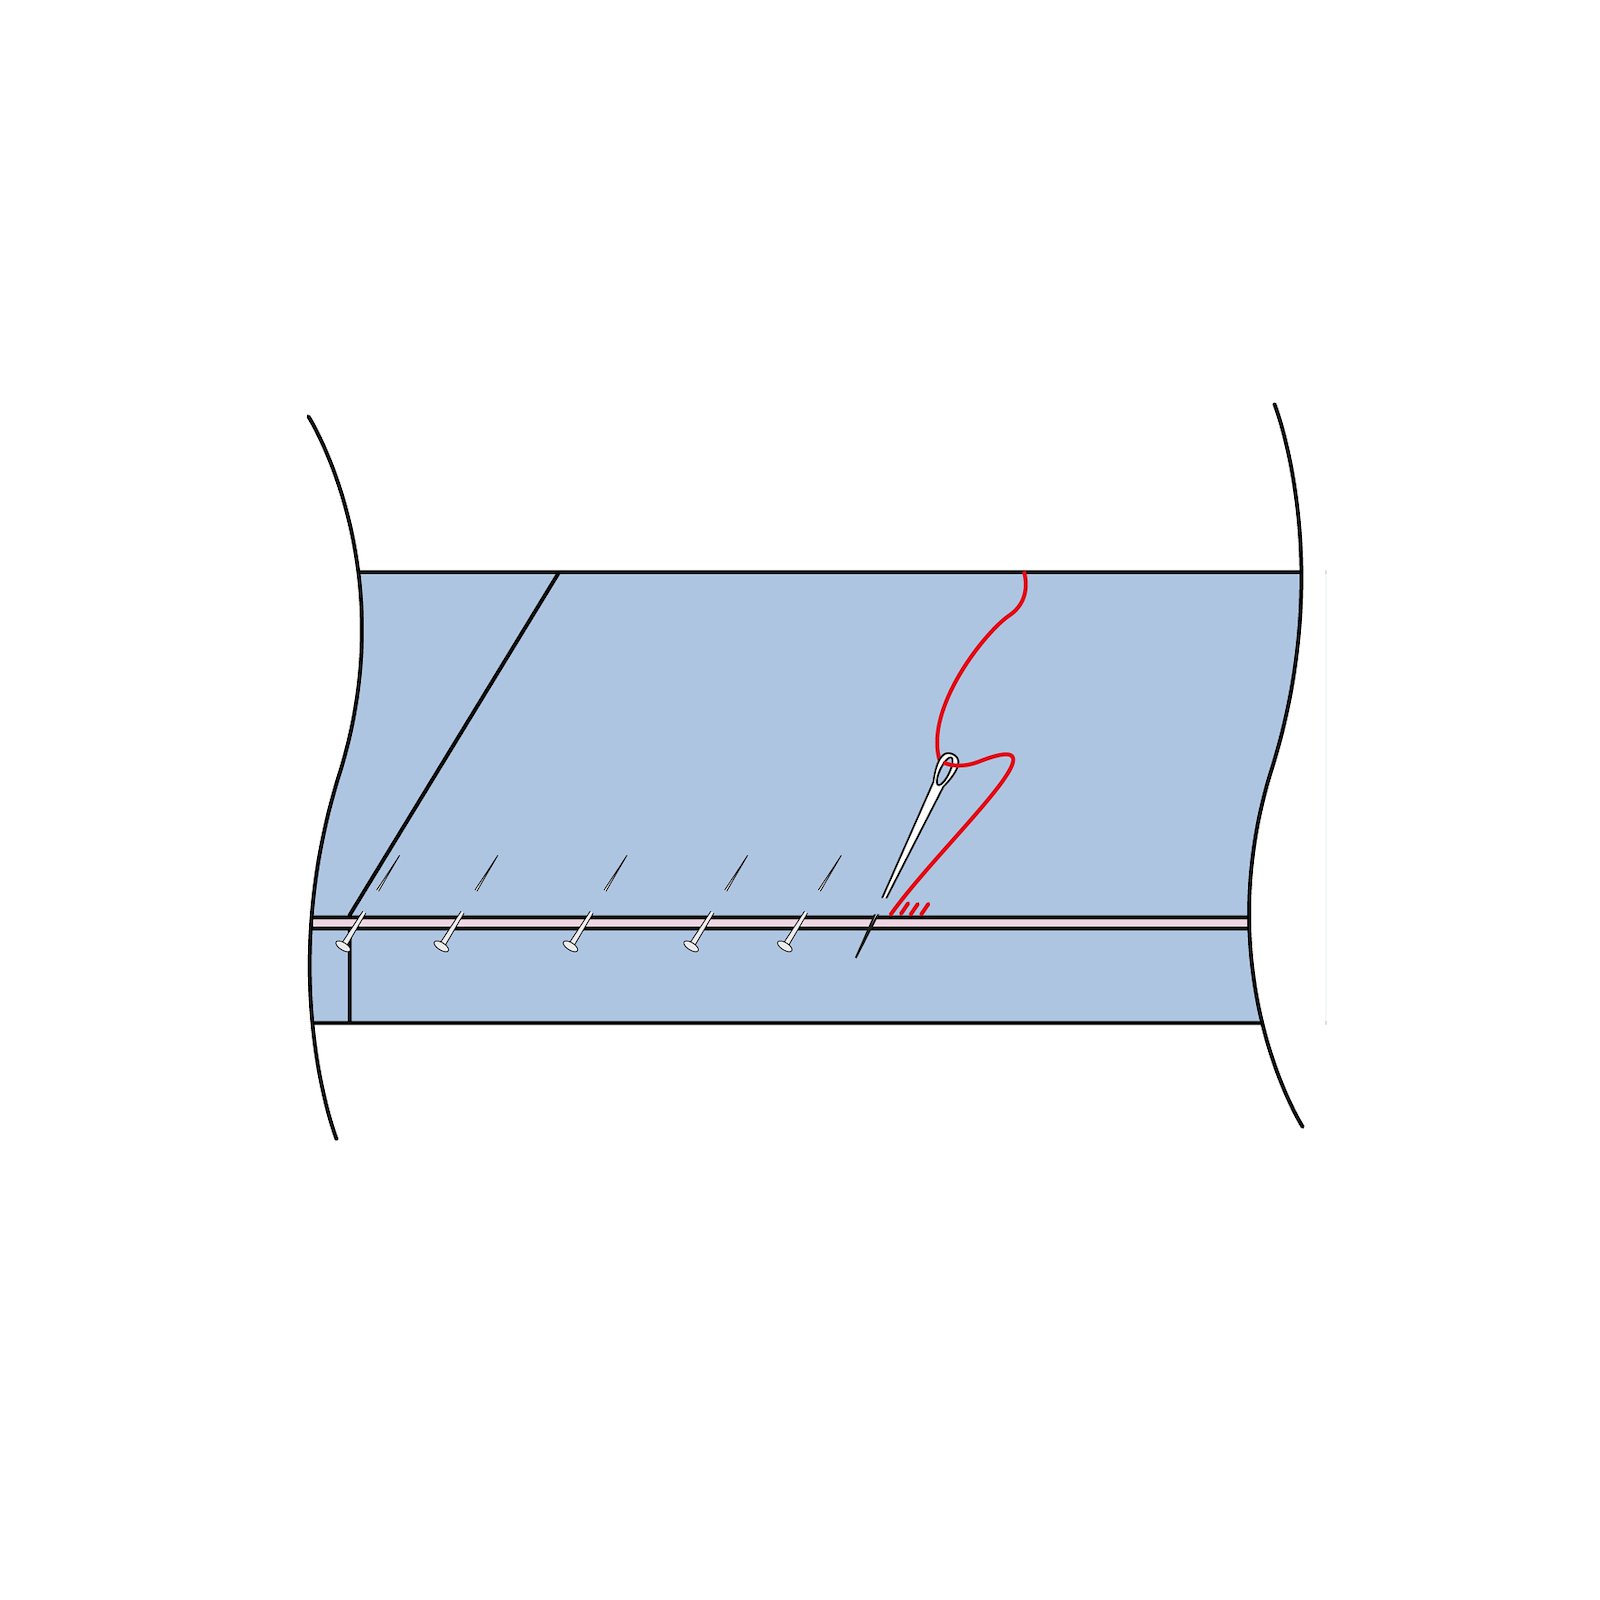
6.Insert flexible foam into the cover at both ends. Pull the cover into place. Now close the gap. Pin and then sew the gap by hand.