Materials
• Fabric consumption = table top
circumference + table top length
+ 15 cm
• 4 mtr Bias tape 13 mm
• Marker pen
• 35 cm vliesofix item no. 9299
• Optional: textile paints and
markers for decoration
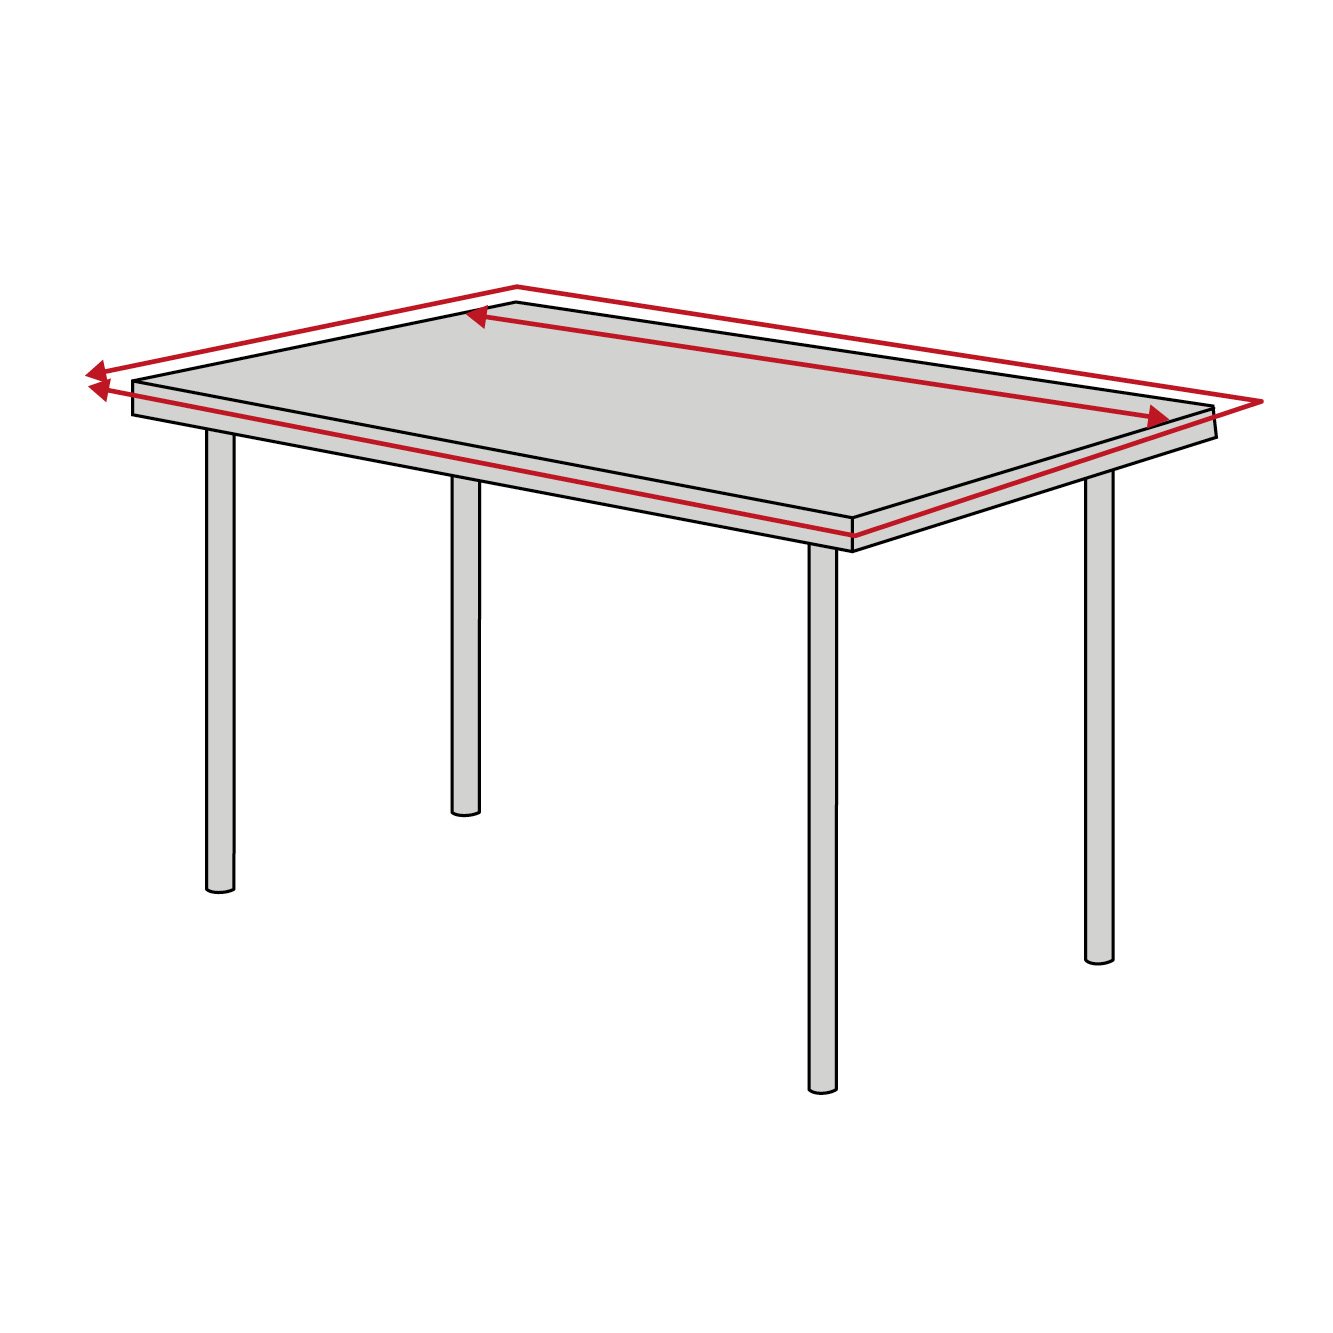
1.How to measure: Calculate how many meters of fabric you need by measuring the table top circumference + table top length + 15 cm for seam allowance. 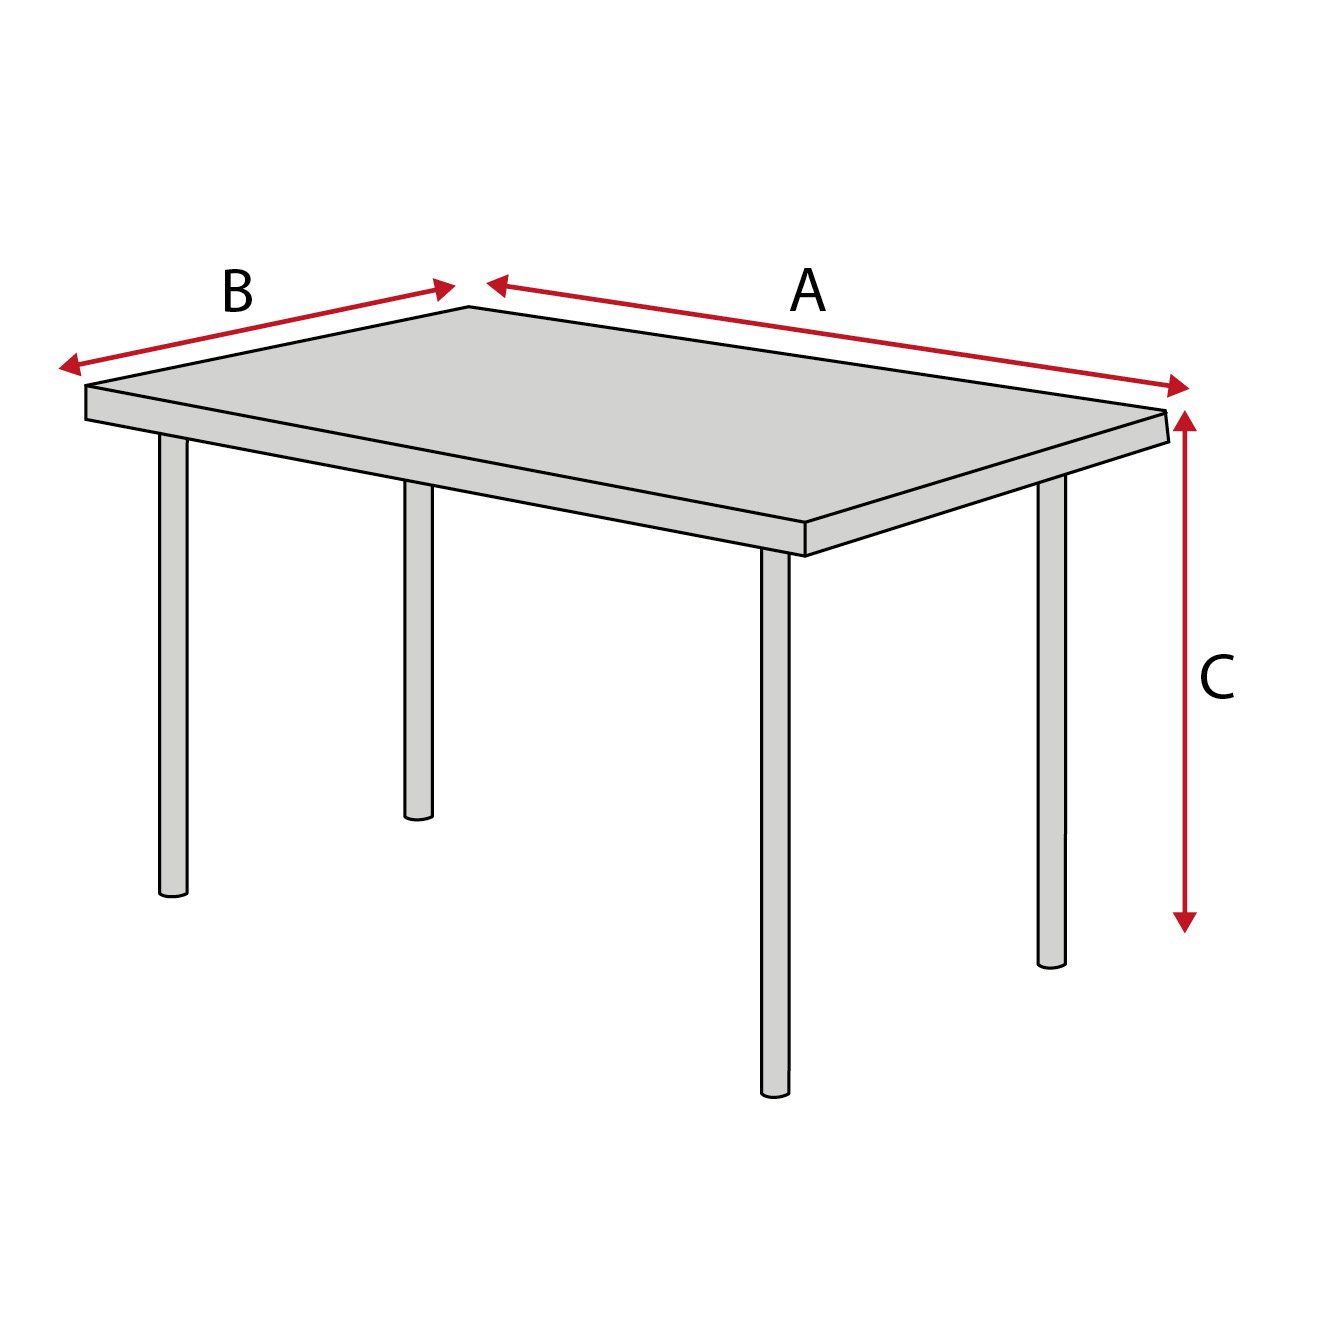
2.Measure these 3 things on your table: Length = A - Width = B - Height = C You will need these measurements to cut the parts for the tent. 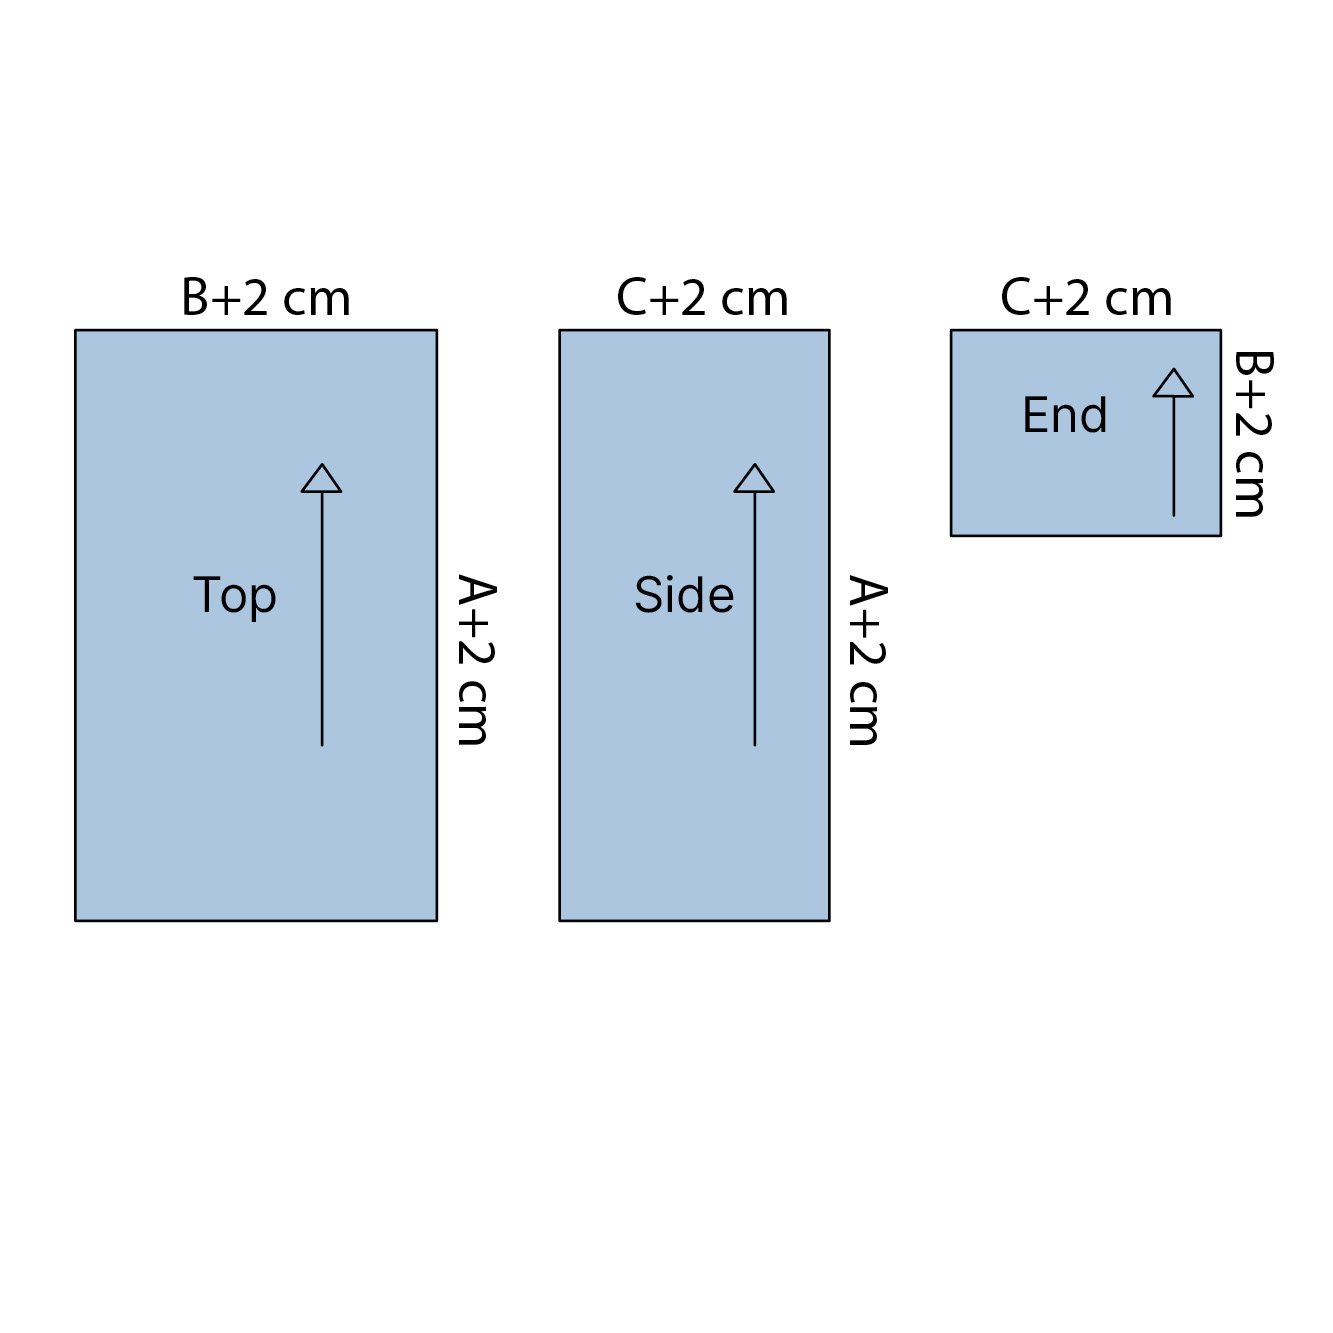
3.Cut 1 piece for the top = A+2 cm x B+2 cm. Cut 2 pieces for sides = A+2 cm x C+2 cm. Cut 2 pieces for ends = B+2 cm x C+2 cm. Measurements include 1 cm seam allowance. Overlock/zigzag all edges. 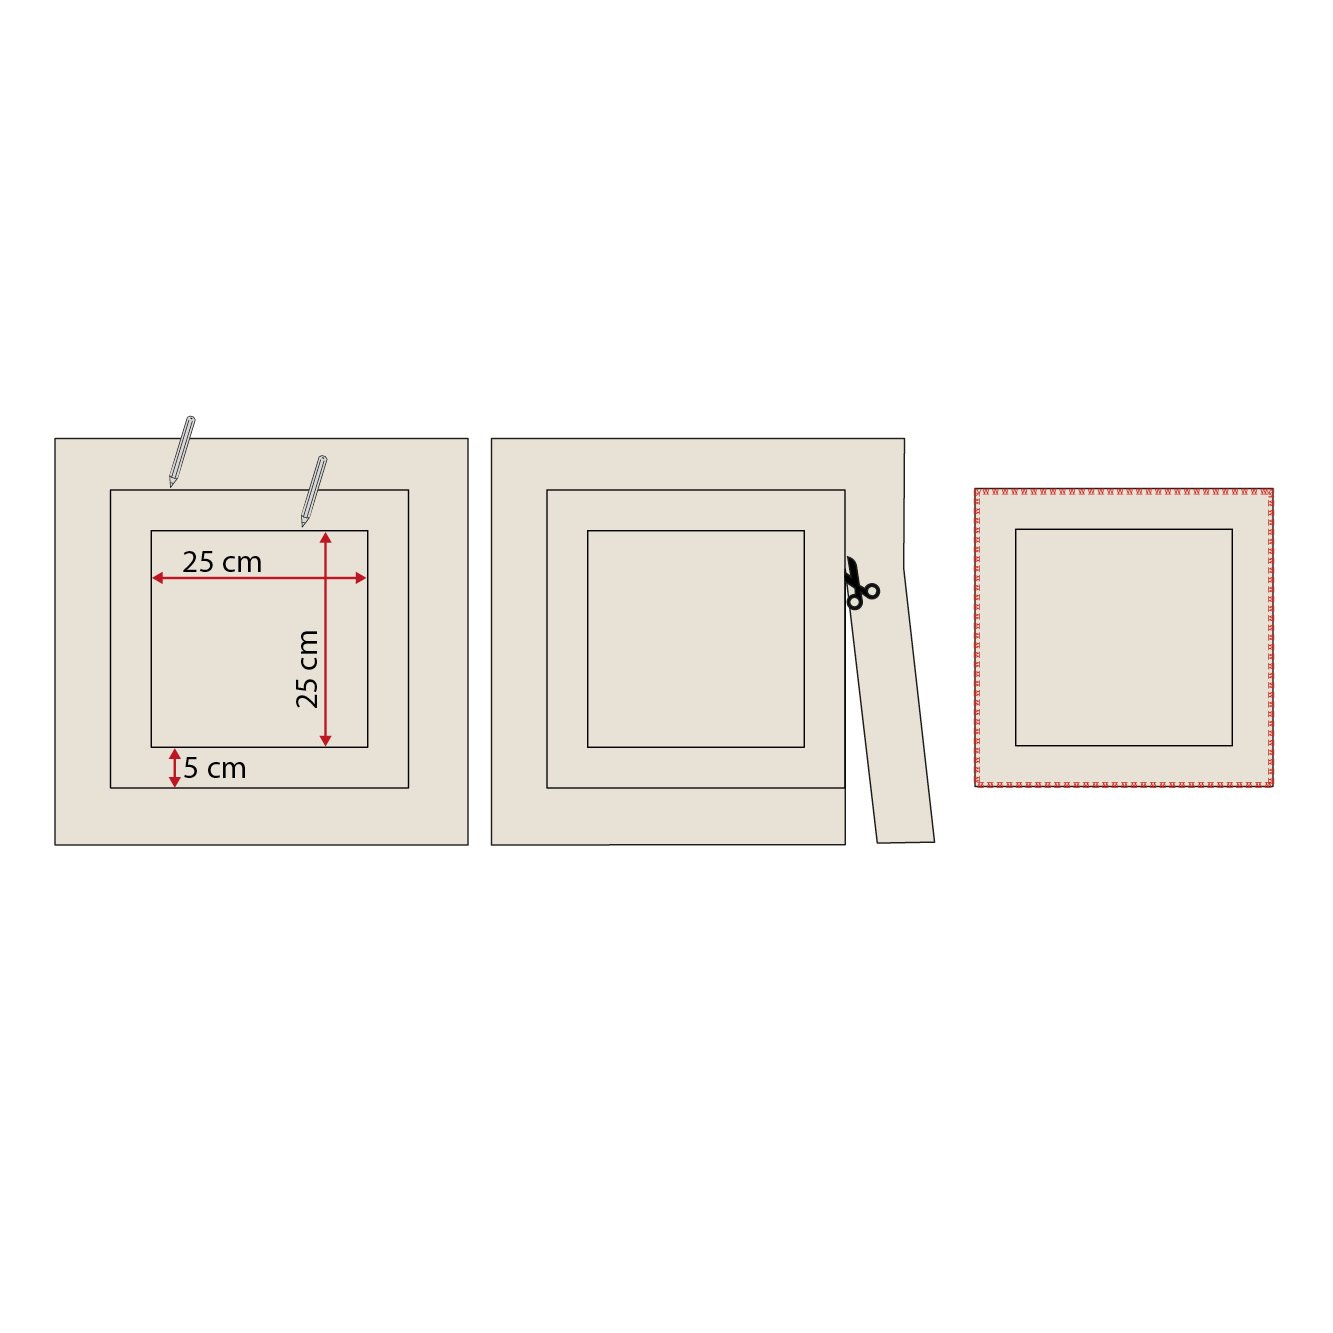
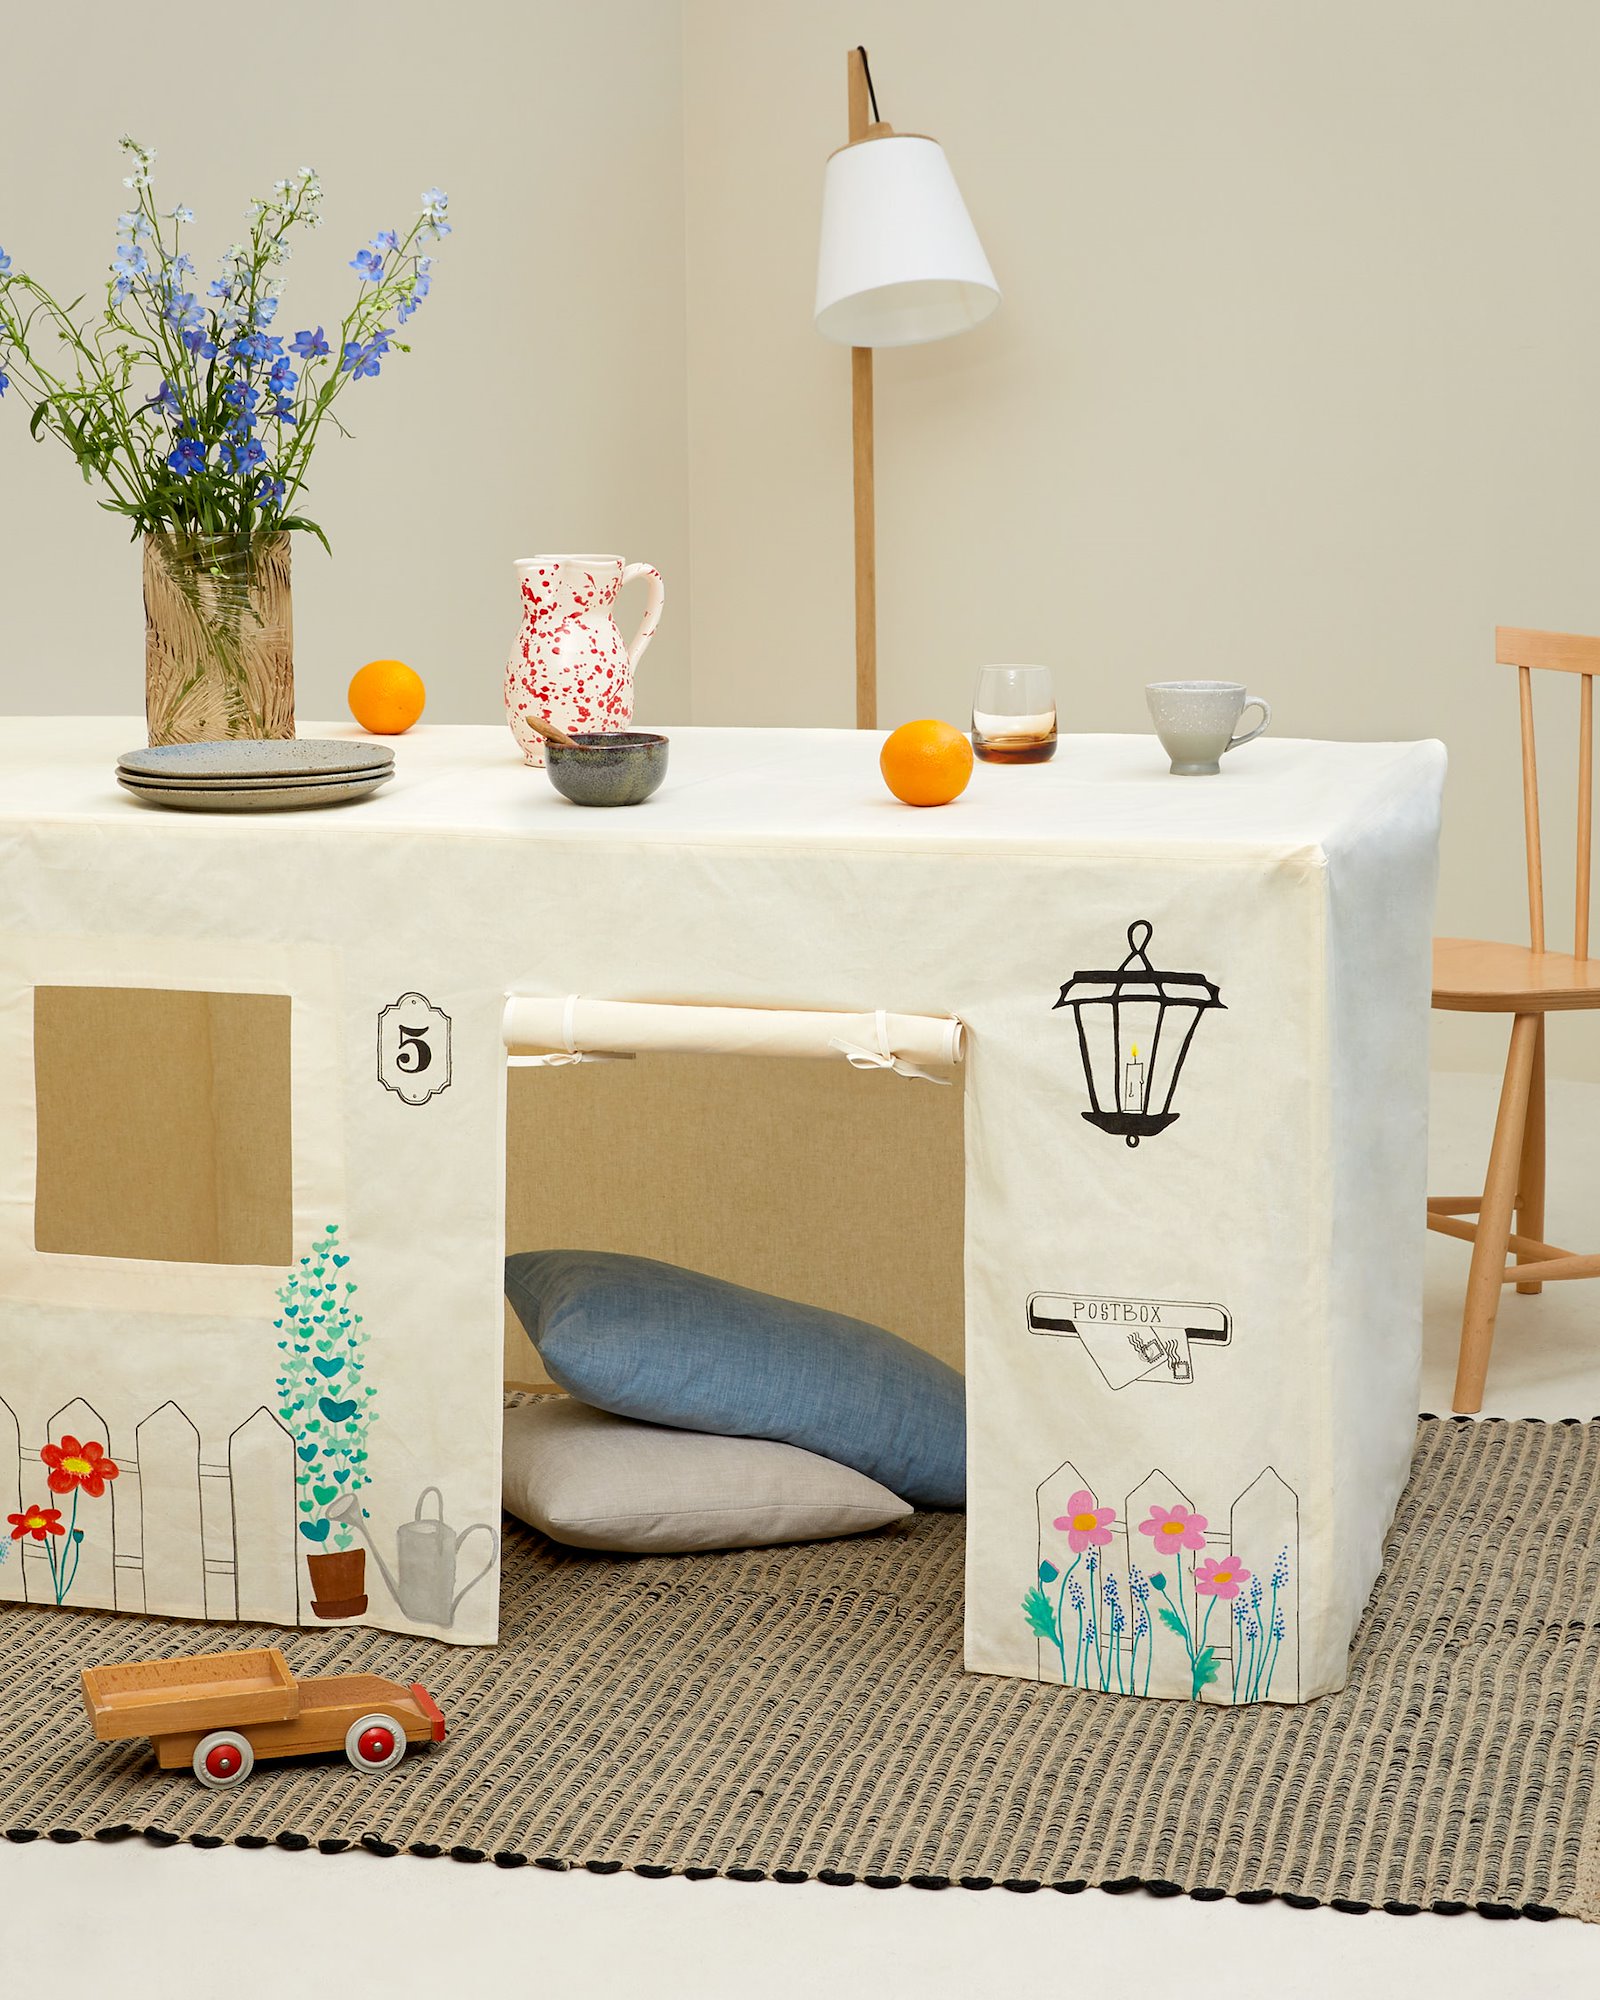
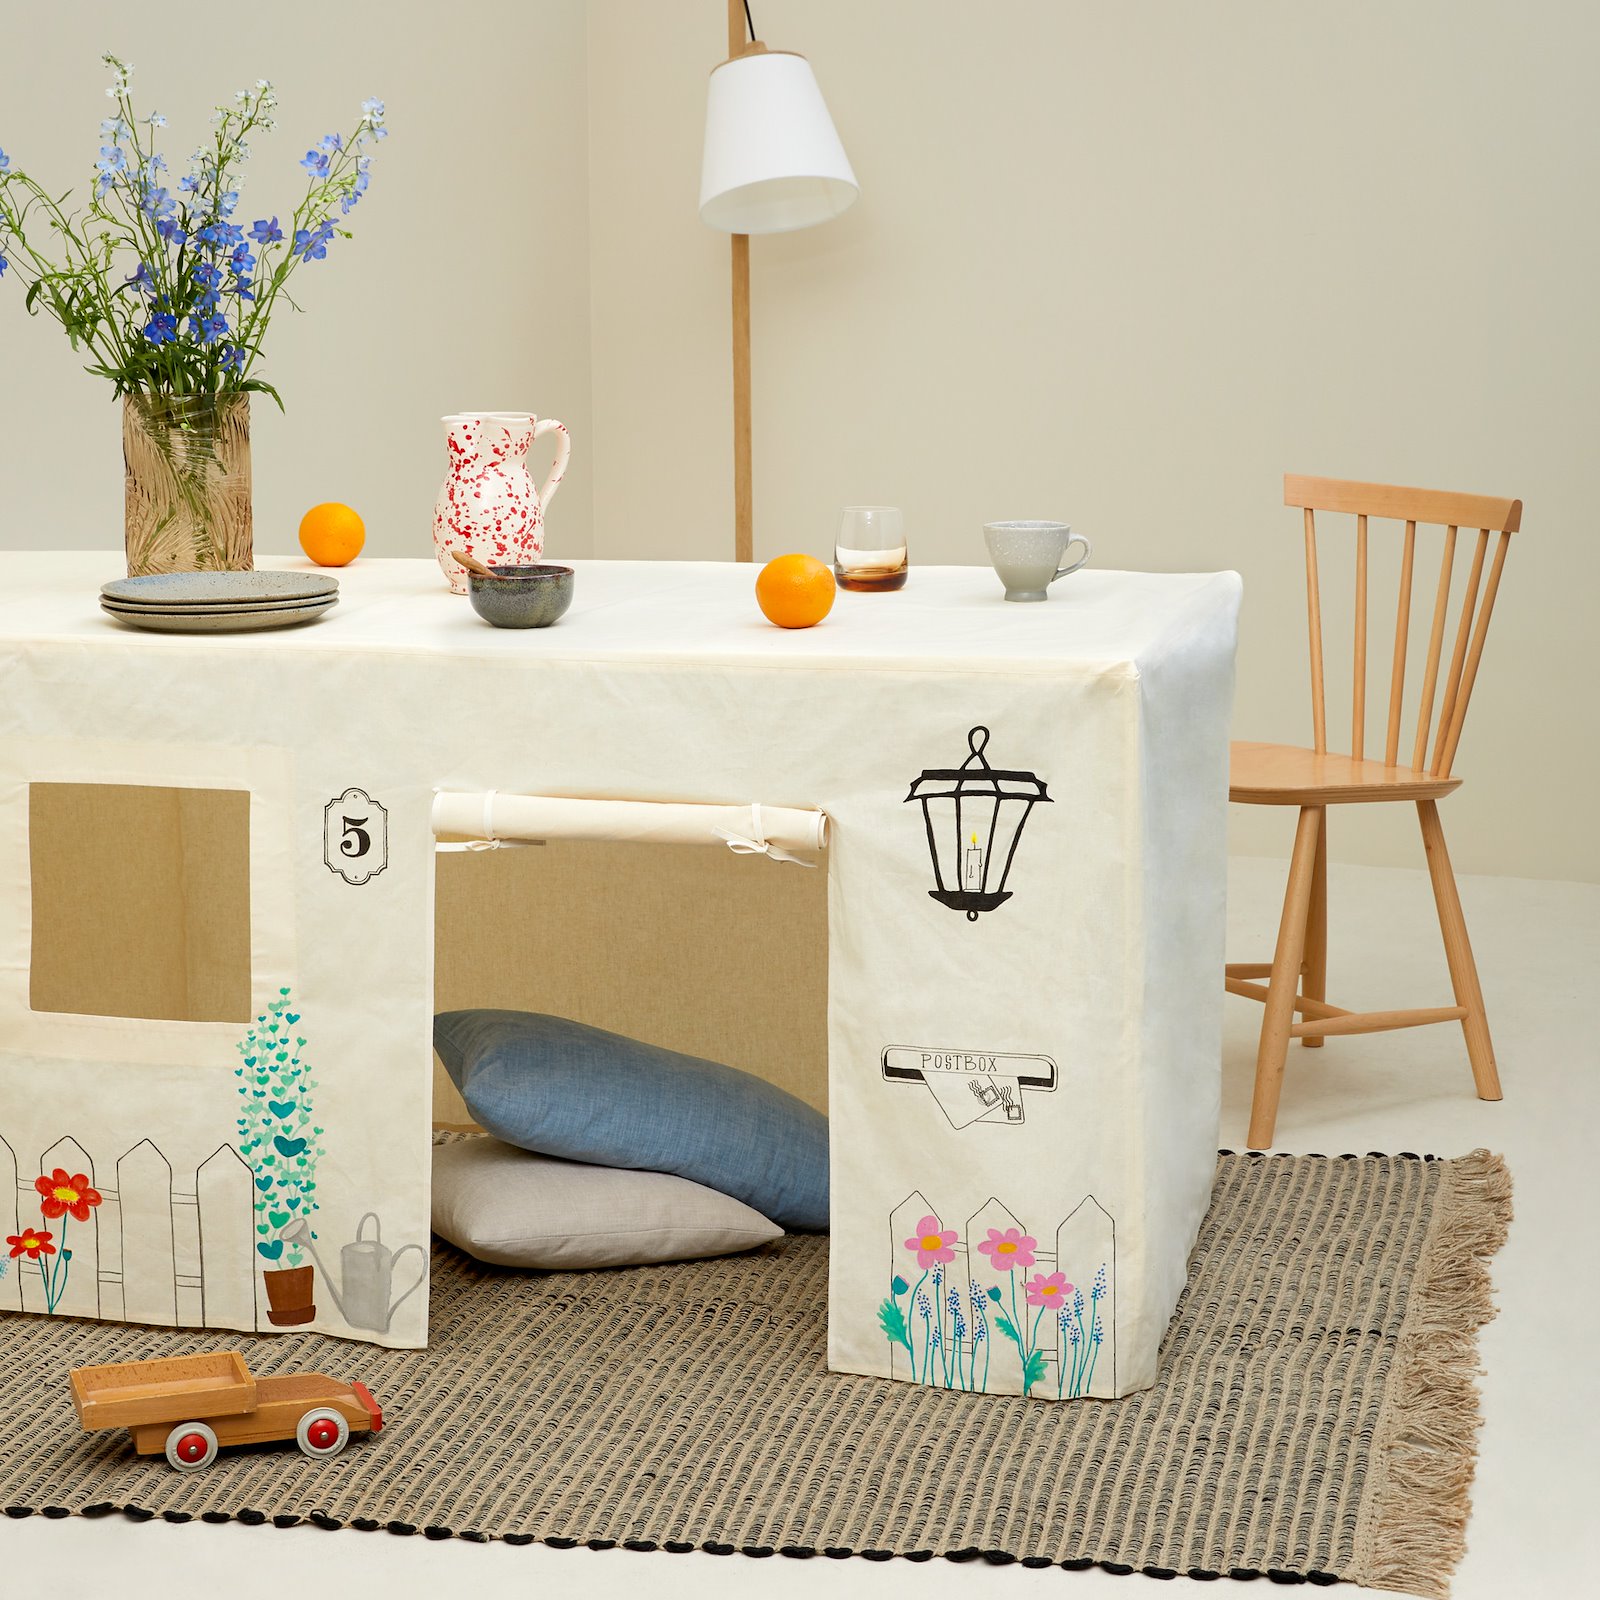
4.How to sew a window: Draw the desired window shape on a piece of fabric. Here we have made it square 25x25 cm. You can also choose to make it e.g. round or semi-curved. Add 5 cm all the way around. Cut along the outer line and overlock/zigzag the edge. Iron vlisofix on the back of the fabric piece, remove the paper, see DIY8044. ATTENTION: You can of course make more windows if you wish. 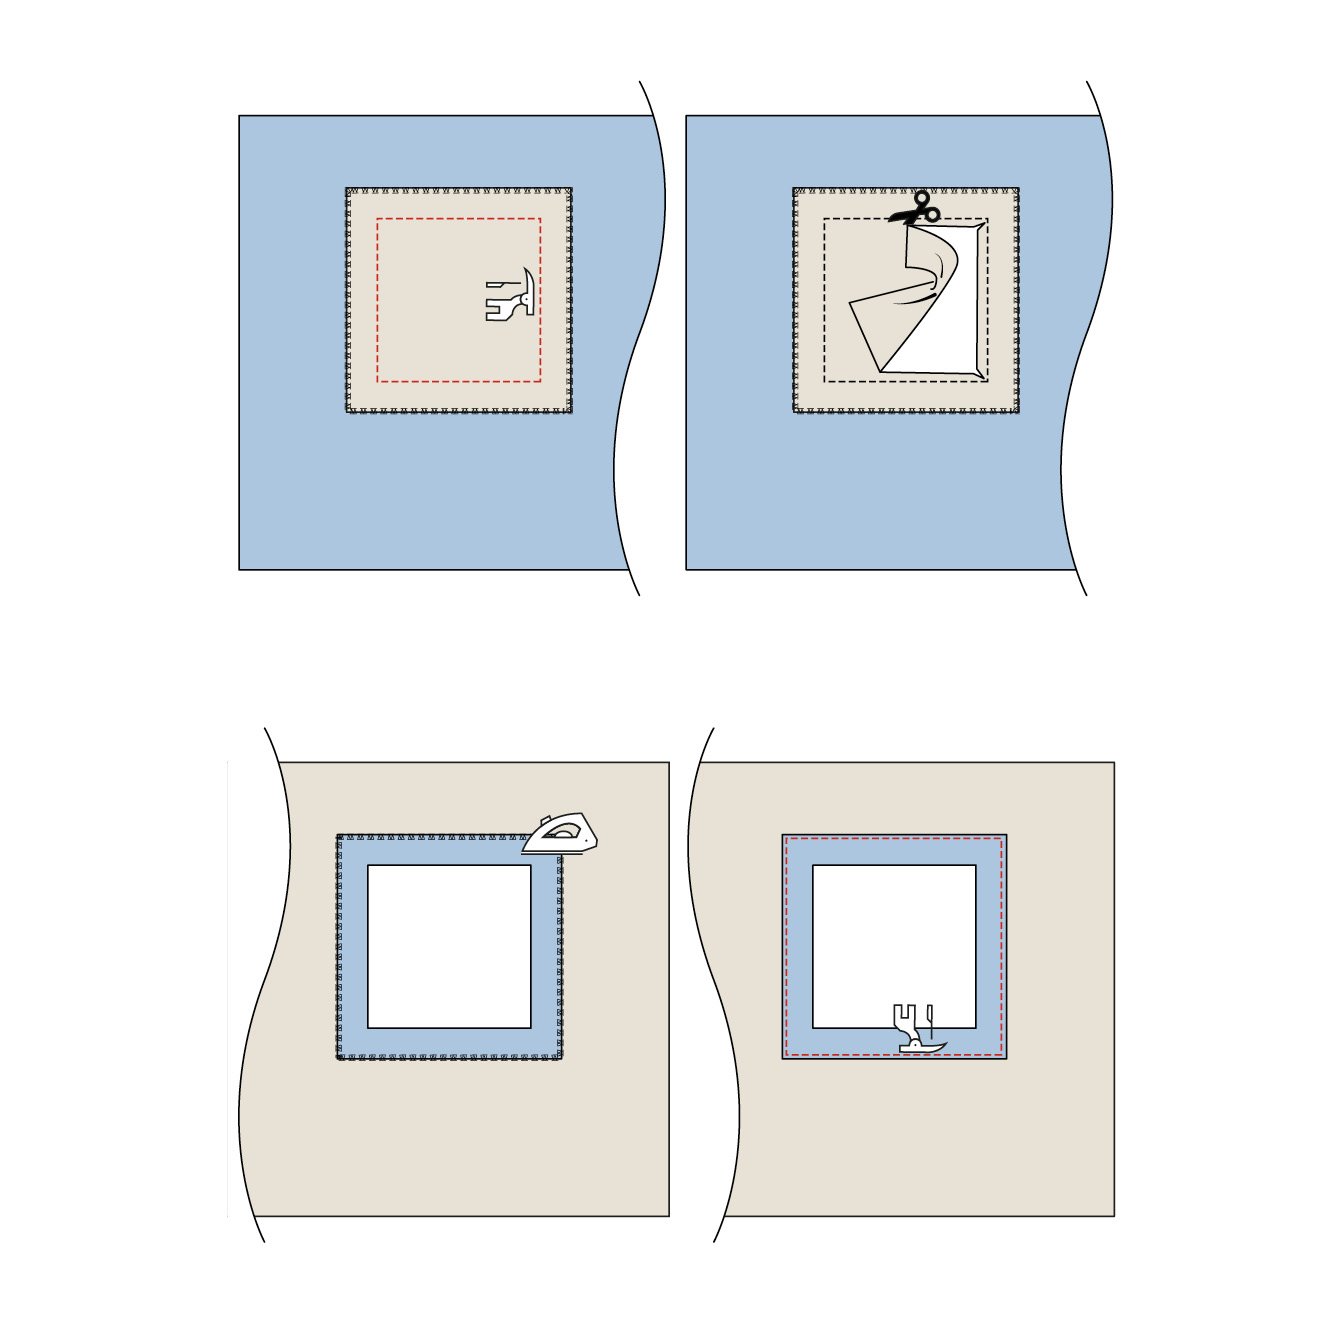
5.Place the window fabric piece right side to right side where you want the window to be placed. Sew along the inside line. Then cut out the inner part 1 cm from the sewing line. Cut diagonally into the corners. For curves, cut small notches along the curved line. Turn the edge to the back side and iron it in place. Stitch around the edge with a 0.5 cm seam allowance 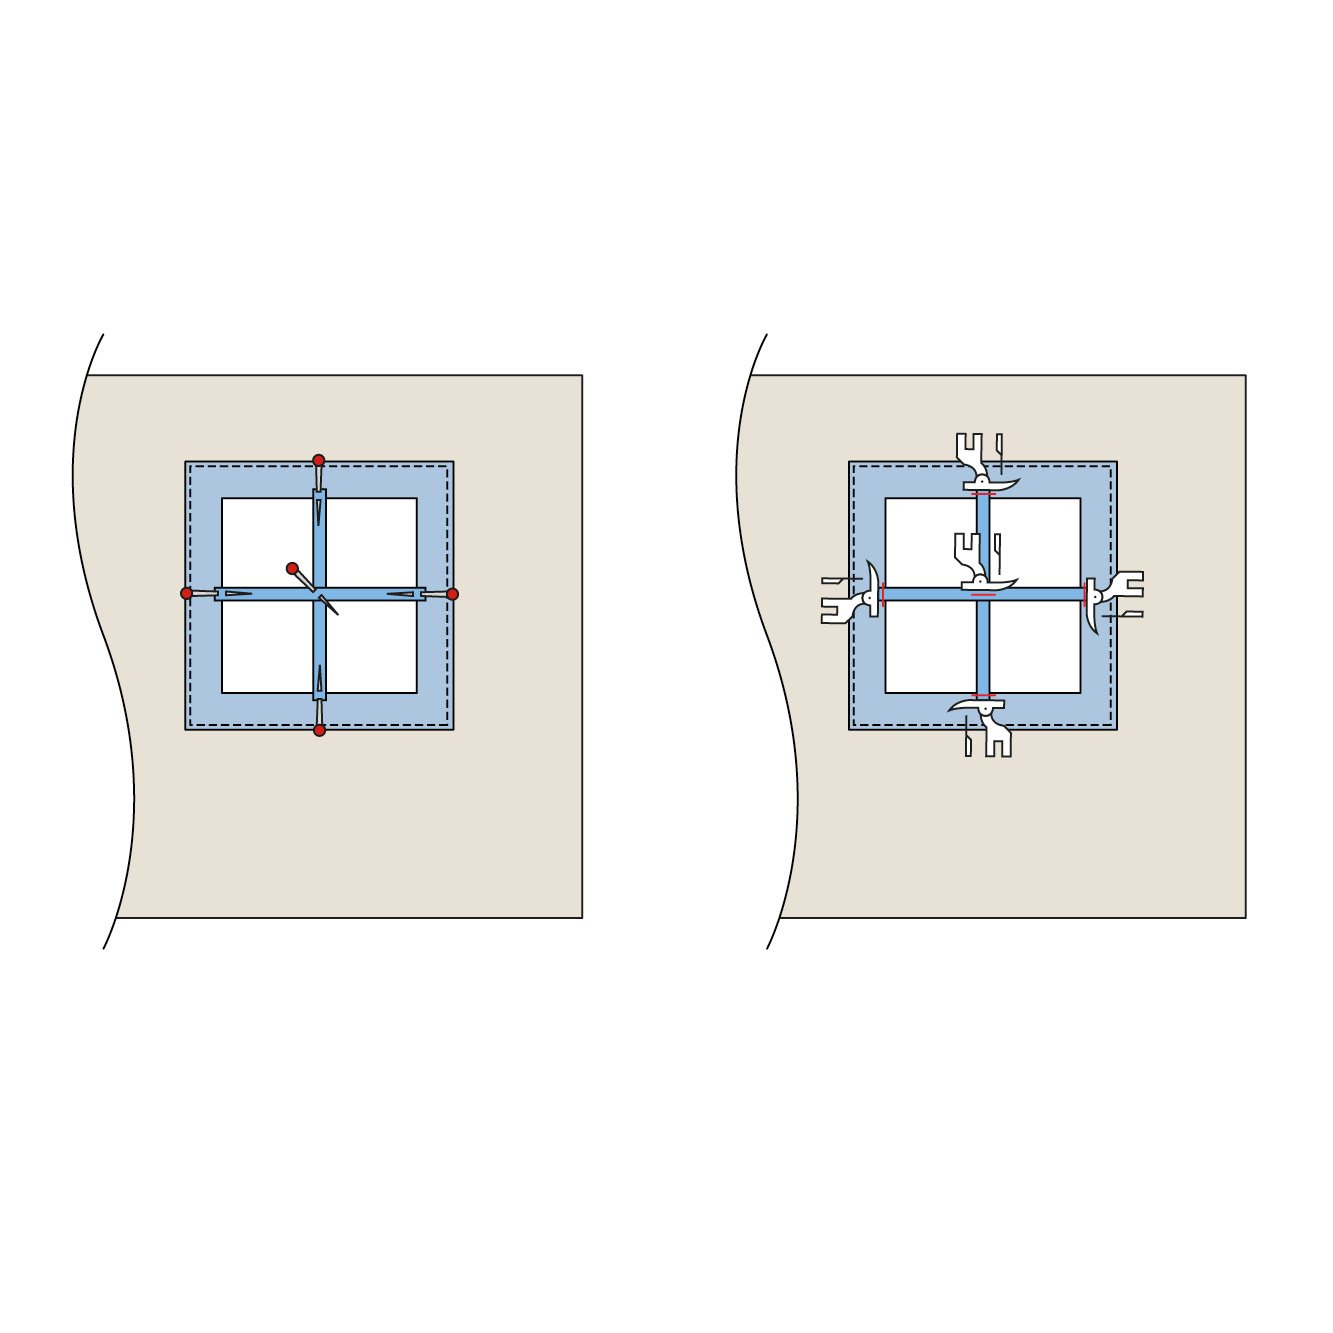
6.TIP: You can also make glazing bars in the window. Fold a piece of bias tape in half and press, stitch along the edge. Place the tape on the back side and stitch the ends in place. Stitch a seam where the "runners" cross each other. 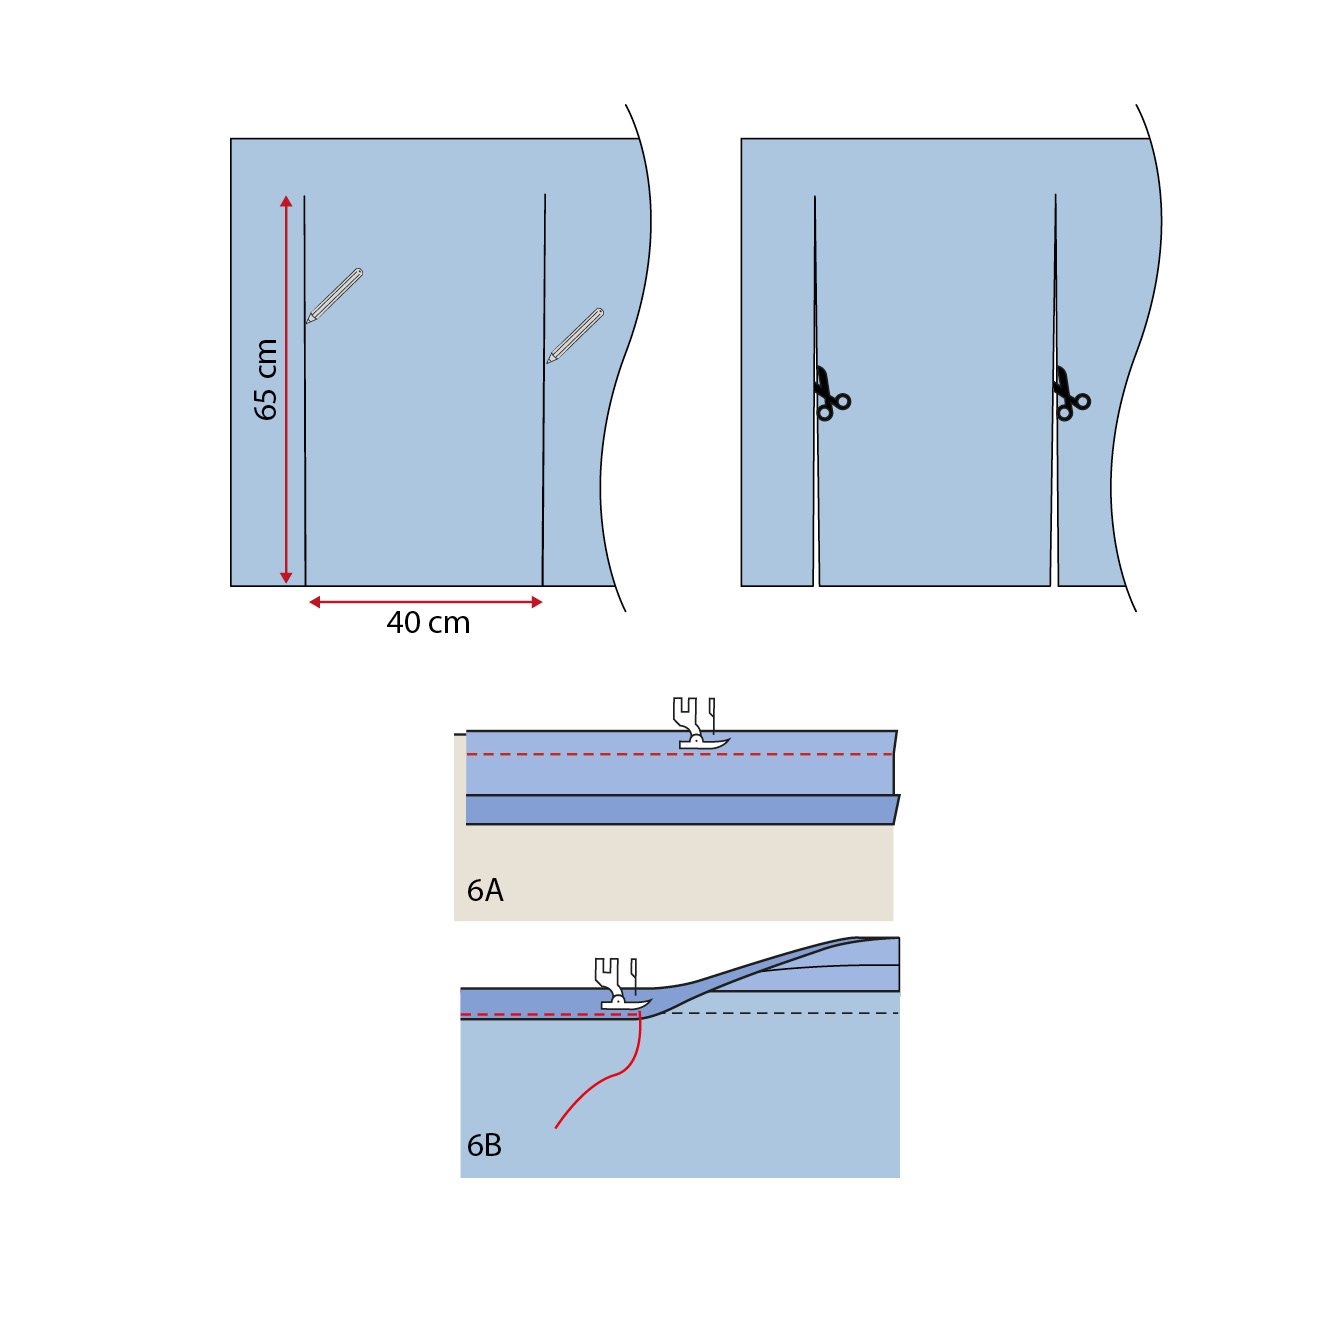
7.How to sew the door: Draw cutting lines for the door opening 65 cm long, where the door is to be placed. The distance between the lines is 40 cm. Cut. 6A. Sew on bias tape from the back side of the fabric, sew in the fold of the bias tape, allowing the bias tape to extend approx. 1 mm beyond the edge of the fabric/clip line. 6B. Fold over to the right side and sew it to the edge. Make sure the bias tape covers the stitching from before. 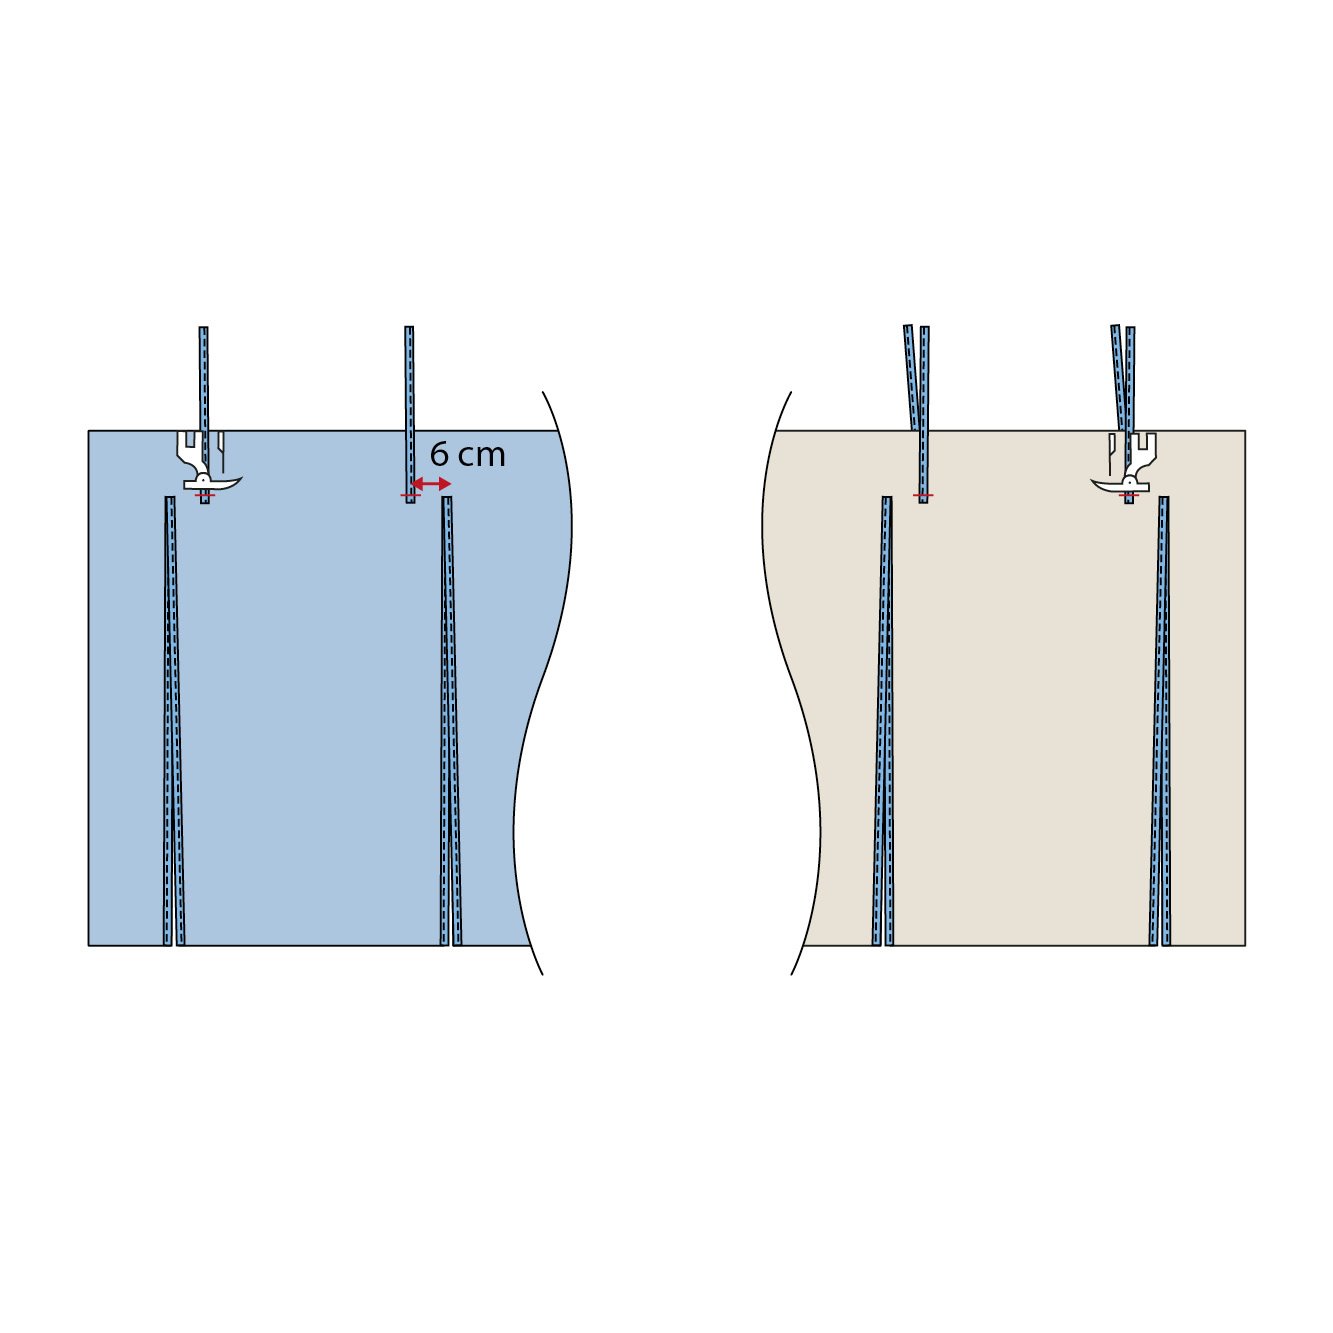
8.Cut 1 m of bias tape. Fold lengthwise, press and stitch a seam along the edge. Divide the ribbon into 4 pieces of 25 cm. Sew 2 pieces 6 cm from the opening on the back side of the fabric. Turn and sew 2 pieces on the right side, sew in the same stitch. 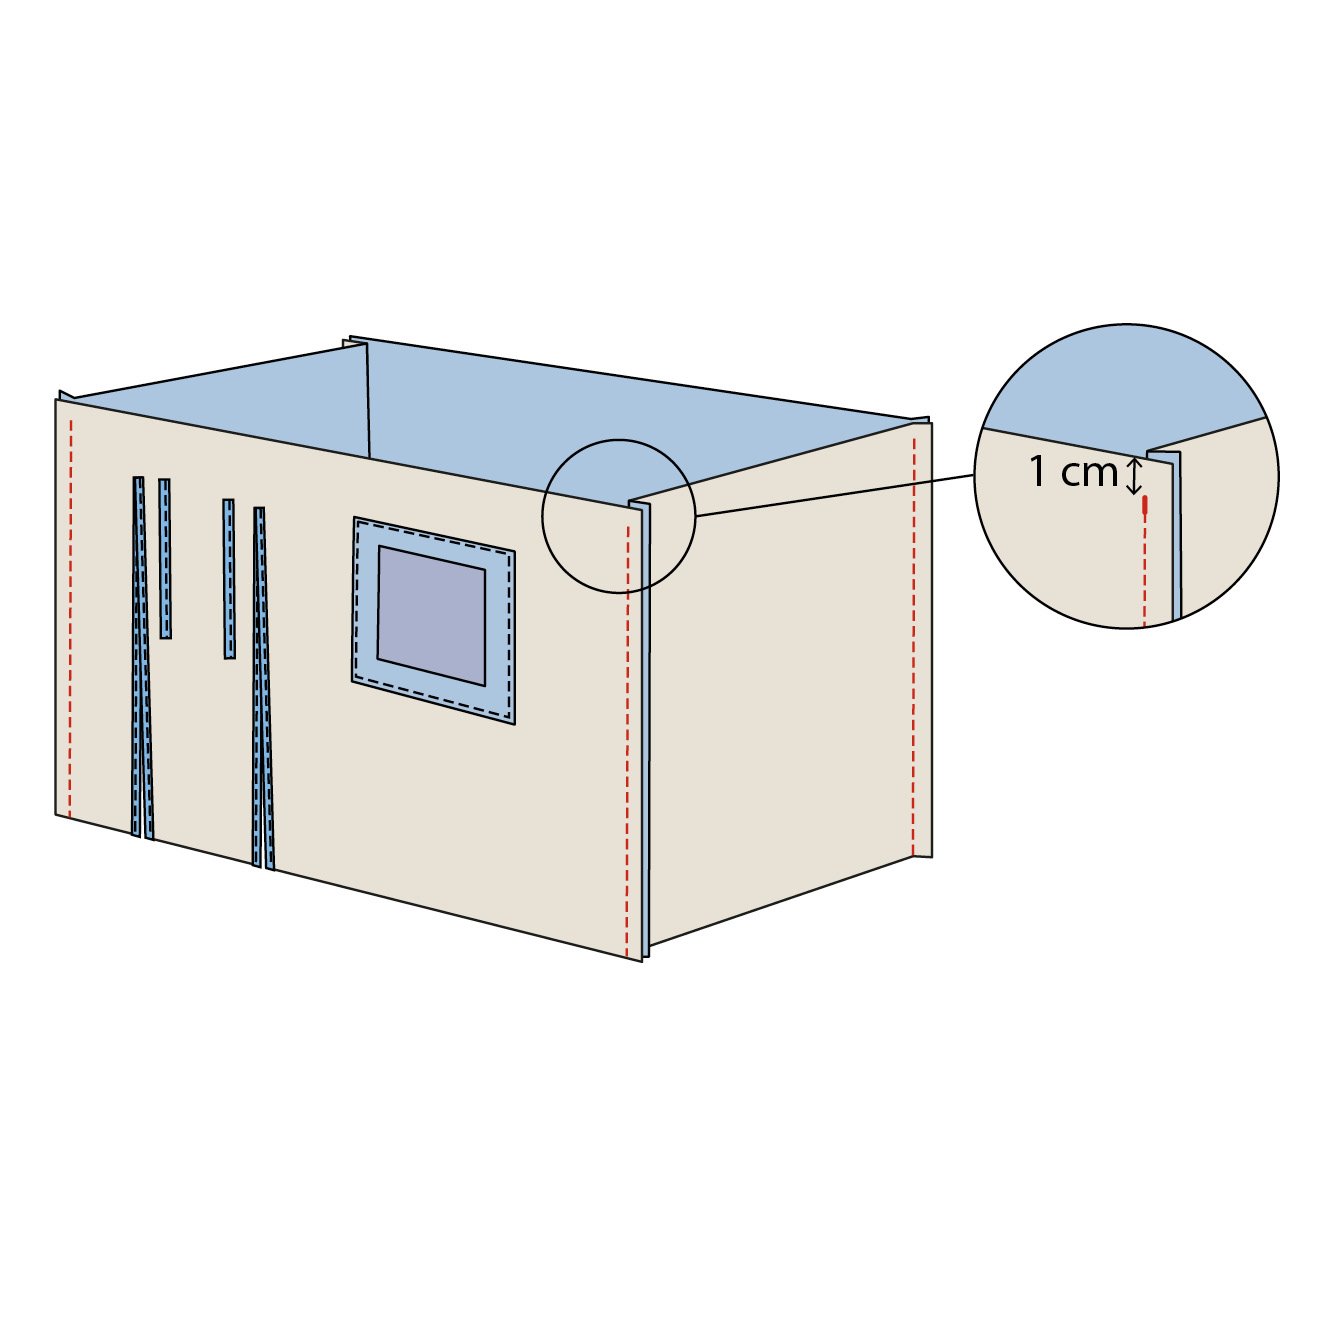
9.Sew the 4 sides together with a 1 cm seam allowance to form a ring. Start at the bottom edge and stop 1 cm from the top. Press the seam apart. 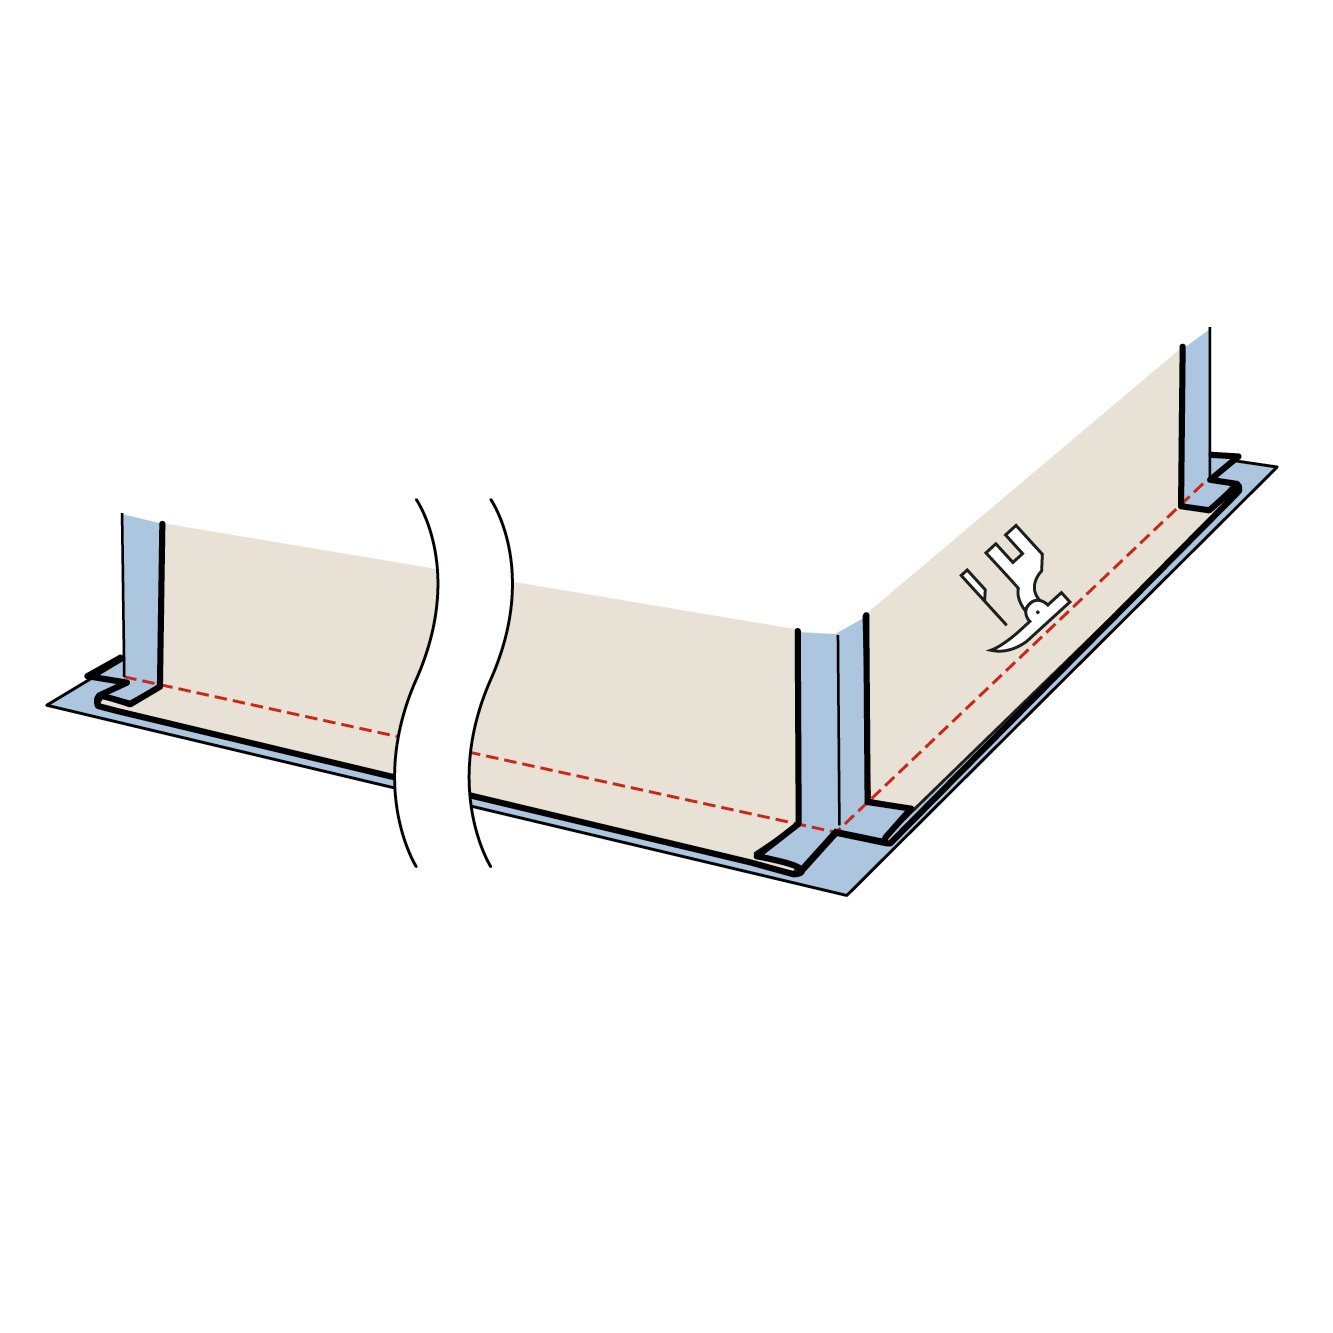
10.Fold the bottom edge 1 cm towards the wrong side and press. Sew a stitch 0.8 cm from the edge. Sew the top to the sides with 1 cm seam allowance and press the edge.